Garage Sale Frame to Cute Corkboard 

This is honestly one of those projects that took a turn because I got lazy. My roommate broke my full-size mirror a long time ago and I tried to come up with a way to reuse the broken glass. I decided on making a mosaic and searched a while for just the right frame. Then I found this:

Garage Sale Frame to Cute Corkboard 

It was perfect for my original project because it was a sturdy frame with a solid backing to lay glass on. The first thing I did was sand it down a little and give it a coat of black spray paint.

Garage Sale Frame to Cute Corkboard 

I started laying the glass pieces (without glue), but this is as far as I got before giving up (or at least I told myself I would finish it later).

Garage Sale Frame to Cute Corkboard 

It looked pretty cool, but it got harder to arrange the glass pieces without much space in between. I also decided when I was finished it was going to be really heavy.

Instead I had Chris dump all the glass for me and I  pulled out some leftover cork and fabric. I decided to make a corkboard for the office I keep dreaming about.

To begin I laid out the cork and measured the dimensions of the inside of the frame. I measured it out on the cork and drew the lines where I needed to cut.

Garage Sale Frame to Cute Corkboard 

After cutting I put the cork in the frame to check it was right before cutting the fabric.

Garage Sale Frame to Cute Corkboard 

To cut the fabric I placed the cork on top and cut it leaving a little bit extra to fold over the edges of the cork.

My fabric was a little wrinkly, and we have very limited resources to fix that. Iron? Nope. Dryer? Nope. DIY de-wrinkle spray made with fabric softener? Definitely nope. Instead, I tried the next closest thing to the dryer trick. Which was hanging my cut piece of fabric on the towel bar in the bathroom while I showered. Took the wrinkles right out! 🙂

To glue it together I used mod podge on the face of the cork and used my hot glue gun to glue the edges of the fabric to the back of the cork.

Garage Sale Frame to Cute Corkboard 

Then, to glue the cork to the frame I put hot glue all along the edges and an X through the middle. I had to do it quickly so the glue wouldn’t cool.

Garage Sale Frame to Cute Corkboard 

Quickly after I placed the corkboard, and tucked the edges into the frame.

Garage Sale Frame to Cute Corkboard 

And that was it! I plan on using it to “pin” ideas for inspiration and home makeover ideas. Like a little project board.

What do you use to corral your inspiration?

See You Around!

Lauren <3

5 Creative China Cabinet Ideas

I have been gawking over beautiful china cabinets recently, but new china cabinets are outrageously expensive and my house has limited options of where I can even put one. I did some searching on Pinterest and came up with a list of 5 creative china cabinet ideas.

5 Creative China Cabinet Ideas | Unique ways to display china and glass

Buy a Thrifted Cabinet

The most common approach I have seen is finding a cabinet on Craigslist, at yard sales, or Goodwill/Salvation army. This is a great approach because you can find a typical cabinet, and upgrade it to your needs. Some people restore the hutch to its original glory or even restyle it to something completely different.

5 Creative China Cabinet Ideas | Thrift an old china hutch

Here is an example using General Finishes Java Gel Stain. General Finishes is a really popular brand right now that I have seen a lot of people use for furniture makeovers. This technique changes the look completely while still keeping the beauty of the wood.

5 Creative China Cabinet Ideas | Thrift an old china hutch 5 Creative China Cabinet Ideas | Thrift an old china hutch

This is one of my absolute favorite painted hutch makeovers. I also really love the details of the hutch itself. The transformation from before is crazy!

Upcycle a Bookshelf

I would love to restyle a thrifted hutch, but I am just having a hard time finding a cabinet that’s the right style and price. Soon I might try following this idea of taking a plain bookshelf and adding molding and legs to it. It might even be simple enough to add glass doors to it too.

5 Creative China Cabinet Ideas | Upcycle a bookshelf 5 Creative China Cabinet Ideas | Upcycle a bookshelf

I’m sure it would be way easier to get my hands on an old bookshelf, not to mention how much easier it would be to transport. This would also be a good fit since I don’t have a ton of space in my house for a huge cabinet.

Use Picture Shelves

This is another great option if you have limited floor space, but need some more decorations up on the wall. This would be great above my table in the “dining room”.

5 Creative China Cabinet Ideas | Use picture shelves

This would also be a great option because if you upgrade to a hutch the shelves can easily be used for something else… Maybe as a picture display? 😉

Wood Crates

Another particularly unique idea I came across was hanging wood crates and displaying dishes in them.

5 Creative China Cabinet Ideas | Use Crates

I love the rustic vibe this gives off, and I think the possibilities are endless. You could paint the crates, stain them different colors and arrange them in different ways to get a different look. These crates could also be reused if you upgrade to something different.

Old Windows

This last idea is particularly creative. Use old windows and reclaimed wood to make a cabinet for your dishes.

5 Creative China Cabinet Ideas | Upcycle windows and reclaimed wood

This idea is really customizable too. The picture is linked to a post on how to use old windows, and it didn’t have a link to the original project for this. This cabinet could also be made in different sizes depending on the old windows you can find.

Would you try any of these ideas? If so, which ones? Can you think of any other creative china cabinet ideas?

If you’re interested in learning more about the specific projects all the photos are linked to the source where I found them.

See You Around!

Lauren <3

P.S. if you liked this post, or thought it was helpful, don’t forget to share it! 🙂

The Easiest Pallet Headboard That Ever Existed

Recently, Pinterest created a lot of buzz about reclaimed wood and pallet furniture . So, I wanted to get my hands on some pallets and see what all the craze was about. The first project I wanted to do was create a simple headboard for my apartment bedroom. As you may have already seen here, my apartment has white textured walls and in order to make a cozy space I needed to add color as well as more visual interest.

My goal with this project was to not spend any additional money, and I also wanted a piece that I wouldn’t feel bad trashing once I moved out of my apartment. A pallet was perfect because you can find tons of them for free, and upcycling gives them an extended life.

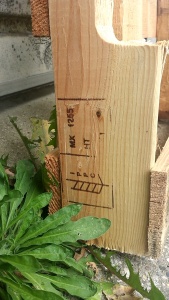
To begin any pallet project you need to make sure they are safe to use. This post helped me learn what the different markings on a pallet meant, and which markings meant a pallet was unsafe to use. Below is a picture of the stamp on my pallet:

Flip This Rental | The Easiest Pallet Headboard That Ever Existed - Pallet Markings

The label marking on the left side is the stamp of the International Plant Protection Convention (IPPC) and this stamp means the pallet is up to the IPPC’s standards (read the linked post above for more details). The upper right marking MX 1255 is the country code (Mexico) followed by the registration number of the supplier. Below that, HT means the pallet was heat treated opposed to MB – treated with Methyl Bromide. Do not use pallets with an MB stamp!

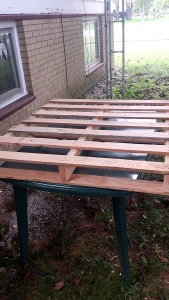
After making sure my pallet was safe to use I began using a palm sander to smooth out the pallet. Using that thing didn’t last long! There was either something wrong with it or I’m just a weakling. It was bouncing all over and made my hand tingle way too much. So instead I decided to switch over to the good old fashion non-electric sanding block. A headboard doesn’t need to be baby butt smooth either, so a regular sanding block worked just fine. I sanded it just enough to make sure I wouldn’t get any slivers. This is how my pallet looked to start:

Flip This Rental | The Easiest Pallet Headboard That Ever Existed

To add color to my pallet I decided to use leftover Howard Restor-A-Finish in Dark Walnut from this project instead of buying a stain. To apply the finish you can just use an old rag or use steel wool. Fine steel wool is typically used to buff out scratches in wood that is being restored. I used steel wool since I had quite a bit and I didn’t know if the Restor-A-Finish would stain my rag or not. We don’t have a lot of crappy rags around our house and I didn’t want to risk it ;).

Flip This Rental | The Easiest Pallet Headboard That Ever Existed

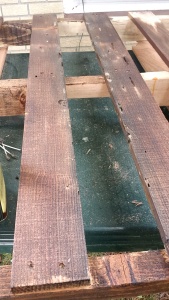
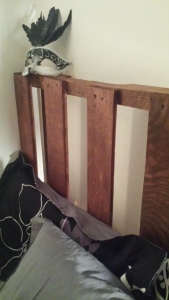
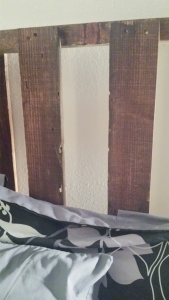
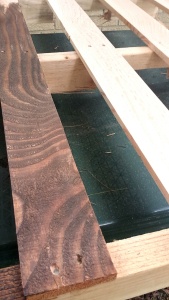
Above is a close up of the contrast between the wood with finish and without. I really like how the finish emphasized the grain in the wood which will add visual interest for my room.

Flip This Rental | The Easiest Pallet Headboard That Ever Existed

You can especially see in the board on the right in the above picture that there are little holes and imperfections in the wood. I used Q-tips dipped in the finish to get into the little crevices. it worked really well, but I went through quite a few Q-tips because the finish drained out of them really quickly.

Flip This Rental | The Easiest Pallet Headboard That Ever Existed

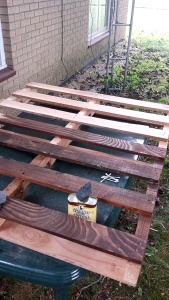
Here is a farther back picture of the difference between with and without finish.

Flip This Rental | The Easiest Pallet Headboard That Ever Existed

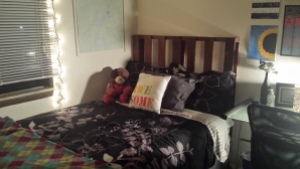
Here is the finished product up on my bed! This project was so simple I really could not have asked for it to go any smoother. To get the headboard up I pulled my mattress out a little and the frame stayed put. I simply set the headboard on top of my bed frame. Once I pushed my mattress back the pallet wobbled a little, so I stuck two command strips on the back of each side to keep it held against the wall.

Now I will share some complimentary glamour shots 😉

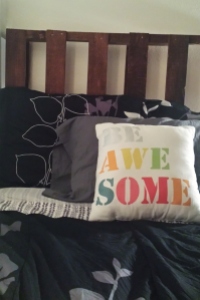
 Flip This Rental | The Easiest Pallet Headboard That Ever Existed Flip This Rental | The Easiest Pallet Headboard That Ever Existed Flip This Rental | The Easiest Pallet Headboard That Ever Existed

As soon as I got the headboard up on my bed I was so giddy. I can’t believe how easy this project was and it looks great! I absolutely love how the wood looks worn in some places. It has a rustic barn feel to it. I have two more pallets at home and I already have ideas for them! I’m not sure how soon I can tackle those projects, but I’m definitely excited to get started.

See You Around!

Lauren <3

Pssst.. If you liked this post don’t forget to share it!

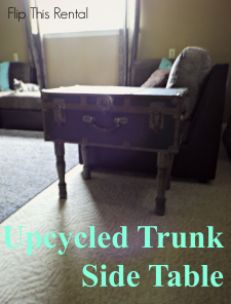
Upcycled Trunk Side Table and Blanket Storage

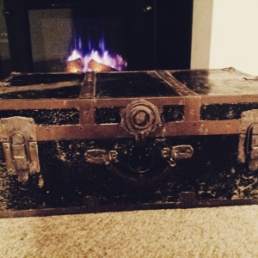
I completed my trunk table long before my blogging days, but I thought I’d share it with you since I receive a lot of compliments on it. This wasn’t a project I planned out and needed to go find the supplies for. I think the best projects aren’t planned because you find a piece of inspiration and just run with it. I found my trunk at Salvation Army piled in with some other luggage. It was $10 and I instantly knew it would be a killer table… with a lot of love that is (I typically buy things of this nature if you couldn’t already tell).

Upcycled Trunk Side Table and Blanket Storage | Flip This Rental

A photo I shared on Instagram that makes this trashy trunk look way more glam than it actually was.

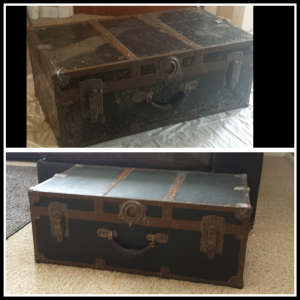
Upcycled Trunk Side Table and Blanket Storage | Flip This Rental

The first photo was after I cleaned this beast and the second photo was after I slapped on a coat of chalkboard paint I had on hand. I thought about writing on it with chalk, but I decided that didn’t really go with my style. I also thought about painting the brown metal parts, but I didn’t have a good color for it and I thought it made the trunk look just shabby enough with the fresh paint. Still, I want to go back and clean it up a little bit more because there are some rusty spots that don’t look so hot.

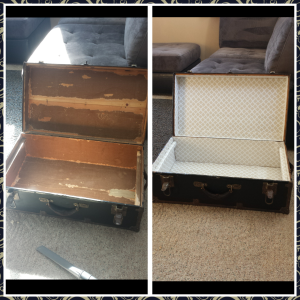
Upcycled Trunk Side Table and Blanket Storage | Flip This Rental

The inside of the trunk had ugly contact paper and smelled mustier than a century old mummy. I scraped as much of the paper out as I could and vacuumed the rest. To get the smell out I put cat litter in the box. I heard that will trap all the smells and when you dump it out the smell will be gone. It worked I think but then it just smelled like dusty cat litter.

The new inside of the trunk is shelf liner but I totally bought the wrong kind. I bought the squishy stuff not the plain paper kind. I was in a rush and I really liked the design on it, but it cost like $10 and I ended up having to buy two rolls of it. Seriously a dumb mistake. I used mod podge to stick the shelf liner in so then my trunk smelled like glue instead of cat litter. I think that’s a good thing? Eventually I sprayed Febreze in it and it took the smell away. 🙂

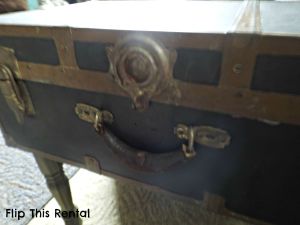
Upcycled Trunk Side Table and Blanket Storage | Flip This Rental

An up close of the front hardware. This is one of my favorite parts about the piece.

Upcycled Trunk Side Table and Blanket Storage | Flip This Rental

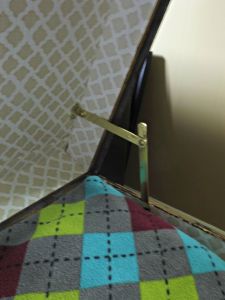
I added this on so the lid would stay open while grabbing out blankets.

Upcycled Trunk Side Table and Blanket Storage | Flip This Rental

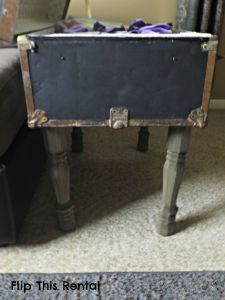
I measured how tall I wanted the legs to be based on the height of the couch. Then I stained them using the vinegar and steel wool technique except I used the kind with soap in it and tried to rinse out the soap. I don’t recommend that. You can buy plain steel wool at the hardware store.

Upcycled Trunk Side Table and Blanket Storage | Flip This Rental

Upcycled Trunk Side Table and Blanket Storage | Flip This Rental

So what do you think? Were my expensive mistakes still worth it?

See You Around!

Lauren <3
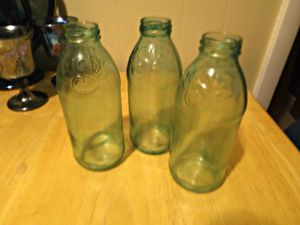
Simple Colored Bottles Craft

Lately I’ve been stressed out about finishing projects around the house before I move back to school in the fall. During time off of school I live at home with my boyfriend, Chris, and during the school year I live on campus with friends. Last year was my first year so I lived in a dorm with two other girls. This year I will be living in an apartment with those two girls plus 3 other roommates. I come home quite often since I don’t live far from the college, but this year I want to make a point to relax on the weekends instead of worrying about homework or trying to do major home improvement projects.

Today I did a simple craft to take my mind off the things I feel like I “have” to do. For this craft you will need:

Bottles
Mod podge
Paintbrush
Food coloring

Simple Colored Bottles Craft How To | Flip This Rental

You can use old bottles for this craft such as snapple bottles, starbucks iced coffee bottles, or you can buy some from a craft store. I had a few snapple bottles on hand so I decided to use those. (I’m saving my starbucks bottles for a coffee candle craft 😉 )

If you are reusing bottles you will need to peel the label off and get off any extra gunk. I used a mixture of mostly baking soda and a little bit of vegetable oil and scrubbed the bottles with paper towel.

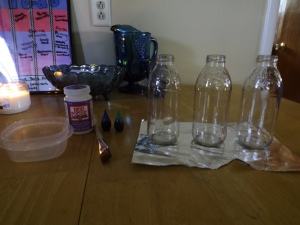
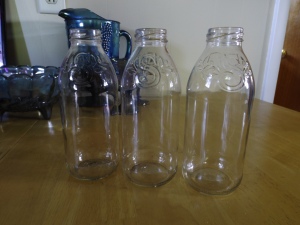
This is what they looked like after de-gunking:

Simple Colored Bottles Craft How To | Flip This Rental

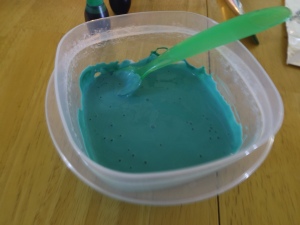
Then I mixed up a combination of mod podge and food coloring. I used 6 drops of blue and 4 drops of green. For this project I used hard coat mod podge. This is what my mod podge looked like after adding in the food coloring:

Simple Colored Bottles Craft How To | Flip This Rental

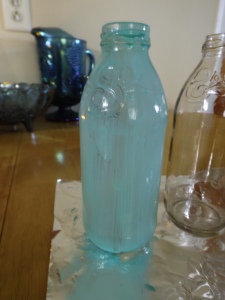
I applied the mixture to my bottles with a brush and tried to keep brush marks to a minimum.

Simple Colored Bottles Craft How To | Flip This Rental

Simple Colored Bottles Craft How To | Flip This Rental

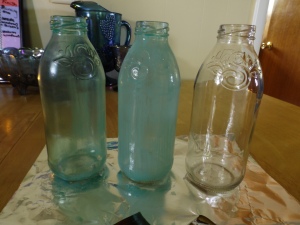
On the left is the bottle mostly dry, the middle is just after applying mod podge. I was trying to follow a tutorial I found on Pinterest to make the bottles look like sea glass, but I didn’t have matte mod podge and used the hard coat instead. They turned out nice in the end, though. I don’t quite have a spot for them but I think maybe they can travel to school with me. Maybe I’ll make a pallet shelf for the bathroom and put them up there. The main thing is that this was a nice de-stressing craft 🙂

Simple Colored Bottles Craft How To | Flip This Rental

What kinds of things do you do to de-stress? Would you like to hear about my DIY adventures in my college apartment too? Drop by the comments and let me know what you think!

See You Around!

Lauren <3