Comparing the Cost of DIY Curtains and non-DIY Curtains

Easily the best feature of my new room is the insane amount of windows I have. On the other hand, having an insane amount of windows is not so great when you’re trying to sleep.

When I moved in, there were plastic blinds on half of the windows and the ones that were left looked like junk. My friend that lived here before me tacked blankets up to keep the light out. I knew I was going to go in a different direction and wanted something pretty. Something that would block out the light when I wanted and let light in when I wanted.

Comparing the Cost of DIY Curtains and non-DIY Curtains | Windows Before

As I’m sure you know, curtains are freaking expensive, especially when you have a bunch of really big windows. So, I made curtains out of sheets which was an idea I had seen from a few different bloggers on Pinterest. In this post I’ll show you the materials I used and their cost so you can weigh the pros/cons of doing a similar project.

My Window Dimensions

In my room I have 3 windows that are all 70 inches by 70 inches. Therefore, I needed 6 curtain panels that were at least 35 inches wide and 70 inches long. Obviously, these dimensions would cover the window but the length would not look great.

Ideally, curtains are hung at least 3 inches above the window. Personally, I like the curtains to touch the floor but not pool too much. To make sure I got sheets that were long enough, I measured from the top of the window to the floor and added three inches.

Curtain Materials

After searching around a little bit for different sheets I decided on the Mainstays 200 Thread Count Sheet in twin size. They had the best color option at the cheapest price so it was an easy decision. I used both a solid and patterned sheet to make the curtains thicker as well as reversible. I chose navy for the solid color and the blue diamond ikat pattern.

These sheets are $4.97 each and I needed 12  (6 patterned, 6 solid) for a total of $59.64. Each sheet is 66 inches wide by 96 inches long. In a different room I think one sheet would have been fine, but I wanted to block out a lot of light in my bedroom.

Below is an example of how much light 1 sheet (left) blocks versus 2 (right).
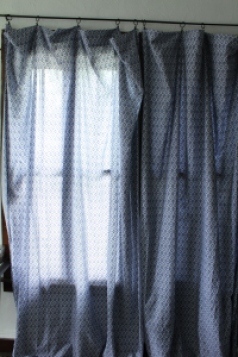
Comparing the Cost of DIY Curtains and non-DIY Curtains | 1 sheet versus 2

Cost of DIY Curtains (Fabric) and Pre-Made Curtains

I thought I was shelling out a decent amount of money for these curtains, so I was interested to see how much more I would have spent to buy fabric or just straight up buy curtains and achieve a similar look.

If I would have bought fabric from JoAnn’s:

  • Lining Fabric (54″ wide) – $3/yd (on sale) x 16 yds (to match 96″ length)= $48 (not on sale = $96)

  • Print Fabric (54″ wide) – $4.50/yd (on sale) x 16 yds = $72 (not on sale = $144)

The total price for just fabric would have been $120 on sale, $240 not on sale!

I found a pretty good deal at JCPenney on 50″ x 95″ back tab curtains for $13.99 each (clearance) times 6 panels for a total of $83.94. These aren’t that much more expensive, but the user reviews mention these curtains are not the best at blocking light.

Curtain Hardware

In all honesty, I didn’t want to do a whole lot of work besides hanging the curtains up so I didn’t get all fancy and make back tabs or put in grommets or anything. Instead, I just bought clip rings in oil rubbed bronze. There are 7 rings in each package, each package costs $4.74 and I bought 5 packages for a total of $23.70. I ended up using 5 rings on each panel so I still had 5 left over.

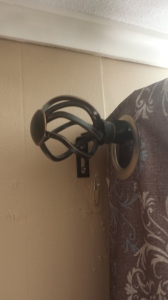
Last but not least I got curtain rods from Home Depot, also in oil rubbed bronze, for $6.97 x 3 for a total of $20.91. They’re 48 – 84 inches long and 7/16 in. thick.  I was trying to get the cheapest option possible, but aesthetically I think a thicker curtain rod would be better.

Total Cost Breakdown

here is an overview of the items I bought and their costs:

  • 12 twin sheets x $4.97 each = $59.64
  • 5 packages of (7) curtain rings x $4.74 each = $23.70
  • 3 curtain rods x $6.97 each = $20.91

Bringing the total cost of curtains and hardware (without tax) to $104.25

Comparing the Cost of DIY Curtains and non-DIY Curtains | Curtain Pattern

I absolutely love the way these curtains turned out and I think they add a lot of style and function to the room (but hey, I may be a little biased). I know in my next apartment I won’t be using all of the panels but I think it was a great investment compared to buying pre-made curtains.

What do you think? Would you try sheet curtains, DIY curtains out of fabric, or just buy curtains? I would love to hear your pro/con list!

See You Around!

Lauren <3

Comparing the Cost of DIY Curtains and non-DIY Curtains

Punch List for A Rent Ready Home

I contacted my landlord with questions about the house which means I am one step closer to buying it. With all of the questions I asked her I should be able to run the numbers, make an offer, and work out a deal. Considering I can’t know how much longer we have until it’s time to get renters I compiled a punch list of things left to do.

In order to have the lower unit rent ready, these are the things that I must have completed

  • Remove the door in T’s bedroom
  • Paint the last wall in T’s bedroom
  • Paint the trim in T’s bedroom

Punch List for A Rent Ready Home

These first three tasks are the leftovers from when I painted the paneling in this room and the fact that the trim is in desperate need of a fresh coat

  • Touch up paint around the house
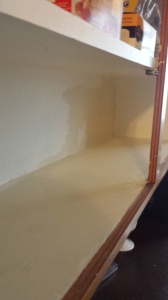
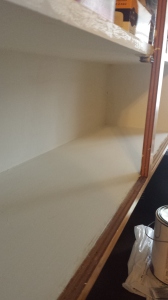
  • Finish Painting Inside Cabinets
  • Paint Outside Cabinets
  • Seal the grout on the new backsplash

Punch List for A Rent Ready Home

  • Check that the heater is clean and running smoothly
  • Check the smoke detector
  • Fix the run in the carpet
  • Install a fan in the bathroom
  • Fix the overhead light in the bathroom
  • Clean everything

On the other hand, there are also things I would like to have done before we get tenants. Time and money permitting

  • Replace carpet with new carpet in bedrooms/living room
  • Replace carpet with laminate in kitchen/dining area

american-quarter-horse-angle_1000

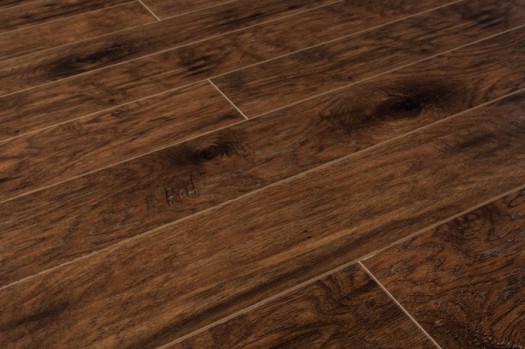
I’m thinking of going with a laminate similar to this (maybe even this one), and a beige brown carpet

  • Stain stair treads, paint the risers.

These last three wants all have to do with flooring. The only spot in our unit that doesn’t have carpet is the bathroom. Even in the places that it makes sense to have carpet, the carpet isn’t so great even after a good cleaning. Mostly the idea with replacing the flooring is we would likely get a better deal if we bought the same flooring for upstairs and downstairs all at once. One of the first things I would like to do once (if) we get the house is replace all the flooring upstairs even before moving in.

I’m planning on knocking out some of the items on the must-do list over my spring break (in one week). It’s probably a good thing that we just got bombarded with snow here in Michigan, otherwise I might be tempted to do some yard work.

What’s on your punch list?

See You Around!

Lauren <3
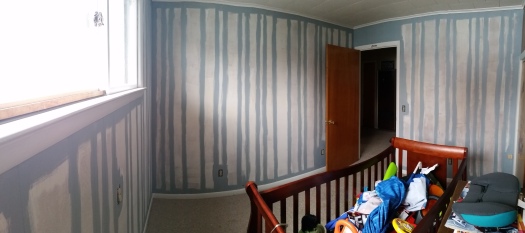
 

The Final Piece to a Paneling Free Home

I’m moving quite slowly on progress with the house, so this weekend I finally painted little T’s bedroom!

The Final Piece to a Paneling Free Home

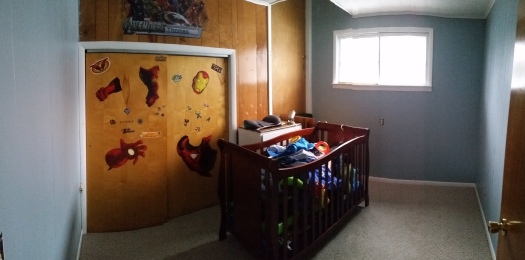
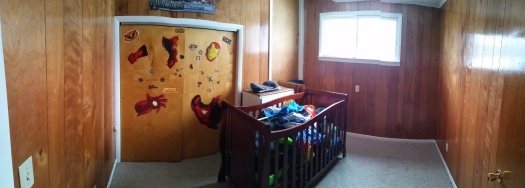
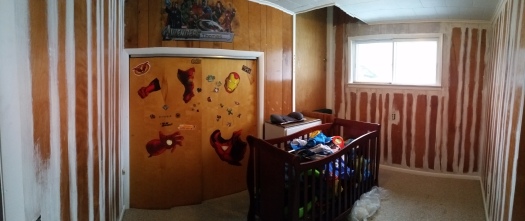
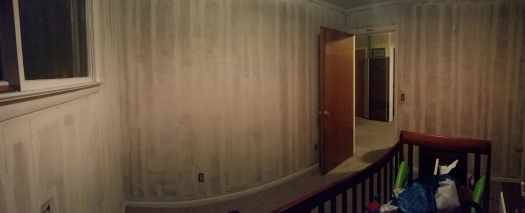
Here is the panorama of this crazy room before its kick ass makeover. Hello again weird door midway up the wall. Glad you decided to make another appearance on the blog.

The post title suggests there is literally no more paneling in my house, but I mean the paneling is painted. Then again that’s not entirely true because I’m not going to paint the closet wall until we take out the weird door and drywall it. When that happens I’ll fill in the cracks in the paneling on just that wall so it doesn’t look super mish moshy. But anyway, PROGRESS. and that is why we are gathered here today.

The Final Piece to a Paneling Free Home

First I filled the crib up with toys, shoved it to the middle of the room, took stuff out of the room, put things in the closet, and decapitated the iron man sticker.

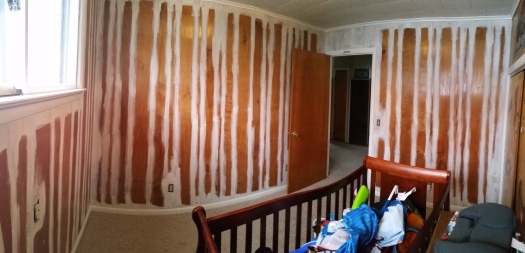
To prep I filled in all the holes with spackle, covered the stuff left in the room with a plastic drop cloth, and took off all the outlet covers. I then went through and sanded all the walls with 220 grit sandpaper. I was going to use my new electric sander, but I figured that would be a bit excessive for just needing to scuff the walls up a bit.

Please please do not skip the sanding step. When Chris and I painted our bedroom paneling we didn’t sand and it was a big mistake. If we nick the walls the paint scrapes right off and you can see the paneling. At the very least rough the surface up a bit even if you don’t sand the crap out of it.

The Final Piece to a Paneling Free Home

The Final Piece to a Paneling Free Home

Before I started painting I wiped all the sanding dust off the walls along with any cobwebs in the corners. I also vacuumed the carpet and along the trim to make sure no dust would get into my paint.

The Final Piece to a Paneling Free Home

The Final Piece to a Paneling Free Home

When I was cutting in I got all of the cracks because a roller doesn’t do a very good job of that. At this point I also filled in any more holes that I didn’t notice the first time around.

The Final Piece to a Paneling Free Home

After priming I saw areas where either the paneling color was showing through or it was discoloration from nicotine. In the end I decided to do one coat since that is what we did in the bedroom, and that paneling was even darker.


The Final Piece to a Paneling Free Home

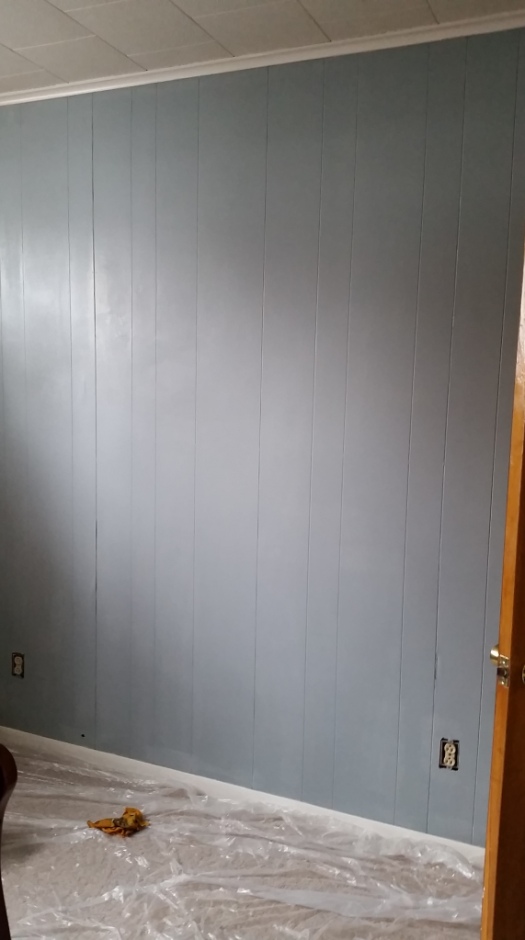
Even when I cut in with the paint I filled in all the cracks. When I started brushing on the paint I remembered how much I love this color. It’s called winter sky gray. It seems rather blue to me though which was a surprise when we first painted our bedroom. I guess it makes sense though since skys are usually blue to some extent.

The Final Piece to a Paneling Free Home

Slightly above the electrical outlet near the door you will notice some flaws in the gaps. These parts were pulling away from the wall which obviously wouldn’t look good when painted. Chris’s genius solution was to staple gun them down, and it actually worked like a gem.

I love this picture because even though I haven’t repainted the trim you can see the crisp difference between the bluish gray wall and the white trim. Just beautiful. (excuse the splotches, the wall wasn’t done drying yet).

The Final Piece to a Paneling Free Home

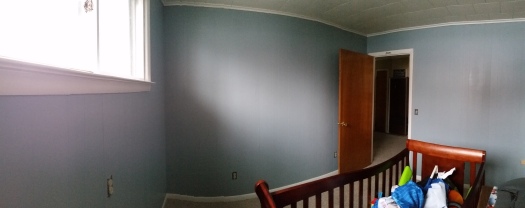
Final product with the “accent wall”. still hadn’t put the room back together yet. I love how much the painted room draws attention to the window. It’s a reminder of how much brighter the room is.

Also notice how high the top of the door goes, and that the area up there is painted. I was using a chair to paint, but couldn’t reach high enough so I asked Chris if he could reach. He just decided to open up the door and stand on the stairs landing. It’s a good thing we’re close friends with the upstairs neighbors and we keep that door unlocked. (it is set up though so both sides can be locked and not one unit has control over the door). Either way it needs to go. Sayonara door!!

The Final Piece to a Paneling Free Home

Another view and a way for me to imagine that there is absolutely no more paneling. 😀 I’m in love.

The Final Piece to a Paneling Free Home

The Final Piece to a Paneling Free Home

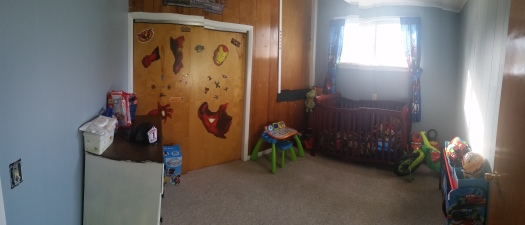
And of course some views of the room put back together/rearranged (minus the still decapitated Iron Man)

Before painting my paneling I also got some really useful information in this blog post about what to use on different types of paneling, and some tools that make it a lot easier.

Chris and I worked on this project for about a day and a half. My body was definitely sore from constantly kneeling, standing, and getting up on a chair. Maybe I’m just weak but that stuff is taxing!

I’m glad to have this project done as it’s really going to propel me into finishing my other projects and working on my time management.

What are your motivating factors?

If you want to see how I finished the white dresser, check out this post.

See You Around!

Lauren <3


Household Odds and Ends

Recently I’ve been working on a variety of small projects trying to cross things off the to-do list. However, I haven’t really had the motivation to attack items full force. Another reason I’m working on finishing things up is to get the house into normalcy before tearing it up again.

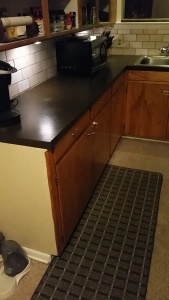
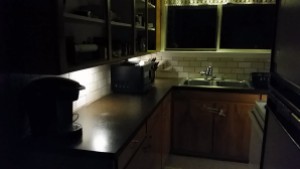
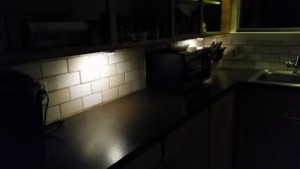
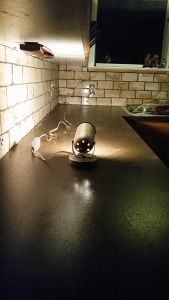
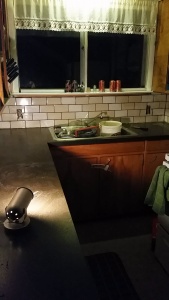
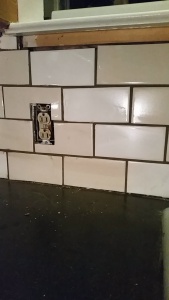
The biggest thing I’ve been focusing on is the kitchen. I put the window trim back on, caulked the back splash, painted underneath the upper cabinets, painted another shelf in the cabinets, and put up under cabinet lighting.

Household Odds and Ends Household Odds and Ends Household Odds and Ends

Above is the progression of under the cabinets from nasty to crisp and clean. I wanted to repaint before I put up the new lights.

Household Odds and Ends

Household Odds and Ends Household Odds and Ends

I’m proud I finally got these lights up, and with how clean the kitchen is. We haven’t done all the dishes in a LONG time. The lights make it so much easier to see when cooking in the kitchen at night. (Get my stupid Spongebob reference?)

Household Odds and Ends Household Odds and Ends

I also found this list I made a while ago with all the things I wanted to do to the house. The unit we currently live in anyway. The picture on the right is when I went through and checked off everything that I had done. It’s interesting to see how I removed some items from my thought process, and what new items I added. It just goes to show that as projects are completed the vision changes.

After finding this I went and remade the list adding on the tasks for the upstairs unit, and I have yet to make a list for the exterior. I have mentioned some of my ideas in a blog post though I think.

Last but not least I started another small project. One of our upstairs neighbors wanted me to update this little box he has, and make it look a little closer to what I think it was supposed to look like anyway. From what I could find online, these boxes are usually dark

Household Odds and Ends
The neighbor’s box is on the right, and Chris’s is on the left. The hardware on the right box is skeletons and pirate like, and the left box has lion’s heads.

I will make a separate post for that project when it’s all done.

Hopefully soon I’ll get an awesome grasp on my time management and go Gung ho on the house projects without getting behind on homework or sleep. That’d be the dream. Spring is coming up fast and I’m getting anxious that I won’t get very many of my winter projects done.

We still haven’t talked to the landlords about buying the property yet. Read: Chris is taking his sweet time setting up a meeting time. Which is holding me back on wanting to start any new house projects. I don’t want to get mid project, be let down, and not finish a project mid chaos. Worst case scenario people.

What have you been putting off? Are you still going full force on new years resolutions/goals? (I’m trying, I really am)

See You Around!

Lauren <3
DIY Ceramic Tile Backsplash

Today is the day I share with you our brand new tile backsplash, and the steps it took to install it. Our kitchen is yet another step closer to being awesome, and it almost doesn’t visually suck anymore.

We were very lucky to get most of our materials free. Below are the list of materials you would need. The only things we had to buy are the items I indicated with a price. Clicking the material links will take you to sources of where to purchase/ where I did purchase the items.

Materials:

My Project Cost:  $37.50 (Accounting for selling the joint compound leftovers and not accounting for sales tax)

Project Value/Potential Cost: $251.53

NOW. The cost will vary depending on the type of materials you buy, and what tools you already own. I just wanted to see with the almost exact products I used, including their sizes, how much this project could have cost me.

If you missed my post of how I prepped my walls check that out here.

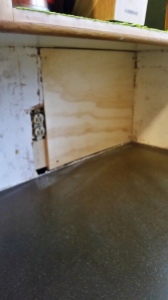
I mentioned I was going to explain how we filled in the hole in our backsplash wall, but I can’t really do that because Chris did it without me. Not complaining, but he didn’t take pictures and he didn’t really explain it to me very well. But, I’m assuming most people don’t have that issue and it’s mostly a case by case thing anyway.

DIY Ceramic Tile Backsplash

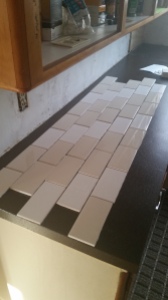
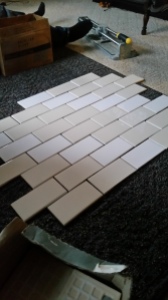
The next thing I did was lay out several tiles in my pattern on the counter. This way after we put the mastic on the wall we wouldn’t have to scramble to get tiles up, and it would help us engrave the pattern into our brain.

DIY Ceramic Tile Backsplash

DIY Ceramic Tile Backsplash

As we went along we used 1/8″ spacers in most places to keep everything even. In some places we didn’t use them because the tile cuts weren’t 100% even so it looked a little weird using a spacer, or the spacer wouldn’t stay put.

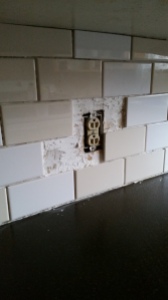
You can see in the picture above that we just tiled around the outlets. This is because we didn’t have the proper tools to make the types of cuts we needed. This can sometimes be avoided by laying out a pattern in a way that doesn’t have weird cuts.

We left all the spots around the outlets without tile, and took tiles to Chris’s brother’s house to have him cut them (since he had the right tools). Afterwards we then reapplied some mastic on the wall and to the tiles.

DIY Ceramic Tile Backsplash

Here is what the tile looked like from a distance once we put it all up.

Then we let it sit for longer than the recommended amount of time before we grouted. We definitely did not choose the best timing to decide to grout. It was around 11:00 PM when we started. We would’ve done it during the day but Chris had Little T over night and we had to wait until he went to bed. 2 year old boys are not very good at entertaining themselves when house work is going on.

Another problem we ran into was rock hard grout. We had to chisel away at the chunk to get usable grout which ended up having little chunky pieces even after we mixed it with water.

If we had started doing this during the day we would have said screw it and just went to buy a new bag of grout but we were tired, wanted to get it done, and it was so late so nowhere close was open. This made it a pain in the behind to apply, but overall didn’t really hinder the way the grout looked.

DIY Ceramic Tile Backsplash

Here’s the grout right after we applied it and before we wiped anything off. Do you like our light strategy? We had to be super quiet because our house only has one heat source and we couldn’t shut Little T’s door all the way because it would get too cold in his room. So instead of turning the kitchen light on and risking waking him up, we just used this and moved it around.

DIY Ceramic Tile Backsplash

This picture is after I wiped everything down with a damp cloth to clean the grout lines up, but not necessarily to get the tile perfectly clean (I have yet to do that).

DIY Ceramic Tile Backsplash

Here is a close up of an area that I got pretty clean.

I really liked the light look of the tile without the grout, and I was a little nervous about what the tile would look like with the dark grout. However, I really like the way it turned out! I think it goes quite nicely with the counter tops and the tile doesn’t stick out as being too modern.

DIY Ceramic Tile Backsplash

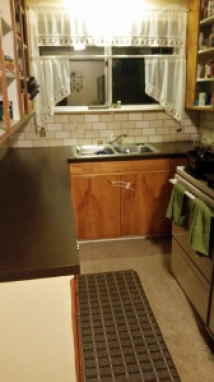
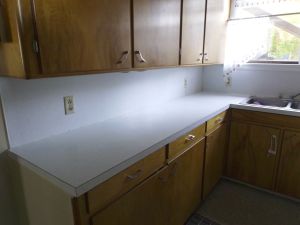
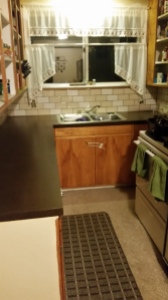
As a reminder that is what the kitchen looked like originally.

DIY Ceramic Tile Backsplash

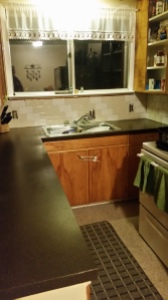
This is what it looks like now. It’s a little discombobulated, but with some new flooring and painted white cabinets it will look prim and proper.

My main suggestion would be to make sure your materials aren’t going to cause you any headache. I’m all about reusing materials so they don’t go to waste but I think I much rather would have bought new grout. Cutting the tiles wasn’t a bad choice, but it was a little nerve wracking that everything wasn’t completely straight as this was my first time doing tile.

The most frustrating part was trying to find the right time to do the project, and I could have benefited from slightly better planning. Overall, I’m satisfied and this was a much needed update.

Have a good holiday, and see you around!

Lauren <3


Winter Projects

Seeing as it is already winter and I have a break and new semester coming up I figure I should create a list of winter projects to accomplish before spring. I also think hope I’m going to have a lot of exterior work to do when the weather gets nice, and I don’t want to be stuck inside.

First things first: kitchen backsplash. The walls are prepped and the hole is filled. I’m going home and should be starting the tile tonight! As a refresher here is what the layout will look like except not so tall.

Winter Projects

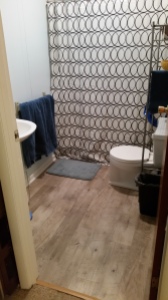
I would also like to replace the carpet in the kitchen with the same plank vinyl we used in the bathroom. The catch with this is we are going to tell our landlords we’ll only do it if we can paint the cabinets white, which I also want to complete before spring. The only way it would backfire is if they say no to both. Honestly I wouldn’t be surprised by that at this point. Just imagine this floor:

Winter Projects

In this kitchen:

Winter Projects

Also imagine the new spray painted countertops, ceramic backsplash, and white cabinets. I know, it’s a stretch.

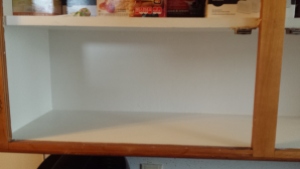
I am currently in the process of scraping the peeling paint out of the old cabinets and repainting the insides. This takes forever but I’m at least hoping to have the upper cabinets done by spring. Here is a crisply painted cabinet innard for your viewing pleasure:

Winter Projects

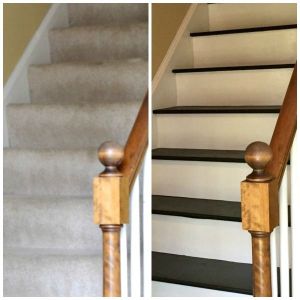
Another project I’ve had on my mind is ripping the carpet off the entry way landing and replacing it with vinyl. If the stairs have good wood underneath I might stain them instead. Think something like this:

Winter Projects
Source: To Simply Inspire

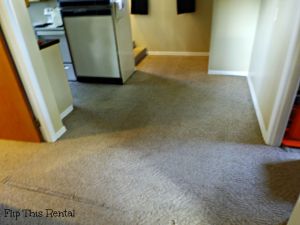
There is a huge run in our carpet outside of the bathroom and I would like to get the carpet stretched so that problem is fixed. Chris’s dad installs flooring and I think we could convince him to fix it for us. You can see the run in the picture below. I think it’s worse now than it was then. (This is from when I cleaned my carpet)

Winter Projects

Maybe this one is adding too many to the pile but I would love to build shelves the whole height of our small entry closet. Currently it has one shelf and that’s really not doing us any good. At the least I want to add in a couple more shelves. This is the hot mess I’m dealing with currently:

Winter Projects

I had Chris send me that picture so sorry for the quality and also sorry for the fall wreath that’s still hanging out. whoops… I should probably take that down.

Honestly the amount of major projects left in the apartment is becoming minimal. Chris and I are getting a little more serious about looking at buying the place,  especially since I will be living there full time starting in May. Our expenses will be smaller and we’ll have extra money to invest. So far it seems like a good idea but we need to look into the details.

I can just imagine the hilarity of showing you the before pictures of the upstairs. It’s a million times worse than what we started with in our unit. Although I think I might like the layout better.

What are your plans for the winter?

See You Around!

Lauren <3
Cleaning Cabinet Hardware Naturally

Once upon a time in an insane land far away, I thought my landlords were going to let me paint my cabinets. In some fantasy I’m still holding onto hope they will. I feel like a broken record at this point, repeating my wishes constantly.

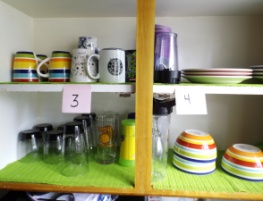
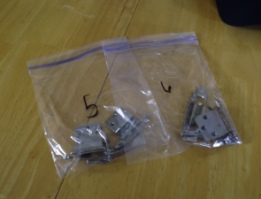
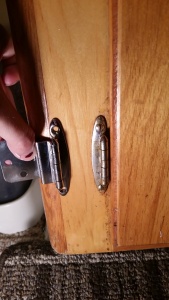
Because I thought they were going to say yes, I spent the time and energy taking all the upper cabinet doors off, labeling them with sticky notes, and cleaning the hardware. I put all the hardware in separate baggies with numbers that correspond with the cabinet they go on.

 Cleaning Cabinet Hardware | Super easy technique for cleaning hardware with items you probably already have Cleaning Cabinet Hardware | Super easy technique for cleaning hardware with items you probably already have

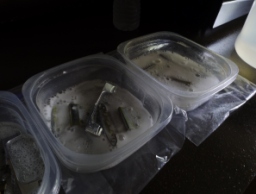
To clean the door’s hardware I put them in separate containers to clean them. I sprinkled baking soda on them before covering them in distilled white vinegar and let them soak for a few hours.

Cleaning Cabinet Hardware | Super easy technique for cleaning hardware with items you probably already have Cleaning Cabinet Hardware | Super easy technique for cleaning hardware with items you probably already have

After soaking I scrubbed the hardware with an SOS pad and rinsed. The baking soda and vinegar really did a good job of loosening up the gunk that was caked on. If you’re in the process of revamping your cabinets and are reusing your hardware I really recommend doing this step. You can really get into every crevice when the hardware is not on the door.

Cleaning Cabinet Hardware | Super easy technique for cleaning hardware with items you probably already have

Here are a few side by sides of how much of a difference this can make. Plus, a reminder at how horribly disgusting my cabinets are.

Cleaning Cabinet Hardware | Super easy technique for cleaning hardware with items you probably already have Cleaning Cabinet Hardware | Super easy technique for cleaning hardware with items you probably already have

Now I sit and wait until my wish comes true. My cabinets are without doors, and the insides are begging me to paint them. I’ve done a few of the inside shelves as you may have already seen here, and I’m slowly painting them while I wait. I hope I don’t finish all the insides of the cabinets and clean all of the hardware before I get to paint. At least I will have something to keep me busy in the mean time.

When is the last time you thought about cleaning your hardware? Do you get impatient waiting to do your next big project, and how do you deal with the anticipation?

See You Around!

Lauren <3

Thrifty Bathroom Storage

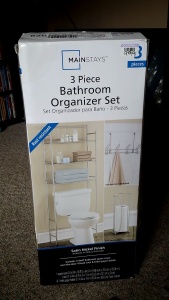
My bathroom is pretty small, and seriously lacking in the storage department along with the rest of my house. I’m a total storage and organization nerd, and I would spend SO much money on storage if I could. But since I can’t, I’m always looking for thrifty ways to get the same effect. The other day Chris and I were at Goodwill, and he spotted this 3 piece bathroom organizer for only $10!! Thrifty bathroom storage for the win!

Thrifty Bathroom Storage #thriftstorefinds #goodwill Thrifty Bathroom Storage #thriftstorefinds #goodwill

I found the exact same thing in the $30 range online!! For some reason I couldn’t find this exact thing on Wal-Mart’s website. Maybe they don’t sell it anymore? In that case this piece is a collector’s item 😉 I was a little nervous to buy it at first because I thought maybe some of the pieces were missing. The box was taped really well, but I was able to peek inside and see that the pieces were still in the plastic bags. So, we decided to take a chance on it.

Thrifty Bathroom Storage #thriftstorefinds #goodwill

When I got all the pieces out I found half of the directions and got scared until I found the other half. Nothing a little tape can’t fix!

Thrifty Bathroom Storage #thriftstorefinds #goodwill

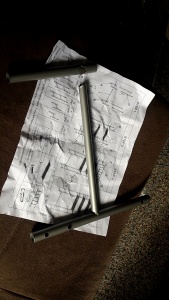
After I fixed the directions I pulled all the pieces and was making sure they were all there. And then I came across this…

Thrifty Bathroom Storage #thriftstorefinds #goodwill

You can’t really see it on the paper, but this is supposed to be one piece. I don’t know what happened but there are two of these parts, and both of them were broken. I put the rest of the shelf together while I figured out how to fix these pieces. They went on top so they weren’t necessary, but it would be better if they could be used.

Finally I remembered some sort of welding stuff that came in a tube. I had seen it on Pinterest before but couldn’t remember exactly what it was. When Chris came home from work he told me it was called JB Weld and he already had some! 😀

Thrifty Bathroom Storage #thriftstorefinds #goodwill

It comes in two tubes. One labeled hardener and one labeled steel. He just mixed a fair amount together (equal amounts of both) on a piece of cardboard and applied it to each broken piece. We let it sit over night and it was all fixed!

Thrifty Bathroom Storage #thriftstorefinds #goodwill

Not the prettiest repair job, but it’s fixed and it’s not very noticeable when the shelf is all put together.

Thrifty Bathroom Storage #thriftstorefinds #goodwill

I’ll have to figure out what all I want to store on here, and how to style it but for now I’m just happy to at least have a place to set things 🙂 I want to store towels on it, but most of the ones we have are stained and ugly. That’s another thing I need to invest in.

Have you ever ran into a thrift store disaster, or had a close call? What was your favorite thrift store find?

See You Around!

Lauren <3

Painting Cabinet Shelves

The cabinet painting is still basically at a halt. The landlords still say no. However, I still have hope and the next plan is to get an extra box of flooring that we will be using in the bathroom, and then we’ll have enough to do the kitchen too. But, we’ll tell the landlords we can’t do it unless we paint the cabinets. Yellow cabinets do not look good with beautiful gray barn wood looking floors. Hopefully this last resort tactic works. I might just have to paint them anyway, but I rather not.

Since I can’t paint the outside of the cabinets I’ve started painting the insides since they desperately need it too.

Painting Cabinet Shelves

This is a different cabinet than I painted, but I had already peeled too much paint off for you to see how dirty it was to start with. I cleaned the shelves really well and they’re still too dingy to be left alone.

Painting Cabinet Shelves

You can see here how the paint is peeling. The peeling is worse in some of the other cabinets.

The worst part about the cabinets is that they trapped the smell of food horribly. Even after I cleaned the cabinets and let them air out without food for a while, I could smell it again shortly after I put everything back.

Painting Cabinet Shelves

Here is the cabinet I painted with most of the paint peeled off the bottom, and quite a bit off the walls. I peeled as much off as I could before sanding it down and wiping up the dust.

Painting Cabinet Shelves

Above is the cabinet with a coat of primer. When I painted the wall trim I didn’t put a coat of primer on it, and I wish I did because it might have helped it from getting dinged up again. I absolutely hate dealing with the peeling paint, so I hope that this primer will cut down on that.

Painting Cabinet Shelves

The cabinet with a coat of paint and all dry.

Painting Cabinet Shelves Painting Cabinet Shelves

Here are comparison photos of a painted shelf and a non painted shelf. The bottom shelf in both pictures is painted, and the top one is not.

Painting Cabinet Shelves

Painting Cabinet Shelves

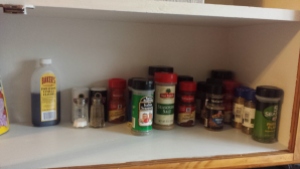
The cabinet is put back together, now I just need to find a better way to organize the spices. I’ll slowly work on painting a shelf or two at a time and hopefully that will keep my mind off wanting to paint the outsides.

I should make decent progress if I don’t get too irritated with having to peel all the paint off. I might, however, get a little grossed out with doing some of the lower cabinets by the sink that are exposed to the pipes inside the wall. Maybe I’ll come up with another project entirely to make them look more finished.

What’s your worst home improvement nightmare? Do you have any tips for organizing spices?

See You Around!

Lauren <3

Living Room Tour

I’m one of those people who likes to rearrange. Furniture, decor, organization, anything. When I get a new piece of furniture I rearrange to make it fit right in with everything else. When the seasons change I add different decorations. Sometimes I just get bored with the arrangement of a room, so I switch it up. My living room is probably the most versatile room to move around the furniture. After cleaning the carpets I figured it was time for a change in the living room.

Flip This Rental | Living Room Tour

Flip This Rental | Living Room Tour

Flip This Rental | Living Room Tour

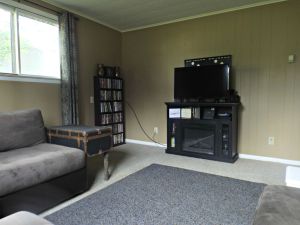
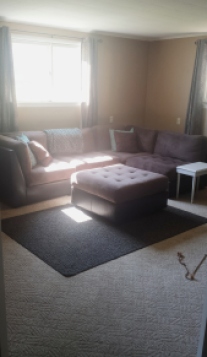
Above is how the living room was set up beforehand. I liked the couch set up because it made a more social space for when we had company. We could comfortably chat with each other or watch television. On the other hand I felt like the set up made our living room feel much smaller than it actually is.

Flip This Rental | Living Room Tour

Here is a panorama of the new living room set up.

Flip This Rental | Living Room Tour

A closer up of the couch set up.

Flip This Rental | Living Room Tour

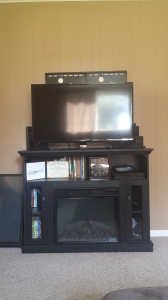
Here’s the fireplace and T.V. You will notice a T.V to the left and the wall mount behind the T.V. on the fireplace. The wall mount T.V. is waiting to be repaired, so the T.V. we are currently using is from the bedroom. I’d like to rearrange the fireplace once the T.V. is fixed so it looks more even. The left side looks really cluttered because of books and DVD’s, whereas on the right the PlayStation and internet router almost blend in.

Flip This Rental | Living Room Tour

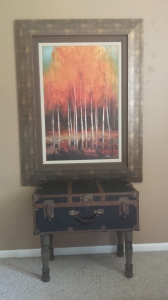
For now I put my trunk table underneath this painting. I could put it on the other end of the couch as an end table, but for now I think putting it here shows off it’s charm a little more. When we decorated the living room I didn’t even realize it, but the colors in our throw pillows and blanket go perfectly with the blues and browns in the painting.

Flip This Rental | Living Room Tour

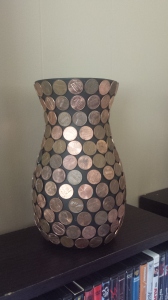
I have two of these penny vases that I DIY’d over on our movie cases. Typically I put them on the fireplace, but right now that space is taken up. I got two almost identical vases at goodwill, (they were the same shape just a different shade of green and one was slightly heavier) and I spray painted them black and hot glued pennies to them. Such an easy decor item and you can hardly tell they’re pennies from far away!

Flip This Rental | Living Room Tour

Another simple update to the living room was changing out the plain white rods and nasty curtains for nice oil rubbed bronze rods and long curtain panels. We left the original hardware and kept the old curtains so we can put them back when we move out.

Project Plans

Flip This Rental | Living Room Tour Flip This Rental | Living Room Tour

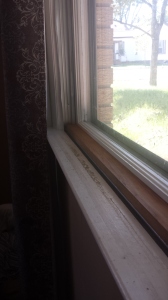
My goal for winter break is to repaint all the window trim. As you can tell in these photos the paint is peeling (just like the rest of the trim in the house was), and it is yellowy underneath. The biggest reason the window trim started majorly peeling was we used plastic over the windows throughout the winter to seal the heat in. When we pulled the plastic off in the spring the paint peeled with it. On the windows that the locks are broken we also have wood pieces to keep the windows “locked”. All the boards are plain wood and I want to paint them white so they blend in. The next best thing would be replacing all the locks, but that costs money.

I want to paint the ceiling trim too as I noticed it is quite nasty in comparison to the baseboard trim that I repainted (you can really notice it in the third picture from the top). I also need to go back and sand down some spackle spots that the boyfriend forgot to sand before we painted. There are also some spots that look a little streaky that we will go over again.

A few other small projects include cleaning the electrical outlet covers, sprucing up the fireplace mantle, and hiding the cable cord and internet routers.

Which set up did you like better: up close and social, or the wide open spaces?

See You Around!

Lauren <3

P.S. If you missed the bathroom tour – check it out here