5 Tips For a Professional Paint Job

Recently I have been working with my uncle a lot who owns Custer’s Renovations & Paint. He does any kind of finishing work you can think of, and I have been learning a ton about painting. So today I’d like to share with you 5 tips on how to achieve a professional paint job on your own. Specifically, I’ll show you how I implemented what I learned when I painted my own bathroom.

Scrape, Repair, & Caulk

One of the first steps to achieving a professional paint job is doing the appropriate prep work. If there are any bumpy areas left from a previous paint job make sure to scrape them away. Fill in any holes and areas that have been dinged. If there are any gaps in the trim make sure to caulk them with paintable latex caulk.

When my bathroom was painted previously there were a bunch of areas where paint splattered off of the roller and left tiny little bumps everywhere. Scraping these away ensured my paint job would be as smooth as possible. The window was painted quite poorly before so it made it difficult to get everything scraped off. However, what I did manage to scrape off and fix made a big difference. There were also huge gaps around the window that made the room look unfinished and overall kind of dingy.

5 Tips For a Professional Paint Job

5 Tips For a Professional Paint Job


5 Tips For a Professional Paint Job
Before

5 Tips For a Professional Paint Job

5 Tips For a Professional Paint Job
After

Sand & Dust

After your repairs dry, make sure to sand the patches and ideally, sand all of the walls with a fine grit sandpaper. Sanding the entire wall ensures you didn’t miss any little bumps and the finish will be smooth. Before painting, take a rag and dust the walls and trim.

It’s also a really good practice to sand in between coats and to do at least two coats.

Lighting

One of the most interesting tips my uncle showed me is how he uses lighting. In his opinion, lighting is one of the biggest factors in catching imperfections. By shining a big, bright light across the wall, you see any flaws such as bumps or drips because the light will create shadows across these areas. Without the light, you might not catch these because natural light doesn’t have the same effect. You might not notice some imperfections when you’re painting but will catch them later on because the lighting has changed. By using a light right off the bat you’re more likely to catch the mistakes.

Details

Another major factor in achieving a professional paint job is paying very close attention to detail. Wipe up any drips you spot or anywhere you painted “outside the lines”. By paying attention to detail throughout the process you will avoid fixing mistakes later on, which is often more difficult than fixing mistakes as they happen.

You want to roll on a decently thick coat of paint, but there is a fine line because you really want to avoid drips. It takes a bit of practice to get used to the feel of the perfect amount of paint and it can also depend on the type of paint you’re using. Some paints, such as Behr, are runnier than others.

One thing I noticed that makes a huge difference in the quality of my own painting is not taping things off. It takes me a lot of time to tape trim off and I can never seem to get the tape sealed right. I actually end up getting more paint on the trim when I tape than if I don’t tape and paint carefully. The key here is to keep a damp rag near you so you can wipe up any little spots where you go outside the lines. The more you practice the less you’ll have to wipe anything up. My uncle is a very skilled professional who is a lot faster, and better, at taping than I am so he’ll tape things here and there.

Stipple

Last but not least, stipple your brush as you’re cutting in. By this I mean dab your brush on the wall instead of dragging it down the wall. This helps match the texture of the roller so you don’t end up seeing brush marks. Typically I drag my brush down the wall to get the right amount of paint on. Then, I go back and stipple it.

These techniques are easy to do and don’t take much time on top of the amount of time it already takes to paint. In the long run, it’s well worth it in order to achieve a professional paint job.

And, of course, I have to show you the before and after pictures 🙂

5 Tips For a Professional Paint Job 5 Tips For a Professional Paint Job5 Tips For a Professional Paint Job 5 Tips For a Professional Paint Job5 Tips For a Professional Paint Job 5 Tips For a Professional Paint Job

The walls are painted with Sherwin Williams Svelte Sage, and the ceiling is painted with Devoe Paint Simplicity Stone.

What’s your favorite tip for a professional paint job?

If you liked this post, feel free to share it 🙂

See You Around!

Lauren <3

The Final Piece to a Paneling Free Home

I’m moving quite slowly on progress with the house, so this weekend I finally painted little T’s bedroom!

The Final Piece to a Paneling Free Home

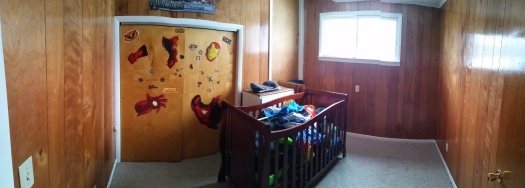
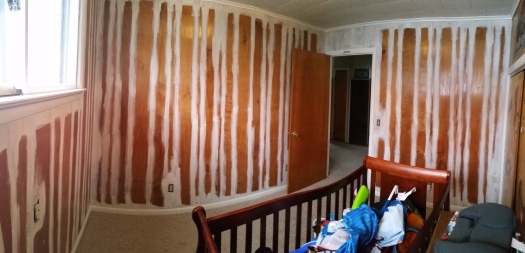
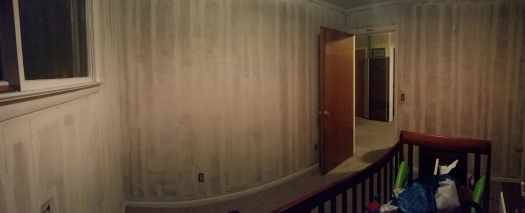
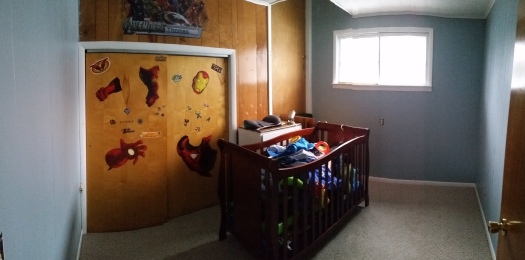
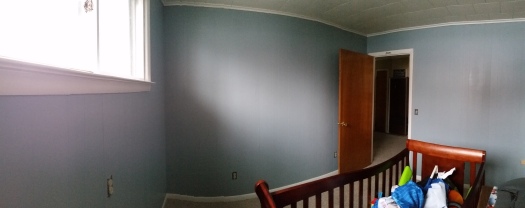
Here is the panorama of this crazy room before its kick ass makeover. Hello again weird door midway up the wall. Glad you decided to make another appearance on the blog.

The post title suggests there is literally no more paneling in my house, but I mean the paneling is painted. Then again that’s not entirely true because I’m not going to paint the closet wall until we take out the weird door and drywall it. When that happens I’ll fill in the cracks in the paneling on just that wall so it doesn’t look super mish moshy. But anyway, PROGRESS. and that is why we are gathered here today.

The Final Piece to a Paneling Free Home

First I filled the crib up with toys, shoved it to the middle of the room, took stuff out of the room, put things in the closet, and decapitated the iron man sticker.

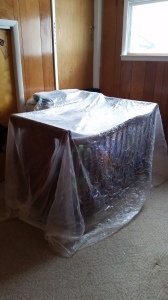
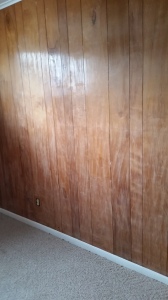
To prep I filled in all the holes with spackle, covered the stuff left in the room with a plastic drop cloth, and took off all the outlet covers. I then went through and sanded all the walls with 220 grit sandpaper. I was going to use my new electric sander, but I figured that would be a bit excessive for just needing to scuff the walls up a bit.

Please please do not skip the sanding step. When Chris and I painted our bedroom paneling we didn’t sand and it was a big mistake. If we nick the walls the paint scrapes right off and you can see the paneling. At the very least rough the surface up a bit even if you don’t sand the crap out of it.

The Final Piece to a Paneling Free Home

The Final Piece to a Paneling Free Home

Before I started painting I wiped all the sanding dust off the walls along with any cobwebs in the corners. I also vacuumed the carpet and along the trim to make sure no dust would get into my paint.

The Final Piece to a Paneling Free Home

The Final Piece to a Paneling Free Home

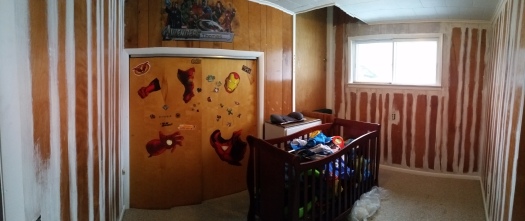
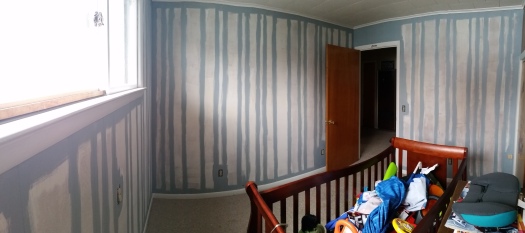
When I was cutting in I got all of the cracks because a roller doesn’t do a very good job of that. At this point I also filled in any more holes that I didn’t notice the first time around.

The Final Piece to a Paneling Free Home

After priming I saw areas where either the paneling color was showing through or it was discoloration from nicotine. In the end I decided to do one coat since that is what we did in the bedroom, and that paneling was even darker.


The Final Piece to a Paneling Free Home

Even when I cut in with the paint I filled in all the cracks. When I started brushing on the paint I remembered how much I love this color. It’s called winter sky gray. It seems rather blue to me though which was a surprise when we first painted our bedroom. I guess it makes sense though since skys are usually blue to some extent.

The Final Piece to a Paneling Free Home

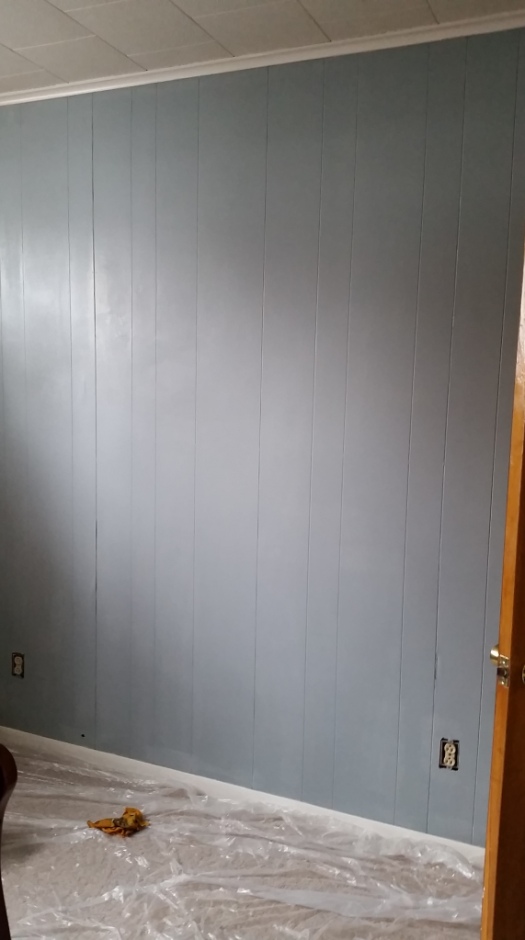
Slightly above the electrical outlet near the door you will notice some flaws in the gaps. These parts were pulling away from the wall which obviously wouldn’t look good when painted. Chris’s genius solution was to staple gun them down, and it actually worked like a gem.

I love this picture because even though I haven’t repainted the trim you can see the crisp difference between the bluish gray wall and the white trim. Just beautiful. (excuse the splotches, the wall wasn’t done drying yet).

The Final Piece to a Paneling Free Home

Final product with the “accent wall”. still hadn’t put the room back together yet. I love how much the painted room draws attention to the window. It’s a reminder of how much brighter the room is.

Also notice how high the top of the door goes, and that the area up there is painted. I was using a chair to paint, but couldn’t reach high enough so I asked Chris if he could reach. He just decided to open up the door and stand on the stairs landing. It’s a good thing we’re close friends with the upstairs neighbors and we keep that door unlocked. (it is set up though so both sides can be locked and not one unit has control over the door). Either way it needs to go. Sayonara door!!

The Final Piece to a Paneling Free Home

Another view and a way for me to imagine that there is absolutely no more paneling. 😀 I’m in love.

The Final Piece to a Paneling Free Home

The Final Piece to a Paneling Free Home

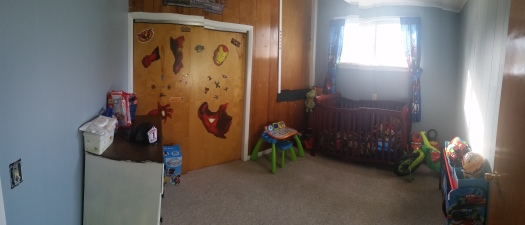
And of course some views of the room put back together/rearranged (minus the still decapitated Iron Man)

Before painting my paneling I also got some really useful information in this blog post about what to use on different types of paneling, and some tools that make it a lot easier.

Chris and I worked on this project for about a day and a half. My body was definitely sore from constantly kneeling, standing, and getting up on a chair. Maybe I’m just weak but that stuff is taxing!

I’m glad to have this project done as it’s really going to propel me into finishing my other projects and working on my time management.

What are your motivating factors?

If you want to see how I finished the white dresser, check out this post.

See You Around!

Lauren <3


Cleaning Cabinet Hardware Naturally

Once upon a time in an insane land far away, I thought my landlords were going to let me paint my cabinets. In some fantasy I’m still holding onto hope they will. I feel like a broken record at this point, repeating my wishes constantly.

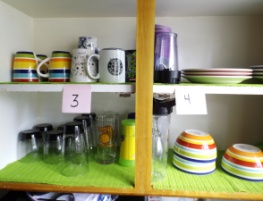
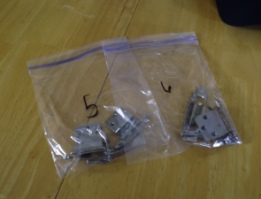
Because I thought they were going to say yes, I spent the time and energy taking all the upper cabinet doors off, labeling them with sticky notes, and cleaning the hardware. I put all the hardware in separate baggies with numbers that correspond with the cabinet they go on.

 Cleaning Cabinet Hardware | Super easy technique for cleaning hardware with items you probably already have Cleaning Cabinet Hardware | Super easy technique for cleaning hardware with items you probably already have

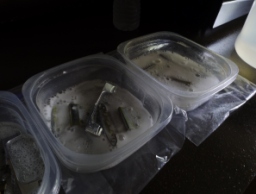
To clean the door’s hardware I put them in separate containers to clean them. I sprinkled baking soda on them before covering them in distilled white vinegar and let them soak for a few hours.

Cleaning Cabinet Hardware | Super easy technique for cleaning hardware with items you probably already have Cleaning Cabinet Hardware | Super easy technique for cleaning hardware with items you probably already have

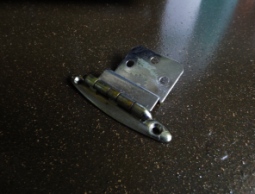
After soaking I scrubbed the hardware with an SOS pad and rinsed. The baking soda and vinegar really did a good job of loosening up the gunk that was caked on. If you’re in the process of revamping your cabinets and are reusing your hardware I really recommend doing this step. You can really get into every crevice when the hardware is not on the door.

Cleaning Cabinet Hardware | Super easy technique for cleaning hardware with items you probably already have

Here are a few side by sides of how much of a difference this can make. Plus, a reminder at how horribly disgusting my cabinets are.

Cleaning Cabinet Hardware | Super easy technique for cleaning hardware with items you probably already have Cleaning Cabinet Hardware | Super easy technique for cleaning hardware with items you probably already have

Now I sit and wait until my wish comes true. My cabinets are without doors, and the insides are begging me to paint them. I’ve done a few of the inside shelves as you may have already seen here, and I’m slowly painting them while I wait. I hope I don’t finish all the insides of the cabinets and clean all of the hardware before I get to paint. At least I will have something to keep me busy in the mean time.

When is the last time you thought about cleaning your hardware? Do you get impatient waiting to do your next big project, and how do you deal with the anticipation?

See You Around!

Lauren <3
Painting Cabinet Shelves

The cabinet painting is still basically at a halt. The landlords still say no. However, I still have hope and the next plan is to get an extra box of flooring that we will be using in the bathroom, and then we’ll have enough to do the kitchen too. But, we’ll tell the landlords we can’t do it unless we paint the cabinets. Yellow cabinets do not look good with beautiful gray barn wood looking floors. Hopefully this last resort tactic works. I might just have to paint them anyway, but I rather not.

Since I can’t paint the outside of the cabinets I’ve started painting the insides since they desperately need it too.

Painting Cabinet Shelves

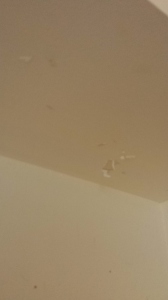
This is a different cabinet than I painted, but I had already peeled too much paint off for you to see how dirty it was to start with. I cleaned the shelves really well and they’re still too dingy to be left alone.

Painting Cabinet Shelves

You can see here how the paint is peeling. The peeling is worse in some of the other cabinets.

The worst part about the cabinets is that they trapped the smell of food horribly. Even after I cleaned the cabinets and let them air out without food for a while, I could smell it again shortly after I put everything back.

Painting Cabinet Shelves

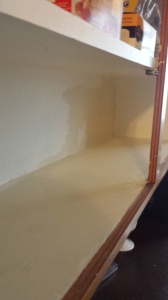
Here is the cabinet I painted with most of the paint peeled off the bottom, and quite a bit off the walls. I peeled as much off as I could before sanding it down and wiping up the dust.

Painting Cabinet Shelves

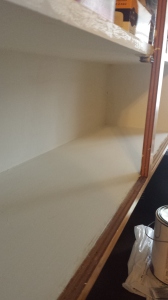
Above is the cabinet with a coat of primer. When I painted the wall trim I didn’t put a coat of primer on it, and I wish I did because it might have helped it from getting dinged up again. I absolutely hate dealing with the peeling paint, so I hope that this primer will cut down on that.

Painting Cabinet Shelves

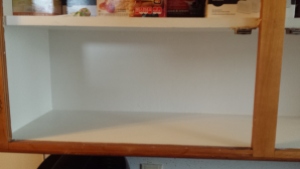
The cabinet with a coat of paint and all dry.

Painting Cabinet Shelves Painting Cabinet Shelves

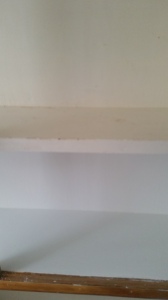
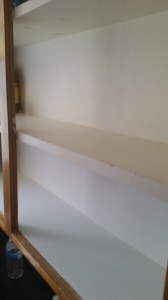
Here are comparison photos of a painted shelf and a non painted shelf. The bottom shelf in both pictures is painted, and the top one is not.

Painting Cabinet Shelves

Painting Cabinet Shelves

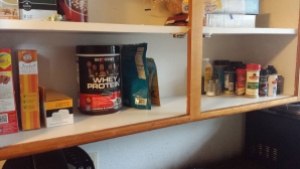
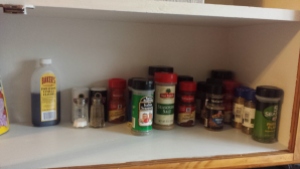
The cabinet is put back together, now I just need to find a better way to organize the spices. I’ll slowly work on painting a shelf or two at a time and hopefully that will keep my mind off wanting to paint the outsides.

I should make decent progress if I don’t get too irritated with having to peel all the paint off. I might, however, get a little grossed out with doing some of the lower cabinets by the sink that are exposed to the pipes inside the wall. Maybe I’ll come up with another project entirely to make them look more finished.

What’s your worst home improvement nightmare? Do you have any tips for organizing spices?

See You Around!

Lauren <3
5 LOGICAL Reasons to Paint Kitchen Cabinets

The night before Chris and I were going to tackle painting the kitchen cabinets he decided that he wanted to ask permission to paint. I got really anxious because there was always the slight chance that she would (ridiculously) say no. Mind you I already had taken off all of the upper cabinet doors along with all the hardware. Did I also mention he had no part in helping with that? Ugh. Boyfriends.

I’m not going to lie, growing up I was a rule follower and I asked permission for everything. I just couldn’t stand the thought of my beautiful white cabinets being torn from my grasp when I am so very capable of painting them myself. She didn’t say no, but she did say she would have to ask her husband. Her husband said NO. AGHHHH. I was furious because I felt like he just didn’t understand, and he hardly does much with the rentals anyway. I wanted to scream and tell her to woman up and realize she doesn’t need her husband’s approval. However that probably wouldn’t solve a thing and I would still have ugly cabinets. So instead I decided to have Chris give these reasons why they should change their minds.

5 LOGICAL Reasons to Paint Kitchen Cabinets | Flip This Rental1. Cabinet Damage

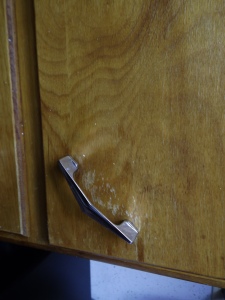
Our cabinets have several spots where they are obviously worn down. There are scratches on one cabinet door (no idea how those got there), finish worn down near handles and edges of doors/drawers. Even after I thoroughly cleaned/degreased everything twice the edges of the cabinets are gummy feeling. A few of the cabinets feel gritty and not smooth like some of the less worn down doors. This is not unusual for old cabinets, but the damage really makes the kitchen look run down.

2. Easy to Clean and Repair

Going along with the previous point, painting the cabinets will make it much easier to clean and repair any spots that get worn out. Putting myself in the landlord’s shoes I know I would want to efficiently clean and make any repairs from the time one tenant moves out, and another one moves in.

It’s harder to see dirt and grime on the cabinets the way they are now because the color of the cabinets exactly matches grease that might splatter out of a frying pan. What kinds of dirt, grime, or food do you know of that is white and will cling itself to a kitchen cabinet? none (okay maybe marshmallow fluff? 😉 ). In another setting cabinets that hide grime are a good thing because they create less work and hide the dirt. In a rental setting white cabinets make it really easy for a landlord to see how dirty the cabinets are, and to make a quick estimate of how long it will take to clean between tenants.

3. New Update for Cheap

Or in our case a new update for $0. It really cannot get any better than that. I respect it if the landlord’s are hesitant because they really like the look of wood and they don’t want to cover it up. However, we have plenty of leftover paint and primer that they already paid for to paint the walls. It would be the same amount of work if not more to sand and re-stain AND it would end up costing them more money in the long run.

5 LOGICAL Reasons to Paint Kitchen Cabinets | Flip This Rental4. White Paint Opens up the Space

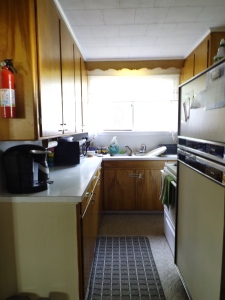
The kitchen in our apartment is really small and feels very claustrophobic because of the dark colors. Using light colors tricks your mind into thinking the space is actually bigger than it is. I especially noticed this when I took the upper cabinets doors off because the insides are actually already white. A decent sized kitchen is on a lot of people’s wishlist when it comes to homes, and at least white cabinets will make it not seem so cramped. Our home is located in a residential area a block or two away from the school. This means the property should really be trying to attract small families. Families generally do a decent amount of cooking so it makes sense to have a kitchen that will fit those needs.

5. Painted Cabinets are Popular

There are images all over Pinterest of painted cabinets, how to paint cabinets, and why you should paint cabinets. These days people are ditching the wood for a crisp paint job. Brains over beauty is generally the way to go. In this case painting the cabinets white is both brains and beauty. Especially in the business of rental properties it is critical to understand what a vast majority of people will be looking for in a home, and not just a select few. I can safely say that a vast majority of people are NOT looking for retro yellowy weird wood grain cabinets.

Obviously I want my living space to be appealing to me, but I also understand that I do not own it and some day someone else will have to work their style into the home as well. Throughout all of my projects I have held this mentality and that’s why it is frustrating to me that they said no to painting the cabinets. To me it seems like a well thought out business move. Hopefully after explaining these points to them they will change their minds.

5 LOGICAL Reasons to Paint Kitchen Cabinets | Flip This Rental

If you liked this post don’t forget to share it!

See You Around!

Lauren <3
Curbside Dresser Makeover

A while back the boyfriend picked up a dresser he saw on the side of the road. It was in good shape structurally but boy oh boy whoever painted this thing did NOT know how to paint. Or they were just extremely lazy. I can’t tell. Please ignore the ugly paneling and the fact that one picture is not in the same orientation as the others. Oops. #SorryNotSorry

Curbside Dresser Makeover | Flip This Rental Curbside Dresser Makeover | Flip This Rental Curbside Dresser Makeover | Flip This Rental Curbside Dresser Makeover | Flip This Rental

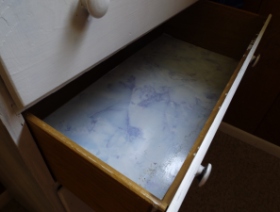
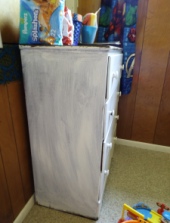
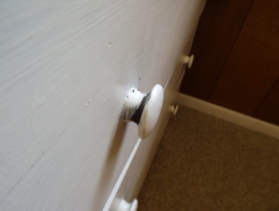
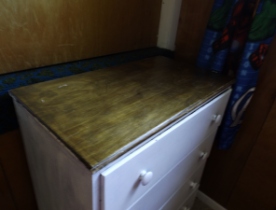
First of all that contact paper is dreadfully ugly and it was really dirty. In the second picture you can see that they painted the dresser but obviously didn’t prime or do a second coat. It’s like they got sick of it and never came back. Also it looks like towards the bottom they didn’t want to get paint on whatever surface the dresser was on so they just avoided that part. Third picture. Apparently they didn’t own a screw driver either so they just slopped some paint on the drawer pull and also didn’t look behind the front of the knob to make sure they got it all. COME ON PEOPLE. Now I almost won’t dump on the top of the dresser because I actually like the look of the wood top BUT they very sloppily painted the sides of the dresser.

Now that I’m done being angry, I’ll show you the process of making the awfulness go away.

Curbside Dresser Makeover | Flip This Rental

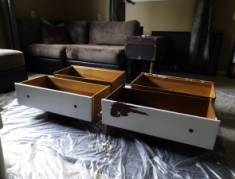
First I propped the drawers up on random objects, took the drawer pulls off, and sanded the drawers slightly. The front right drawer had a little bubble so of course I peeled it and it ended up being a lot bigger than I expected. But it wasn’t anything a little primer and paint couldn’t fix.

 Curbside Dresser Makeover | Flip This RentalCurbside Dresser Makeover | Flip This Rental

What a huge difference one coat of paint can do!

Curbside Dresser Makeover | Flip This Rental

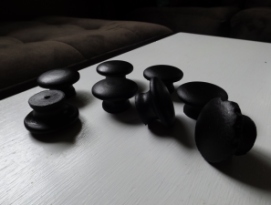
I also spray painted the knobs, and as you can see I made sure to get every angle. Eventually I plan on replacing these because the one on the very right is chipped in weird ways. Yet another baffling thing about this dresser.

Curbside Dresser Makeover | Flip This Rental Curbside Dresser Makeover | Flip This Rental

The dresser is being used in my boyfriend’s son’s room and my main motivation for fixing it up was all the hand-me-down clothes piled up in our living room. All the clothes in the dresser are hand-me-downs plus a bunch more hung up in his closet. Holy cow!

Curbside Dresser Makeover | Flip This Rental Curbside Dresser Makeover | Flip This Rental

First off, if you are wondering what the heck is behind the dresser. It’s a door. I think at one time our “duplex” was a single family home and this was a doorway that led to the basement. In order to make it a duplex they just took the rest of the stairs out and added a door. It’s really strange and there’s not really a way to make it any less strange. *sigh*

Anyway, I couldn’t really get all of the paint off the wood so I got as much as I could. I also used some leftover Restor-A-Finish to hide the scratches and brighten up the wood a little bit.

In the future I would love to paint the drawer fronts and sides red to give it a little pop. I might even change the drawer pulls to Captain America shields to go along with the Avengers theme we’ve got going on. I’m just relieved to have this checked off my to-do list!

Easy Dresser Makeover. It's amazing how far a coat of white paint and a little bit of love will go

If you liked this post don’t forget to share it! 🙂

And if you want to see the next phase in this dresser makeover click here.

See You Around!

Lauren <3