The Easiest Pallet Headboard That Ever Existed

Recently, Pinterest created a lot of buzz about reclaimed wood and pallet furniture . So, I wanted to get my hands on some pallets and see what all the craze was about. The first project I wanted to do was create a simple headboard for my apartment bedroom. As you may have already seen here, my apartment has white textured walls and in order to make a cozy space I needed to add color as well as more visual interest.

My goal with this project was to not spend any additional money, and I also wanted a piece that I wouldn’t feel bad trashing once I moved out of my apartment. A pallet was perfect because you can find tons of them for free, and upcycling gives them an extended life.

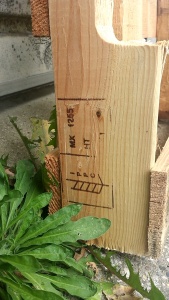
To begin any pallet project you need to make sure they are safe to use. This post helped me learn what the different markings on a pallet meant, and which markings meant a pallet was unsafe to use. Below is a picture of the stamp on my pallet:

Flip This Rental | The Easiest Pallet Headboard That Ever Existed - Pallet Markings

The label marking on the left side is the stamp of the International Plant Protection Convention (IPPC) and this stamp means the pallet is up to the IPPC’s standards (read the linked post above for more details). The upper right marking MX 1255 is the country code (Mexico) followed by the registration number of the supplier. Below that, HT means the pallet was heat treated opposed to MB – treated with Methyl Bromide. Do not use pallets with an MB stamp!

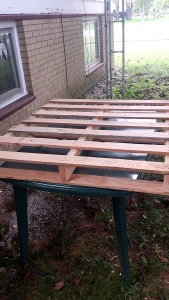
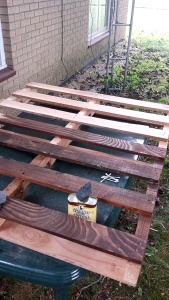
After making sure my pallet was safe to use I began using a palm sander to smooth out the pallet. Using that thing didn’t last long! There was either something wrong with it or I’m just a weakling. It was bouncing all over and made my hand tingle way too much. So instead I decided to switch over to the good old fashion non-electric sanding block. A headboard doesn’t need to be baby butt smooth either, so a regular sanding block worked just fine. I sanded it just enough to make sure I wouldn’t get any slivers. This is how my pallet looked to start:

Flip This Rental | The Easiest Pallet Headboard That Ever Existed

To add color to my pallet I decided to use leftover Howard Restor-A-Finish in Dark Walnut from this project instead of buying a stain. To apply the finish you can just use an old rag or use steel wool. Fine steel wool is typically used to buff out scratches in wood that is being restored. I used steel wool since I had quite a bit and I didn’t know if the Restor-A-Finish would stain my rag or not. We don’t have a lot of crappy rags around our house and I didn’t want to risk it ;).

Flip This Rental | The Easiest Pallet Headboard That Ever Existed

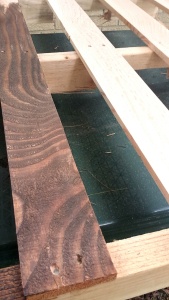
Above is a close up of the contrast between the wood with finish and without. I really like how the finish emphasized the grain in the wood which will add visual interest for my room.

Flip This Rental | The Easiest Pallet Headboard That Ever Existed

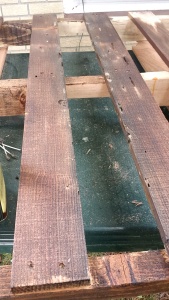
You can especially see in the board on the right in the above picture that there are little holes and imperfections in the wood. I used Q-tips dipped in the finish to get into the little crevices. it worked really well, but I went through quite a few Q-tips because the finish drained out of them really quickly.

Flip This Rental | The Easiest Pallet Headboard That Ever Existed

Here is a farther back picture of the difference between with and without finish.

Flip This Rental | The Easiest Pallet Headboard That Ever Existed

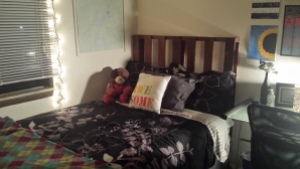
Here is the finished product up on my bed! This project was so simple I really could not have asked for it to go any smoother. To get the headboard up I pulled my mattress out a little and the frame stayed put. I simply set the headboard on top of my bed frame. Once I pushed my mattress back the pallet wobbled a little, so I stuck two command strips on the back of each side to keep it held against the wall.

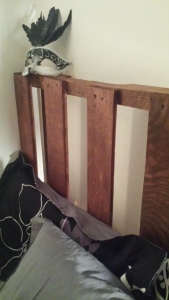
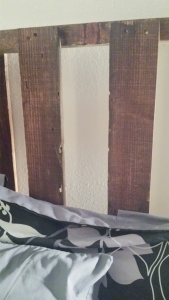
Now I will share some complimentary glamour shots 😉

 Flip This Rental | The Easiest Pallet Headboard That Ever Existed Flip This Rental | The Easiest Pallet Headboard That Ever Existed Flip This Rental | The Easiest Pallet Headboard That Ever Existed

As soon as I got the headboard up on my bed I was so giddy. I can’t believe how easy this project was and it looks great! I absolutely love how the wood looks worn in some places. It has a rustic barn feel to it. I have two more pallets at home and I already have ideas for them! I’m not sure how soon I can tackle those projects, but I’m definitely excited to get started.

See You Around!

Lauren <3

Pssst.. If you liked this post don’t forget to share it!

Antique Chair Makeover – Stage 1


So besides being a crazy youngster that enjoys doing daring things to her rental home without asking her landlord permission, I also enjoy buying old lousy furniture and dumping money and countless hours into it. BUT the final product tends to be somewhat decent so I usually am happy. I bought an old trunk from salvation army for $10 once and turned it into a table. It cost me 3X as much to fix it up but I get a lot of compliments on it so it’s okay.

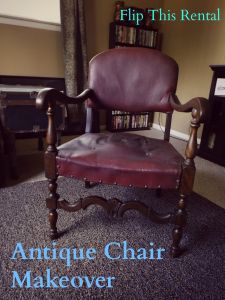
I’m currently working on an old chair my mom’s boyfriend had lying around his garage, so they kindly donated it to me. I cannot for the life of me pinpoint when it was made and it’s driving me bonkers. I wanted to paint it white, distress it, and reupholster it but I have a soft heart for antiques and decided to restore it. I don’t have a place for it in my house so I’m fixing it up and giving it back to my mom for her birthday.

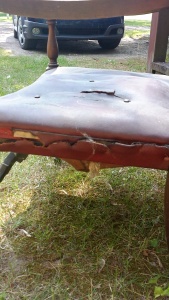
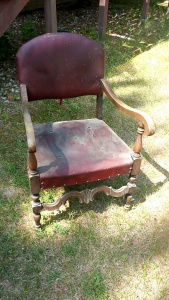
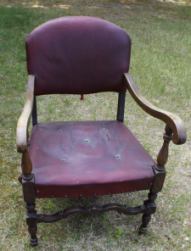
            Antique Chair Makeover - Stage 1| Flip This RentalAntique Chair Makeover - Stage 1| Flip This Rental

This is before I cleaned it. The wood is really worn and dirty, and the leather seats are really damaged. Poor thing needs some TLC 🙁 So far I think it’s made of dark walnut?? and that it’s really old?? maybe?

Antique Chair Makeover - Stage 1| Flip This Rental

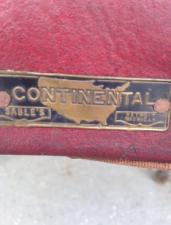
I figured this tag on the back would make it a piece of cake to figure out how old it was, what it’s made of, and how much it’s worth.

WRONG-O. 

I searched for hours, dayssss and I can’t find a chair company/manufacturer, leather company, or anything based out of Detroit. Seriously, if you know anything about this chair tell me. Oh, it’s kind of hard to read but the right side says Detroit, Michigan 😉

The first thing I did with this chair is give it a good cleaning with some hot water, soap, and borax. The borax probably wasn’t necessary but I just love that stuff.

Antique Chair Makeover - Stage 1| Flip This Rental

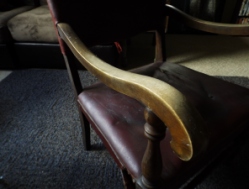
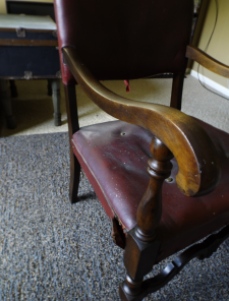
He looks a lot better after a nice bath but he’s far from a shiny diamond of a chair. Sorry chair, you’re still a lump of coal. Next I used Howard Restor-A-Finish in Dark Walnut and #0000 Steel Wool to restore the color of the wood and hydrate it. The top of the arms are really faded. There were also several scratches on the wood and the Restor-A-Finish is supposed to hide them really well.

When using the Restor-A-Finish make sure to put a drop cloth or newspaper underneath your project or apply it outside. It’s very oily and I’m sure it would make a mess if it spills. Let me tell you this stuff makes a BIG difference. You almost can’t tell that the wood was so neglected.

 Antique Chair Makeover - Stage 1| Flip This Rental

 Antique Chair Makeover - Stage 1| Flip This Rental

Antique Chair Makeover - Stage 1| Flip This Rental

Antique Chair Makeover - Stage 1| Flip This Rental

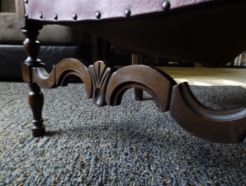
I just love how rich the wood looks after using Restor-A-Finish. It really brings out the carved details in the chair as well. This product is really easy to use and a little goes a long way. I almost wish it came in smaller containers because I don’t really know what else I’ll use it on. Maybe that’s an excuse to buy more dumpy furniture 😛

Stay tuned for the next stage in this chair’s makeover. I’m scared to pull all that leather off!

See You Around!

Lauren <3