Once upon a time in an insane land far away, I thought my landlords were going to let me paint my cabinets. In some fantasy I’m still holding onto hope they will. I feel like a broken record at this point, repeating my wishes constantly.
Because I thought they were going to say yes, I spent the time and energy taking all the upper cabinet doors off, labeling them with sticky notes, and cleaning the hardware. I put all the hardware in separate baggies with numbers that correspond with the cabinet they go on.
To clean the door’s hardware I put them in separate containers to clean them. I sprinkled baking soda on them before covering them in distilled white vinegar and let them soak for a few hours.
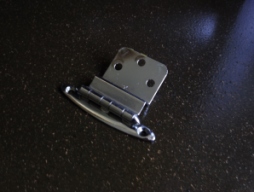
After soaking I scrubbed the hardware with an SOS pad and rinsed. The baking soda and vinegar really did a good job of loosening up the gunk that was caked on. If you’re in the process of revamping your cabinets and are reusing your hardware I really recommend doing this step. You can really get into every crevice when the hardware is not on the door.
Here are a few side by sides of how much of a difference this can make. Plus, a reminder at how horribly disgusting my cabinets are.
Now I sit and wait until my wish comes true. My cabinets are without doors, and the insides are begging me to paint them. I’ve done a few of the inside shelves as you may have already seen here, and I’m slowly painting them while I wait. I hope I don’t finish all the insides of the cabinets and clean all of the hardware before I get to paint. At least I will have something to keep me busy in the mean time.
When is the last time you thought about cleaning your hardware? Do you get impatient waiting to do your next big project, and how do you deal with the anticipation?
I am so excited to finally have this project done. I’ve been waiting at least a couple of months to put the new bathroom floor in, and we finally had time to do it! On Halloween weekend nonetheless, but it was worth it 😀
As you may know if you’ve been following along, we got free Mannington Adura floors from Chris’s dad who installs floors for a living and had leftovers from a job! This stuff is awesome. I can already tell it’s going to be really durable, and it’s absolutely gorgeous. The style and color is called Dockside Seashell. This whole name confused me when we first got it, but I’ll break it down. Mannington is the brand, Adura is a type of “luxury vinyl”, Dockside is the style/grain on the wood, and Seashell is the gray color.
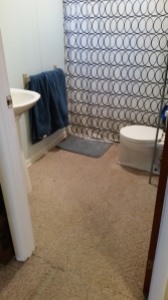
Just a reminder, above is what my bathroom looked like before in all its carpeted glory.
Here is what we found when we moved the toilet. A nasty wax ring, and a nasty unpainted wall! woo. I honestly wasn’t surprised one bit. Grossed out? Yes. Surprised? No.
The next step was removing the carpet, and the layer underneath. Luckily the floor that was under the carpet was in good shape and we didn’t have to remove it all the way down to the concrete.
Next we pulled the tack strips up, swept and cleaned the floor thoroughly before we laid the glue down.
To lay the glue down we started with just one side of the room so it was easier to work. There are instructions that come with the glue but basically you just dump some glue on the floor and use a trowel to spread it around. Then you put a fan on it and wait until it gets tacky or until it is mostly clear. You want to be able to adjust the pieces a little bit, but not enough for them to slide around on you while you work.
To start the floor we put a full size board in the top left corner. Then we cut a board to fit in the space below. The remaining piece from the second board is then put at the top in the next row. Just keep alternating like this and you will get a floor with a good pattern. This is what the professional told us to do, I wouldn’t make this stuff up! 😛
To cut the boards we just used a square and a box knife. In some cases we had to measure the length of the board we needed, but most of the time it was easier to put the board next to where it needed to be laid and make a mark with the knife of where to cut. Generally the boards just need to be scored with the knife, and you can snap it.
Above is where we stopped before laying more glue. Once the rest of the floor was ready to be done Chris sat on the boards we already put in place, and cut the boards on top of a cardboard box.
When we got to this point Chris had to measure how wide of a piece he needed and cut the boards long way. This was pretty difficult using the square, but I imagine there is an easier way to do it so the cut is even the whole way down. We had a little bit of a struggle, but overall it ended up fine.
After the floor was all down there were still a few things I wanted to fix before putting everything back together. One of the things was painting this wall! I couldn’t put the toilet back knowing that this monstrosity was behind it. It just wouldn’t feel like a complete reno. Also notice the rotted out trim in the corner.. we’ll get to that in a bit 😉
The first thing I did was wipe the nastiness off the wall with a hot rag.
Then I sanded the wall so the paint was able to stick well, primed it, and then painted it!
Notice the rotted trim looks different? I used Durham’s Rock Hard Water Putty to fill in the holes and prevent the wood from rotting further. It is a powdered material, and you just add water to activate it. Mix it up and apply it to the surface. I just used my hands since that seemed easiest. This stuff is moldable, sandable, and paintable. And since it comes in powdered form you don’t have to worry about it setting up in the container. It’s super cheap too and I already have other plans for it around the house 😀 I think this is my new favorite home improvement product.
The other thing we did was get rid of the yucky wax seal, and instead of replacing it with another wax seal we opted for a universal reusable seal. It was like $7, and is somewhat adjustable. The whole thing was too tall so we just removed a layer of the spongy stuff in the middle.
The last thing I decided to do was quickly go over the trim with a coat of paint. I’ve painted the bathroom trim before, but now the floor height is lower and some ugly areas were uncovered. As usual I sanded and wiped it down first.
The trim looks as fresh as it’s good ole pal the floor. 😉
Now are you ready for the finished product??? are you sure?? okay, here it is!! 😀
It’s everything I dreamed and more. No joke. I feel like it just makes the space feel so much bigger, brighter, and lighter. It’s amazing.
The bathroom has come such a long way since we moved in and I think it’s becoming one of my favorite spots in the house if it wasn’t already. I can’t wait to show the landlords the results.
Next my plans are to re caulk the shower, and paint the new trim piece between the carpet and the vinyl. I also need to look into cosmetic fixes for the shower surround.
Here’s a side by side just as a reminder 🙂
Do you love it too? Do you feel like you could tackle a similar project after reading this post? What’s your favorite flooring?
I have been gawking over beautiful china cabinets recently, but new china cabinets are outrageously expensive and my house has limited options of where I can even put one. I did some searching on Pinterest and came up with a list of 5 creative china cabinet ideas.
Buy a Thrifted Cabinet
The most common approach I have seen is finding a cabinet on Craigslist, at yard sales, or Goodwill/Salvation army. This is a great approach because you can find a typical cabinet, and upgrade it to your needs. Some people restore the hutch to its original glory or even restyle it to something completely different.
Here is an example using General Finishes Java Gel Stain. General Finishes is a really popular brand right now that I have seen a lot of people use for furniture makeovers. This technique changes the look completely while still keeping the beauty of the wood.
This is one of my absolute favorite painted hutch makeovers. I also really love the details of the hutch itself. The transformation from before is crazy!
Upcycle a Bookshelf
I would love to restyle a thrifted hutch, but I am just having a hard time finding a cabinet that’s the right style and price. Soon I might try following this idea of taking a plain bookshelf and adding molding and legs to it. It might even be simple enough to add glass doors to it too.
I’m sure it would be way easier to get my hands on an old bookshelf, not to mention how much easier it would be to transport. This would also be a good fit since I don’t have a ton of space in my house for a huge cabinet.
Use Picture Shelves
This is another great option if you have limited floor space, but need some more decorations up on the wall. This would be great above my table in the “dining room”.
This would also be a great option because if you upgrade to a hutch the shelves can easily be used for something else… Maybe as a picture display? 😉
Wood Crates
Another particularly unique idea I came across was hanging wood crates and displaying dishes in them.
I love the rustic vibe this gives off, and I think the possibilities are endless. You could paint the crates, stain them different colors and arrange them in different ways to get a different look. These crates could also be reused if you upgrade to something different.
Old Windows
This last idea is particularly creative. Use old windows and reclaimed wood to make a cabinet for your dishes.
This idea is really customizable too. The picture is linked to a post on how to use old windows, and it didn’t have a link to the original project for this. This cabinet could also be made in different sizes depending on the old windows you can find.
Would you try any of these ideas? If so, which ones? Can you think of any other creative china cabinet ideas?
If you’re interested in learning more about the specific projects all the photos are linked to the source where I found them.
See You Around!
Lauren <3
P.S. if you liked this post, or thought it was helpful, don’t forget to share it! 🙂
I am slowly working on creating a home tour which will include before and after pictures of my house as well as explanations of what I plan to do to the house in the future. This page will be “living” so to speak and will constantly be changing as the house changes. Throughout this process I will try to post reveals of rooms that have had a significant amount of change to them along the way.
Today I am going to share my bathroom with you! The bathroom is one of my favorite rooms in the house because at a glance it looks crisp and clean. On the other hand there are still some issues with the bathroom that need to be worked out.
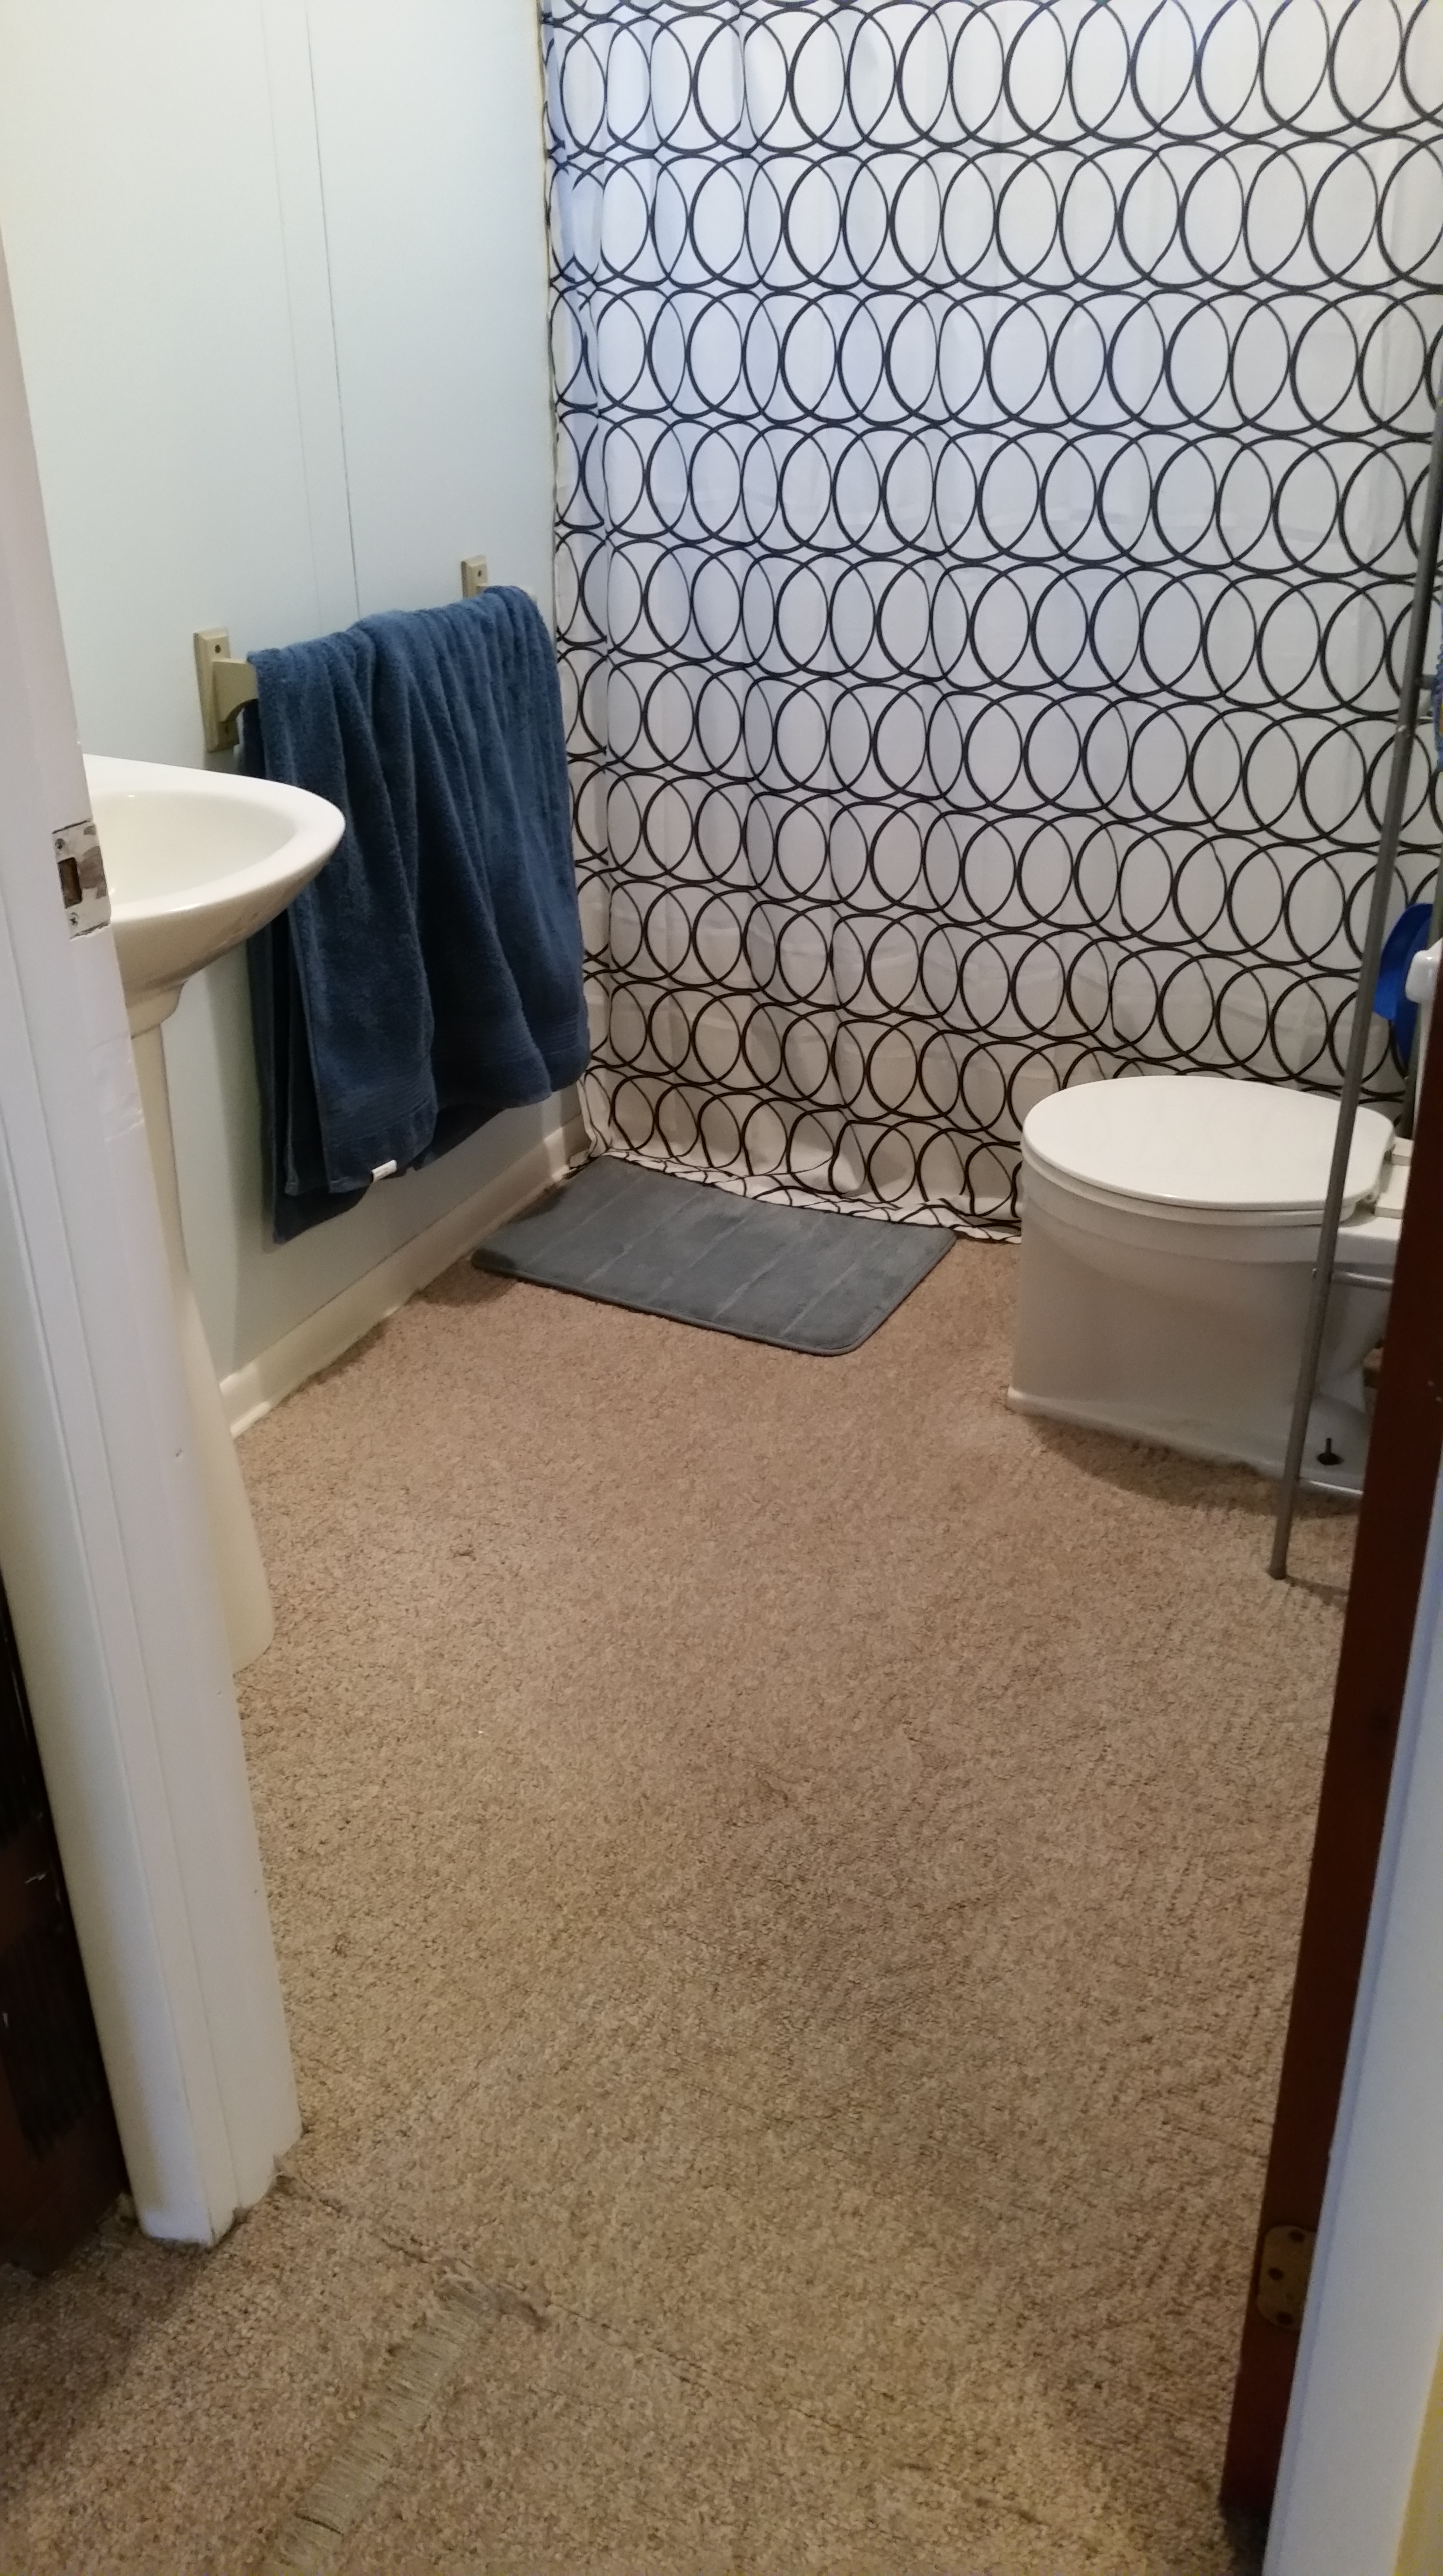
Here is the view of the bathroom before you walk in. I know what your first impression is: mmmm carpet in the bathroom! Yes, it is horrifying and it should be gone soon! Chris and I have flooring to replace the carpet. We just need the gusto to get it done and a few more supplies. Read more about that here if you so choose (and haven’t done so already) 🙂
The main things that changed in the bathroom since we’ve lived here are painting the walls and getting rid of the old sink. Those projects were pre-blog days, and sadly I don’t have before pictures of the sink. However, I did find a picture of the walls while we were in the process of painting!
Holy ew, right?! I don’t think the walls were painted a light yellow because the rest of the house was painted plain white. The color of the walls basically blended in with the plastic on the shower, and now it is a stark contrast as you’ll notice in the photos further down.
The sink was about from the wall on the left to halfway through where the plastic drawers are now. It was retro like my kitchen counters, and the shelf inside the cabinet was rotting out. We lost the storage in the bathroom (which wasn’t useful because of the rot) but we gained a lot more space in the tiny bathroom. I would like to add some shelving to the bathroom above the toilet to gain some of the storage back. We bought the pedestal sink unused at a thrift store for $60 which the landlord reimbursed us for.
In this angle you can see the mirror which has a small medicine cabinet as well as the light above it.
I actually like the light and I think it looks vintage (in a cool way), but it needs a good cleaning and the hardware needs a coat of spray paint.
Oil rubbed bronze anyone? 😀 I spray painted the vent in flat black because it was rusty and nasty looking. The little sea horse is from TJ Maxx – gotta love that place <3 I want to add a hook below the sea horse for a hand towel
Here are what I call the toilet accessories. The q tip holder is a reused candle jar, and the jar with cotton balls is an old spaghetti sauce jar that I painted with chalkboard paint and added a ribbon. The candle is called coastal woods by Mainstays and it smells fantastic by the way 😉
Now for the not so pretty parts. The tub surround is made of plastic sheets and they are stained yellowy. They may have even come in an off white tan ish color, but either way it doesn’t look good. I have been able to get it cleaner using a homemade shower cleaner that uses vinegar, but it’s not anywhere near my standards. The caulking was also done very sloppily and is coming off in some spots around the tub.
Because there isn’t a fan in the bathroom moisture has caused some damage. The paint is peeling and cracking on the window as well as the ceiling. The ceiling is textured and I would love to get rid of it. I would like to add frosted contact paper to half of the window, and take the curtain down. This way there is always natural light coming in, but no one can see into the shower. It would also be epic to add a bathroom fan, but who knows how much that would cost or if the landlord would pay for it.
Here you can see the staining and messy caulk. You can also see a chip in the tub’s finish, and there are a few more in other spots of the tub. Funny story – there is a chipped spot in the back of the tub on the bottom and for the longest time whenever I would be getting in the shower and already had taken my glasses off I would think it was a spider. I had to put my glasses back on and double check it wasn’t a spider. Silly me. I would love to refinish the tub with a rustoleum kit as well as tiling the tub surround. Tiling the tub is probably a long shot though…
I don’t know how this happens but the surround pulled away from the caulk instead of the caulk coming apart. Either way I can’t imagine that’s very good for the wall behind the plastic sheeting.
Well, there’s my bathroom for you! It’s not as glamorous as I would like, but the projects we’ve done so far haven’t cost much money and the decorations were all relatively cheap as well. Once we put the new floor in then I will be much happier with it. The shower is really rough, but at least that can be hidden with a shower curtain.
What do you think of the space? I would love to hear ideas on creative storage solutions! Are you excited to see more room tours and the Home Tour Page?
Recently, Pinterest created a lot of buzz about reclaimed wood and pallet furniture . So, I wanted to get my hands on some pallets and see what all the craze was about. The first project I wanted to do was create a simple headboard for my apartment bedroom. As you may have already seen here, my apartment has white textured walls and in order to make a cozy space I needed to add color as well as more visual interest.
My goal with this project was to not spend any additional money, and I also wanted a piece that I wouldn’t feel bad trashing once I moved out of my apartment. A pallet was perfect because you can find tons of them for free, and upcycling gives them an extended life.
To begin any pallet project you need to make sure they are safe to use. This post helped me learn what the different markings on a pallet meant, and which markings meant a pallet was unsafe to use. Below is a picture of the stamp on my pallet:
The label marking on the left side is the stamp of the International Plant Protection Convention (IPPC) and this stamp means the pallet is up to the IPPC’s standards (read the linked post above for more details). The upper right marking MX 1255 is the country code (Mexico) followed by the registration number of the supplier. Below that, HT means the pallet was heat treated opposed to MB – treated with Methyl Bromide. Do not use pallets with an MB stamp!
After making sure my pallet was safe to use I began using a palm sander to smooth out the pallet. Using that thing didn’t last long! There was either something wrong with it or I’m just a weakling. It was bouncing all over and made my hand tingle way too much. So instead I decided to switch over to the good old fashion non-electric sanding block. A headboard doesn’t need to be baby butt smooth either, so a regular sanding block worked just fine. I sanded it just enough to make sure I wouldn’t get any slivers. This is how my pallet looked to start:
To add color to my pallet I decided to use leftover Howard Restor-A-Finish in Dark Walnut from this project instead of buying a stain. To apply the finish you can just use an old rag or use steel wool. Fine steel wool is typically used to buff out scratches in wood that is being restored. I used steel wool since I had quite a bit and I didn’t know if the Restor-A-Finish would stain my rag or not. We don’t have a lot of crappy rags around our house and I didn’t want to risk it ;).
Above is a close up of the contrast between the wood with finish and without. I really like how the finish emphasized the grain in the wood which will add visual interest for my room.
You can especially see in the board on the right in the above picture that there are little holes and imperfections in the wood. I used Q-tips dipped in the finish to get into the little crevices. it worked really well, but I went through quite a few Q-tips because the finish drained out of them really quickly.
Here is a farther back picture of the difference between with and without finish.
Here is the finished product up on my bed! This project was so simple I really could not have asked for it to go any smoother. To get the headboard up I pulled my mattress out a little and the frame stayed put. I simply set the headboard on top of my bed frame. Once I pushed my mattress back the pallet wobbled a little, so I stuck two command strips on the back of each side to keep it held against the wall.
Now I will share some complimentary glamour shots 😉
As soon as I got the headboard up on my bed I was so giddy. I can’t believe how easy this project was and it looks great! I absolutely love how the wood looks worn in some places. It has a rustic barn feel to it. I have two more pallets at home and I already have ideas for them! I’m not sure how soon I can tackle those projects, but I’m definitely excited to get started.
See You Around!
Lauren <3
Pssst.. If you liked this post don’t forget to share it!
Now that I’ve been settled in to my apartment for almost two weeks I figured it’s time to give you a little tour of my bedroom! The main goal with my room was to fill as much of the wall space with color as I could. I ordered a tapestry from Amazon and it practically fills up my entire East wall. To the right of my wall I hung a big map from my kayaking trip last summer.
Above is the panoramic view of my room. I was standing in the doorway when I took this picture. As you can see the room isn’t huge, but it’s a decent size.
This is supposed to be an entryway bench but I use it to store jeans, pajama pants, and leggings. I put the bench on risers so it would be easier to grab stuff and I wouldn’t have to bend way over. It also makes it blend in with the room better because all of my furniture is about the same height. On top of the bench I have my textbooks, a jar of change, my jewelry holder, and upcycled cans used for holding pens, pencils, and what not. The lampshade is for a future DIY project.
This is my small gallery to the left of my window. Once I print out pictures I will add them here to fill in the spaces.
Here are the little details on my bed. I love the idea of having basic black and whites and adding splashes of color with artwork and small objects. The puppy was a valentine’s day present from my boyfriend and he keeps me from getting homesick (yes I know that sounds childish).
Everything you see in the gallery above my desk is a DIY I made. I made my calendar from a cheap poster frame with paint samples and washi tape to divide up the days and weeks. I write on it with a whiteboard marker. The vase is a spray painted wine bottle with “flowers” made from melted CD’s and gold wire.
My closet isn’t very pretty but for now it’s pretty functional. I have two different sets of drawers for more clothes and the black bin is all my extra shoes. To the left is my laundry basket, a box full of sweaters, and on top of that I have a bag full of purses I’m currently not using and other bags. On the shelf I fold all my sweatshirts, t-shirts, and tank tops as well as extra sheets for my bed.
This is my scarf rack inside my closet. I made this by putting two command hooks on each end and using a curtain rod. Most of the scarves are hung up with shower curtain rings. I didn’t quite have enough otherwise they’d all be hung on rings. The winter fluffy scarves are towards the back and the lighter scarves are in the front.
I keep my printer on top of this storage ottoman. In the ottoman are random things for hanging pictures and just stuff I don’t use on a regular basis. Below the Arctic Monkeys poster I plan on hanging two sheets of paper. One will have all of my professors office hours and contact information, and the other paper will have the detailed goals that I set for this semester. When I took this picture I just realized the trim on the closet and the trim on the door are different colors and grain :’D gotta love college housing.
I love how cozy my room turned out and it’s definitely nice being able to have a space to call my own since I don’t have that at home. So what do you think? Did I do a good job hiding the fact that I live in cheap bland apartment?
I completed my trunk table long before my blogging days, but I thought I’d share it with you since I receive a lot of compliments on it. This wasn’t a project I planned out and needed to go find the supplies for. I think the best projects aren’t planned because you find a piece of inspiration and just run with it. I found my trunk at Salvation Army piled in with some other luggage. It was $10 and I instantly knew it would be a killer table… with a lot of love that is (I typically buy things of this nature if you couldn’t already tell).
A photo I shared on Instagram that makes this trashy trunk look way more glam than it actually was.
The first photo was after I cleaned this beast and the second photo was after I slapped on a coat of chalkboard paint I had on hand. I thought about writing on it with chalk, but I decided that didn’t really go with my style. I also thought about painting the brown metal parts, but I didn’t have a good color for it and I thought it made the trunk look just shabby enough with the fresh paint. Still, I want to go back and clean it up a little bit more because there are some rusty spots that don’t look so hot.
The inside of the trunk had ugly contact paper and smelled mustier than a century old mummy. I scraped as much of the paper out as I could and vacuumed the rest. To get the smell out I put cat litter in the box. I heard that will trap all the smells and when you dump it out the smell will be gone. It worked I think but then it just smelled like dusty cat litter.
The new inside of the trunk is shelf liner but I totally bought the wrong kind. I bought the squishy stuff not the plain paper kind. I was in a rush and I really liked the design on it, but it cost like $10 and I ended up having to buy two rolls of it. Seriously a dumb mistake. I used mod podge to stick the shelf liner in so then my trunk smelled like glue instead of cat litter. I think that’s a good thing? Eventually I sprayed Febreze in it and it took the smell away. 🙂
An up close of the front hardware. This is one of my favorite parts about the piece.
I added this on so the lid would stay open while grabbing out blankets.
I measured how tall I wanted the legs to be based on the height of the couch. Then I stained them using the vinegar and steel wool technique except I used the kind with soap in it and tried to rinse out the soap. I don’t recommend that. You can buy plain steel wool at the hardware store.
So what do you think? Were my expensive mistakes still worth it?
Lately I’ve been stressed out about finishing projects around the house before I move back to school in the fall. During time off of school I live at home with my boyfriend, Chris, and during the school year I live on campus with friends. Last year was my first year so I lived in a dorm with two other girls. This year I will be living in an apartment with those two girls plus 3 other roommates. I come home quite often since I don’t live far from the college, but this year I want to make a point to relax on the weekends instead of worrying about homework or trying to do major home improvement projects.
Today I did a simple craft to take my mind off the things I feel like I “have” to do. For this craft you will need:
Bottles
Mod podge
Paintbrush
Food coloring
You can use old bottles for this craft such as snapple bottles, starbucks iced coffee bottles, or you can buy some from a craft store. I had a few snapple bottles on hand so I decided to use those. (I’m saving my starbucks bottles for a coffee candle craft 😉 )
If you are reusing bottles you will need to peel the label off and get off any extra gunk. I used a mixture of mostly baking soda and a little bit of vegetable oil and scrubbed the bottles with paper towel.
This is what they looked like after de-gunking:
Then I mixed up a combination of mod podge and food coloring. I used 6 drops of blue and 4 drops of green. For this project I used hard coat mod podge. This is what my mod podge looked like after adding in the food coloring:
I applied the mixture to my bottles with a brush and tried to keep brush marks to a minimum.
On the left is the bottle mostly dry, the middle is just after applying mod podge. I was trying to follow a tutorial I found on Pinterest to make the bottles look like sea glass, but I didn’t have matte mod podge and used the hard coat instead. They turned out nice in the end, though. I don’t quite have a spot for them but I think maybe they can travel to school with me. Maybe I’ll make a pallet shelf for the bathroom and put them up there. The main thing is that this was a nice de-stressing craft 🙂
What kinds of things do you do to de-stress? Would you like to hear about my DIY adventures in my college apartment too? Drop by the comments and let me know what you think!
A while back the boyfriend picked up a dresser he saw on the side of the road. It was in good shape structurally but boy oh boy whoever painted this thing did NOT know how to paint. Or they were just extremely lazy. I can’t tell. Please ignore the ugly paneling and the fact that one picture is not in the same orientation as the others. Oops. #SorryNotSorry
First of all that contact paper is dreadfully ugly and it was really dirty. In the second picture you can see that they painted the dresser but obviously didn’t prime or do a second coat. It’s like they got sick of it and never came back. Also it looks like towards the bottom they didn’t want to get paint on whatever surface the dresser was on so they just avoided that part. Third picture. Apparently they didn’t own a screw driver either so they just slopped some paint on the drawer pull and also didn’t look behind the front of the knob to make sure they got it all. COME ON PEOPLE. Now I almost won’t dump on the top of the dresser because I actually like the look of the wood top BUT they very sloppily painted the sides of the dresser.
Now that I’m done being angry, I’ll show you the process of making the awfulness go away.
First I propped the drawers up on random objects, took the drawer pulls off, and sanded the drawers slightly. The front right drawer had a little bubble so of course I peeled it and it ended up being a lot bigger than I expected. But it wasn’t anything a little primer and paint couldn’t fix.
What a huge difference one coat of paint can do!
I also spray painted the knobs, and as you can see I made sure to get every angle. Eventually I plan on replacing these because the one on the very right is chipped in weird ways. Yet another baffling thing about this dresser.
The dresser is being used in my boyfriend’s son’s room and my main motivation for fixing it up was all the hand-me-down clothes piled up in our living room. All the clothes in the dresser are hand-me-downs plus a bunch more hung up in his closet. Holy cow!
First off, if you are wondering what the heck is behind the dresser. It’s a door. I think at one time our “duplex” was a single family home and this was a doorway that led to the basement. In order to make it a duplex they just took the rest of the stairs out and added a door. It’s really strange and there’s not really a way to make it any less strange. *sigh*
Anyway, I couldn’t really get all of the paint off the wood so I got as much as I could. I also used some leftover Restor-A-Finish to hide the scratches and brighten up the wood a little bit.
In the future I would love to paint the drawer fronts and sides red to give it a little pop. I might even change the drawer pulls to Captain America shields to go along with the Avengers theme we’ve got going on. I’m just relieved to have this checked off my to-do list!
If you liked this post don’t forget to share it! 🙂
And if you want to see the next phase in this dresser makeover click here.
So besides being a crazy youngster that enjoys doing daring things to her rental home without asking her landlord permission, I also enjoy buying old lousy furniture and dumping money and countless hours into it. BUT the final product tends to be somewhat decent so I usually am happy. I bought an old trunk from salvation army for $10 once and turned it into a table. It cost me 3X as much to fix it up but I get a lot of compliments on it so it’s okay.
I’m currently working on an old chair my mom’s boyfriend had lying around his garage, so they kindly donated it to me. I cannot for the life of me pinpoint when it was made and it’s driving me bonkers. I wanted to paint it white, distress it, and reupholster it but I have a soft heart for antiques and decided to restore it. I don’t have a place for it in my house so I’m fixing it up and giving it back to my mom for her birthday.
This is before I cleaned it. The wood is really worn and dirty, and the leather seats are really damaged. Poor thing needs some TLC 🙁 So far I think it’s made of dark walnut?? and that it’s really old?? maybe?
I figured this tag on the back would make it a piece of cake to figure out how old it was, what it’s made of, and how much it’s worth.
WRONG-O.
I searched for hours, dayssss and I can’t find a chair company/manufacturer, leather company, or anything based out of Detroit. Seriously, if you know anything about this chair tell me. Oh, it’s kind of hard to read but the right side says Detroit, Michigan 😉
The first thing I did with this chair is give it a good cleaning with some hot water, soap, and borax. The borax probably wasn’t necessary but I just love that stuff.
He looks a lot better after a nice bath but he’s far from a shiny diamond of a chair. Sorry chair, you’re still a lump of coal. Next I used Howard Restor-A-Finish in Dark Walnut and #0000 Steel Wool to restore the color of the wood and hydrate it. The top of the arms are really faded. There were also several scratches on the wood and the Restor-A-Finish is supposed to hide them really well.
When using the Restor-A-Finish make sure to put a drop cloth or newspaper underneath your project or apply it outside. It’s very oily and I’m sure it would make a mess if it spills. Let me tell you this stuff makes a BIG difference. You almost can’t tell that the wood was so neglected.
I just love how rich the wood looks after using Restor-A-Finish. It really brings out the carved details in the chair as well. This product is really easy to use and a little goes a long way. I almost wish it came in smaller containers because I don’t really know what else I’ll use it on. Maybe that’s an excuse to buy more dumpy furniture 😛
Stay tuned for the next stage in this chair’s makeover. I’m scared to pull all that leather off!