DIY Plank Vinyl Floor – Bathroom Update

I am so excited to finally have this project done. I’ve been waiting at least a couple of months to put the new bathroom floor in, and we finally had time to do it! On Halloween weekend nonetheless, but it was worth it 😀

As you may know if you’ve been following along, we got free Mannington Adura floors from Chris’s dad who installs floors for a living and had leftovers from a job! This stuff is awesome. I can already tell it’s going to be really durable, and it’s absolutely gorgeous. The style and color is called Dockside Seashell. This whole name confused me when we first got it, but I’ll break it down. Mannington is the brand, Adura is a type of “luxury vinyl”, Dockside is the style/grain on the wood, and Seashell is the gray color.
DIY Plank Vinyl Floor - Bathroom Update

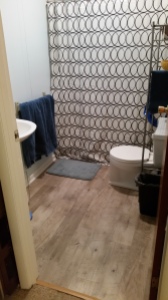
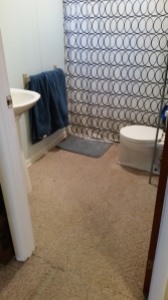
Just a reminder, above is what my bathroom looked like before in all its carpeted glory.

DIY Plank Vinyl Floor - Bathroom Update

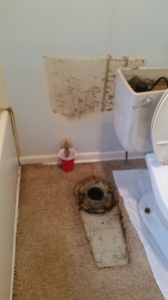
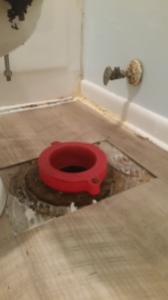
Here is what we found when we moved the toilet. A nasty wax ring, and a nasty unpainted wall! woo. I honestly wasn’t surprised one bit. Grossed out? Yes. Surprised? No.

 DIY Plank Vinyl Floor - Bathroom UpdateDIY Plank Vinyl Floor - Bathroom Update

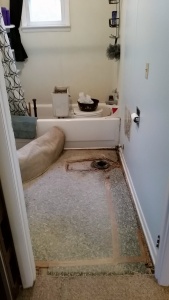
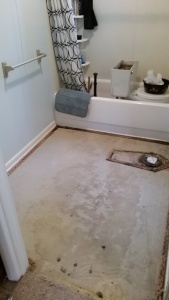
The next step was removing the carpet, and the layer underneath. Luckily the floor that was under the carpet was in good shape and we didn’t have to remove it all the way down to the concrete.

Next we pulled the tack strips up, swept and cleaned the floor thoroughly before we laid the glue down.

DIY Plank Vinyl Floor - Bathroom Update

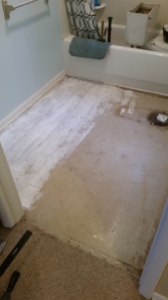
To lay the glue down we started with just one side of the room so it was easier to work. There are instructions that come with the glue but basically you just dump some glue on the floor and use a trowel to spread it around. Then you put a fan on it and wait until it gets tacky or until it is mostly clear. You want to be able to adjust the pieces a little bit, but not enough for them to slide around on you while you work.

To start the floor we put a full size board in the top left corner. Then we cut a board to fit in the space below. The remaining piece from the second board is then put at the top in the next row. Just keep alternating like this and you will get a floor with a good pattern. This is what the professional told us to do, I wouldn’t make this stuff up! 😛

DIY Plank Vinyl Floor - Bathroom Update

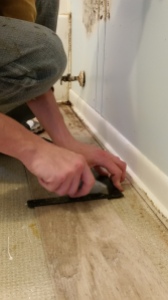
To cut the boards we just used a square and a box knife. In some cases we had to measure the length of the board we needed, but most of the time it was easier to put the board next to where it needed to be laid and make a mark with the knife of where to cut. Generally the boards just need to be scored with the knife, and you can snap it.

DIY Plank Vinyl Floor - Bathroom Update

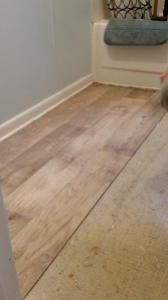
Above is where we stopped before laying more glue. Once the rest of the floor was ready to be done Chris sat on the boards we already put in place, and cut the boards on top of a cardboard box.

DIY Plank Vinyl Floor - Bathroom Update

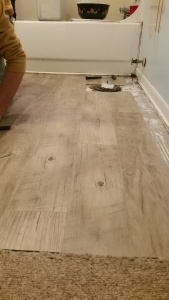
When we got to this point Chris had to measure how wide of a piece he needed and cut the boards long way. This was pretty difficult using the square, but I imagine there is an easier way to do it so the cut is even the whole way down. We had a little bit of a struggle, but overall it ended up fine.

DIY Plank Vinyl Floor - Bathroom Update

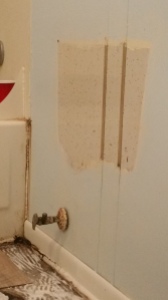
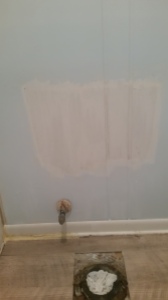
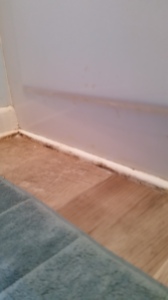
After the floor was all down there were still a few things I wanted to fix before putting everything back together. One of the things was painting this wall! I couldn’t put the toilet back knowing that this monstrosity was behind it. It just wouldn’t feel like a complete reno. Also notice the rotted out trim in the corner.. we’ll get to that in a bit 😉

The first thing I did was wipe the nastiness off the wall with a hot rag.

DIY Plank Vinyl Floor - Bathroom Update DIY Plank Vinyl Floor - Bathroom Update

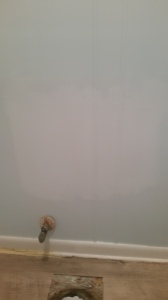
Then I sanded the wall so the paint was able to stick well, primed it, and then painted it!

Notice the rotted trim looks different? I used Durham’s Rock Hard Water Putty to fill in the holes and prevent the wood from rotting further. It is a powdered material, and you just add water to activate it. Mix it up and apply it to the surface. I just used my hands since that seemed easiest. This stuff is moldable, sandable, and paintable. And since it comes in powdered form you don’t have to worry about it setting up in the container. It’s super cheap too and I already have other plans for it around the house 😀 I think this is my new favorite home improvement product.

DIY Plank Vinyl Floor - Bathroom Update

The other thing we did was get rid of the yucky wax seal, and instead of replacing it with another wax seal we opted for a universal reusable seal. It was like $7, and is somewhat adjustable. The whole thing was too tall so we just removed a layer of the spongy stuff in the middle.

DIY Plank Vinyl Floor - Bathroom Update DIY Plank Vinyl Floor - Bathroom Update

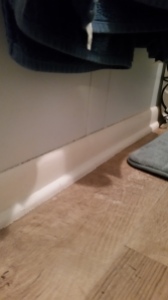
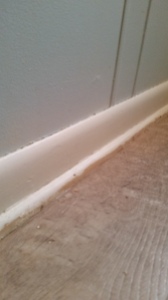
The last thing I decided to do was quickly go over the trim with a coat of paint. I’ve painted the bathroom trim before, but now the floor height is lower and some ugly areas were uncovered. As usual I sanded and wiped it down first.

DIY Plank Vinyl Floor - Bathroom Update

The trim looks as fresh as it’s good ole pal the floor. 😉

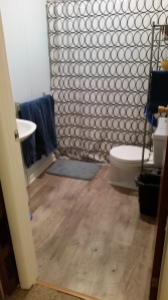
Now are you ready for the finished product??? are you sure?? okay, here it is!! 😀

DIY Plank Vinyl Floor - Bathroom Update

It’s everything I dreamed and more. No joke. I feel like it just makes the space feel so much bigger, brighter, and lighter. It’s amazing.

The bathroom has come such a long way since we moved in and I think it’s becoming one of my favorite spots in the house if it wasn’t already. I can’t wait to show the landlords the results.

Next my plans are to re caulk the shower, and paint the new trim piece between the carpet and the vinyl. I also need to look into cosmetic fixes for the shower surround.

DIY Plank Vinyl Floor - Bathroom Update DIY Plank Vinyl Floor - Bathroom Update

Here’s a side by side just as a reminder 🙂

Do you love it too? Do you feel like you could tackle a similar project after reading this post? What’s your favorite flooring?

See You Around!

Lauren <3

Living Room Tour

I’m one of those people who likes to rearrange. Furniture, decor, organization, anything. When I get a new piece of furniture I rearrange to make it fit right in with everything else. When the seasons change I add different decorations. Sometimes I just get bored with the arrangement of a room, so I switch it up. My living room is probably the most versatile room to move around the furniture. After cleaning the carpets I figured it was time for a change in the living room.

Flip This Rental | Living Room Tour

Flip This Rental | Living Room Tour

Flip This Rental | Living Room Tour

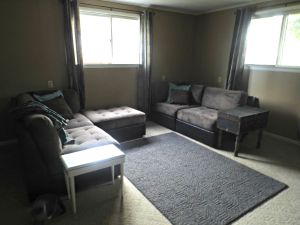
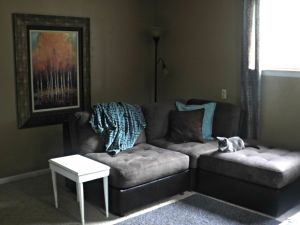
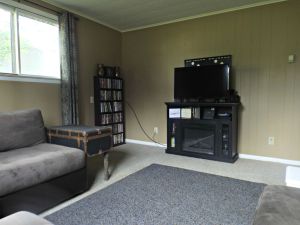
Above is how the living room was set up beforehand. I liked the couch set up because it made a more social space for when we had company. We could comfortably chat with each other or watch television. On the other hand I felt like the set up made our living room feel much smaller than it actually is.

Flip This Rental | Living Room Tour

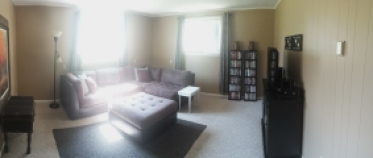
Here is a panorama of the new living room set up.

Flip This Rental | Living Room Tour

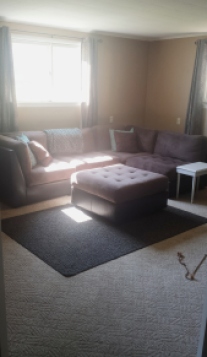
A closer up of the couch set up.

Flip This Rental | Living Room Tour

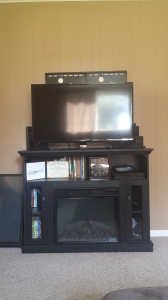
Here’s the fireplace and T.V. You will notice a T.V to the left and the wall mount behind the T.V. on the fireplace. The wall mount T.V. is waiting to be repaired, so the T.V. we are currently using is from the bedroom. I’d like to rearrange the fireplace once the T.V. is fixed so it looks more even. The left side looks really cluttered because of books and DVD’s, whereas on the right the PlayStation and internet router almost blend in.

Flip This Rental | Living Room Tour

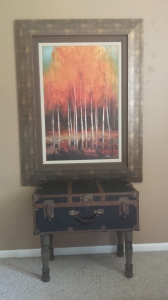
For now I put my trunk table underneath this painting. I could put it on the other end of the couch as an end table, but for now I think putting it here shows off it’s charm a little more. When we decorated the living room I didn’t even realize it, but the colors in our throw pillows and blanket go perfectly with the blues and browns in the painting.

Flip This Rental | Living Room Tour

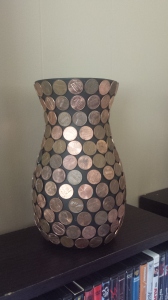
I have two of these penny vases that I DIY’d over on our movie cases. Typically I put them on the fireplace, but right now that space is taken up. I got two almost identical vases at goodwill, (they were the same shape just a different shade of green and one was slightly heavier) and I spray painted them black and hot glued pennies to them. Such an easy decor item and you can hardly tell they’re pennies from far away!

Flip This Rental | Living Room Tour

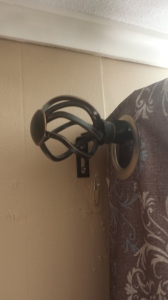
Another simple update to the living room was changing out the plain white rods and nasty curtains for nice oil rubbed bronze rods and long curtain panels. We left the original hardware and kept the old curtains so we can put them back when we move out.

Project Plans

Flip This Rental | Living Room Tour Flip This Rental | Living Room Tour

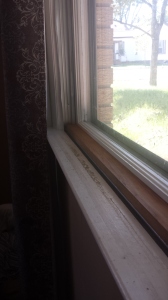
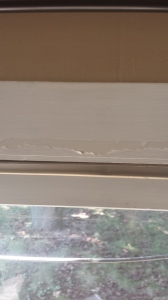
My goal for winter break is to repaint all the window trim. As you can tell in these photos the paint is peeling (just like the rest of the trim in the house was), and it is yellowy underneath. The biggest reason the window trim started majorly peeling was we used plastic over the windows throughout the winter to seal the heat in. When we pulled the plastic off in the spring the paint peeled with it. On the windows that the locks are broken we also have wood pieces to keep the windows “locked”. All the boards are plain wood and I want to paint them white so they blend in. The next best thing would be replacing all the locks, but that costs money.

I want to paint the ceiling trim too as I noticed it is quite nasty in comparison to the baseboard trim that I repainted (you can really notice it in the third picture from the top). I also need to go back and sand down some spackle spots that the boyfriend forgot to sand before we painted. There are also some spots that look a little streaky that we will go over again.

A few other small projects include cleaning the electrical outlet covers, sprucing up the fireplace mantle, and hiding the cable cord and internet routers.

Which set up did you like better: up close and social, or the wide open spaces?

See You Around!

Lauren <3
P.S. If you missed the bathroom tour – check it out here

The Easiest Pallet Headboard That Ever Existed

Recently, Pinterest created a lot of buzz about reclaimed wood and pallet furniture . So, I wanted to get my hands on some pallets and see what all the craze was about. The first project I wanted to do was create a simple headboard for my apartment bedroom. As you may have already seen here, my apartment has white textured walls and in order to make a cozy space I needed to add color as well as more visual interest.

My goal with this project was to not spend any additional money, and I also wanted a piece that I wouldn’t feel bad trashing once I moved out of my apartment. A pallet was perfect because you can find tons of them for free, and upcycling gives them an extended life.

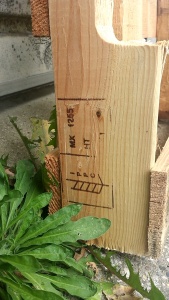
To begin any pallet project you need to make sure they are safe to use. This post helped me learn what the different markings on a pallet meant, and which markings meant a pallet was unsafe to use. Below is a picture of the stamp on my pallet:

Flip This Rental | The Easiest Pallet Headboard That Ever Existed - Pallet Markings

The label marking on the left side is the stamp of the International Plant Protection Convention (IPPC) and this stamp means the pallet is up to the IPPC’s standards (read the linked post above for more details). The upper right marking MX 1255 is the country code (Mexico) followed by the registration number of the supplier. Below that, HT means the pallet was heat treated opposed to MB – treated with Methyl Bromide. Do not use pallets with an MB stamp!

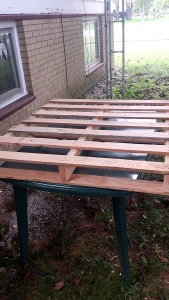
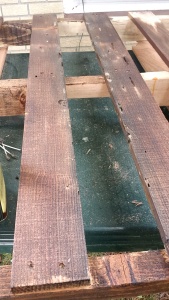
After making sure my pallet was safe to use I began using a palm sander to smooth out the pallet. Using that thing didn’t last long! There was either something wrong with it or I’m just a weakling. It was bouncing all over and made my hand tingle way too much. So instead I decided to switch over to the good old fashion non-electric sanding block. A headboard doesn’t need to be baby butt smooth either, so a regular sanding block worked just fine. I sanded it just enough to make sure I wouldn’t get any slivers. This is how my pallet looked to start:

Flip This Rental | The Easiest Pallet Headboard That Ever Existed

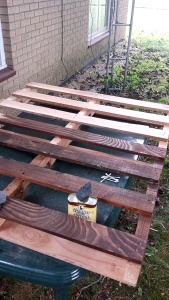
To add color to my pallet I decided to use leftover Howard Restor-A-Finish in Dark Walnut from this project instead of buying a stain. To apply the finish you can just use an old rag or use steel wool. Fine steel wool is typically used to buff out scratches in wood that is being restored. I used steel wool since I had quite a bit and I didn’t know if the Restor-A-Finish would stain my rag or not. We don’t have a lot of crappy rags around our house and I didn’t want to risk it ;).

Flip This Rental | The Easiest Pallet Headboard That Ever Existed

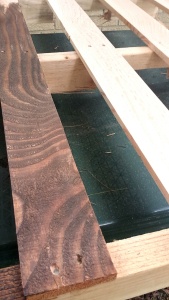
Above is a close up of the contrast between the wood with finish and without. I really like how the finish emphasized the grain in the wood which will add visual interest for my room.

Flip This Rental | The Easiest Pallet Headboard That Ever Existed

You can especially see in the board on the right in the above picture that there are little holes and imperfections in the wood. I used Q-tips dipped in the finish to get into the little crevices. it worked really well, but I went through quite a few Q-tips because the finish drained out of them really quickly.

Flip This Rental | The Easiest Pallet Headboard That Ever Existed

Here is a farther back picture of the difference between with and without finish.

Flip This Rental | The Easiest Pallet Headboard That Ever Existed

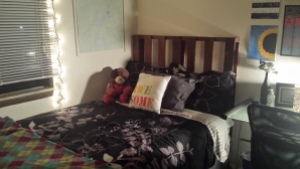
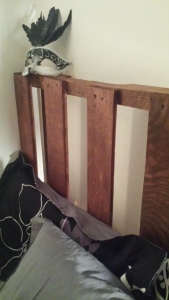
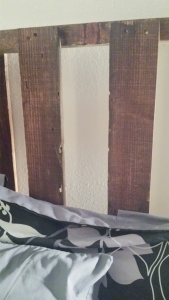
Here is the finished product up on my bed! This project was so simple I really could not have asked for it to go any smoother. To get the headboard up I pulled my mattress out a little and the frame stayed put. I simply set the headboard on top of my bed frame. Once I pushed my mattress back the pallet wobbled a little, so I stuck two command strips on the back of each side to keep it held against the wall.

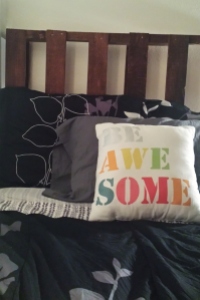
Now I will share some complimentary glamour shots 😉

 Flip This Rental | The Easiest Pallet Headboard That Ever Existed Flip This Rental | The Easiest Pallet Headboard That Ever Existed Flip This Rental | The Easiest Pallet Headboard That Ever Existed

As soon as I got the headboard up on my bed I was so giddy. I can’t believe how easy this project was and it looks great! I absolutely love how the wood looks worn in some places. It has a rustic barn feel to it. I have two more pallets at home and I already have ideas for them! I’m not sure how soon I can tackle those projects, but I’m definitely excited to get started.

See You Around!

Lauren <3
Pssst.. If you liked this post don’t forget to share it!

Flip This Rental – College Style

Now that I’ve been settled in to my apartment for almost two weeks I figured it’s time to give you a little tour of my bedroom! The main goal with my room was to fill as much of the wall space with color as I could. I ordered a tapestry from Amazon and it practically fills up my entire East wall. To the right of my wall I hung a big map from my kayaking trip last summer.

Flip This Rental - College Style | My Apartment Bedroom

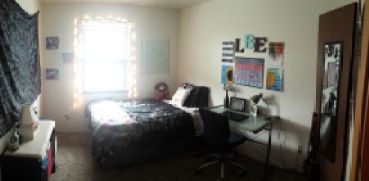
Above is the panoramic view of my room. I was standing in the doorway when I took this picture. As you can see the room isn’t huge, but it’s a decent size.

Flip This Rental - College Style | My Apartment Bedroom

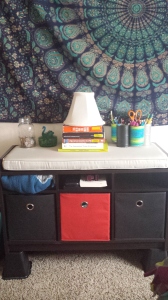
This is supposed to be an entryway bench but I use it to store jeans, pajama pants, and leggings. I put the bench on risers so it would be easier to grab stuff and I wouldn’t have to bend way over. It also makes it blend in with the room better because all of my furniture is about the same height. On top of the bench I have my textbooks, a jar of change, my jewelry holder, and upcycled cans used for holding pens, pencils, and what not. The lampshade is for a future DIY project.

Flip This Rental - College Style | Small Gallery Wall

This is my small gallery to the left of my window. Once I print out pictures I will add them here to fill in the spaces.

Flip This Rental - College Style | Bed Details

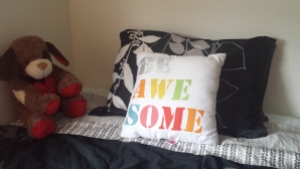
Here are the little details on my bed. I love the idea of having basic black and whites and adding splashes of color with artwork and small objects. The puppy was a valentine’s day present from my boyfriend and he keeps me from getting homesick (yes I know that sounds childish).

Flip This Rental - College Style | Desk Decorations

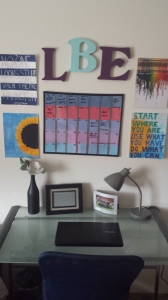
Everything you see in the gallery above my desk is a DIY I made. I made my calendar from a cheap poster frame with paint samples and washi tape to divide up the days and weeks. I write on it with a whiteboard marker. The vase is a spray painted wine bottle with “flowers” made from melted CD’s and gold wire.

Flip This Rental - College Style | Bedroom Closet

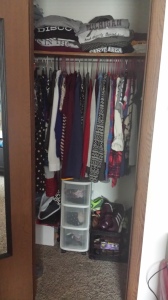
My closet isn’t very pretty but for now it’s pretty functional. I have two different sets of drawers for more clothes and the black bin is all my extra shoes. To the left is my laundry basket, a box full of sweaters, and on top of that I have a bag full of purses I’m currently not using and other bags. On the shelf I fold all my sweatshirts, t-shirts, and tank tops as well as extra sheets for my bed.

Flip This Rental - College Style | Easy Scarf Storage

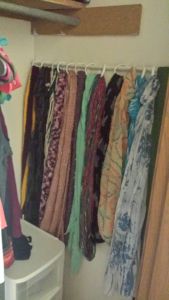
This is my scarf rack inside my closet. I made this by putting two command hooks on each end and using a curtain rod. Most of the scarves are hung up with shower curtain rings. I didn’t quite have enough otherwise they’d all be hung on rings. The winter fluffy scarves are towards the back and the lighter scarves are in the front.

Flip This Rental - College Style | My Apartment Bedroom

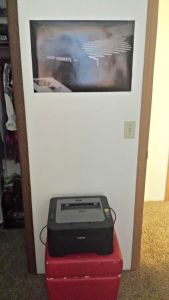
I keep my printer on top of this storage ottoman. In the ottoman are random things for hanging pictures and just stuff I don’t use on a regular basis. Below the Arctic Monkeys poster I plan on hanging two sheets of paper. One will have all of my professors office hours and contact information, and the other paper will have the detailed goals that I set for this semester. When I took this picture I just realized the trim on the closet and the trim on the door are different colors and grain :’D gotta love college housing.

I love how cozy my room turned out and it’s definitely nice being able to have a space to call my own since I don’t have that at home. So what do you think? Did I do a good job hiding the fact that I live in cheap bland apartment?

See You Around!

Lauren <3