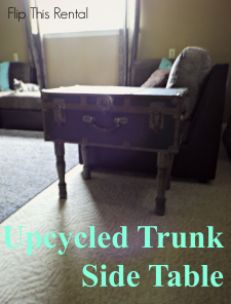
Upcycled Trunk Side Table and Blanket Storage

I completed my trunk table long before my blogging days, but I thought I’d share it with you since I receive a lot of compliments on it. This wasn’t a project I planned out and needed to go find the supplies for. I think the best projects aren’t planned because you find a piece of inspiration and just run with it. I found my trunk at Salvation Army piled in with some other luggage. It was $10 and I instantly knew it would be a killer table… with a lot of love that is (I typically buy things of this nature if you couldn’t already tell).

Upcycled Trunk Side Table and Blanket Storage | Flip This Rental

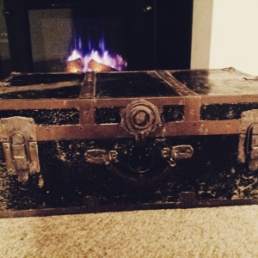
A photo I shared on Instagram that makes this trashy trunk look way more glam than it actually was.

Upcycled Trunk Side Table and Blanket Storage | Flip This Rental

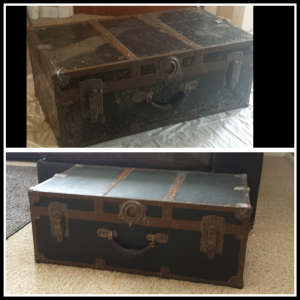
The first photo was after I cleaned this beast and the second photo was after I slapped on a coat of chalkboard paint I had on hand. I thought about writing on it with chalk, but I decided that didn’t really go with my style. I also thought about painting the brown metal parts, but I didn’t have a good color for it and I thought it made the trunk look just shabby enough with the fresh paint. Still, I want to go back and clean it up a little bit more because there are some rusty spots that don’t look so hot.

Upcycled Trunk Side Table and Blanket Storage | Flip This Rental

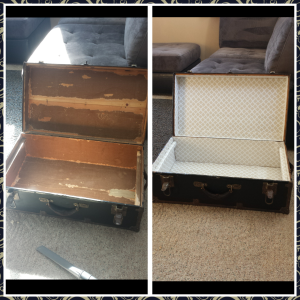
The inside of the trunk had ugly contact paper and smelled mustier than a century old mummy. I scraped as much of the paper out as I could and vacuumed the rest. To get the smell out I put cat litter in the box. I heard that will trap all the smells and when you dump it out the smell will be gone. It worked I think but then it just smelled like dusty cat litter.

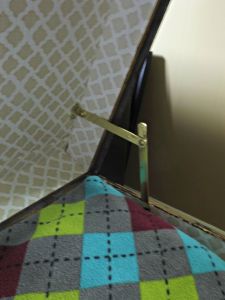
The new inside of the trunk is shelf liner but I totally bought the wrong kind. I bought the squishy stuff not the plain paper kind. I was in a rush and I really liked the design on it, but it cost like $10 and I ended up having to buy two rolls of it. Seriously a dumb mistake. I used mod podge to stick the shelf liner in so then my trunk smelled like glue instead of cat litter. I think that’s a good thing? Eventually I sprayed Febreze in it and it took the smell away. 🙂

Upcycled Trunk Side Table and Blanket Storage | Flip This Rental

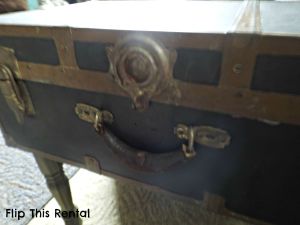
An up close of the front hardware. This is one of my favorite parts about the piece.

Upcycled Trunk Side Table and Blanket Storage | Flip This Rental

I added this on so the lid would stay open while grabbing out blankets.

Upcycled Trunk Side Table and Blanket Storage | Flip This Rental

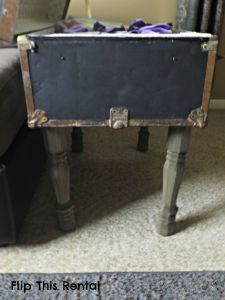
I measured how tall I wanted the legs to be based on the height of the couch. Then I stained them using the vinegar and steel wool technique except I used the kind with soap in it and tried to rinse out the soap. I don’t recommend that. You can buy plain steel wool at the hardware store.

Upcycled Trunk Side Table and Blanket Storage | Flip This Rental

Upcycled Trunk Side Table and Blanket Storage | Flip This Rental

So what do you think? Were my expensive mistakes still worth it?

See You Around!

Lauren <3

Simple Colored Bottles Craft

Lately I’ve been stressed out about finishing projects around the house before I move back to school in the fall. During time off of school I live at home with my boyfriend, Chris, and during the school year I live on campus with friends. Last year was my first year so I lived in a dorm with two other girls. This year I will be living in an apartment with those two girls plus 3 other roommates. I come home quite often since I don’t live far from the college, but this year I want to make a point to relax on the weekends instead of worrying about homework or trying to do major home improvement projects.

Today I did a simple craft to take my mind off the things I feel like I “have” to do. For this craft you will need:

Bottles
Mod podge
Paintbrush
Food coloring

Simple Colored Bottles Craft How To | Flip This Rental

You can use old bottles for this craft such as snapple bottles, starbucks iced coffee bottles, or you can buy some from a craft store. I had a few snapple bottles on hand so I decided to use those. (I’m saving my starbucks bottles for a coffee candle craft 😉 )

If you are reusing bottles you will need to peel the label off and get off any extra gunk. I used a mixture of mostly baking soda and a little bit of vegetable oil and scrubbed the bottles with paper towel.

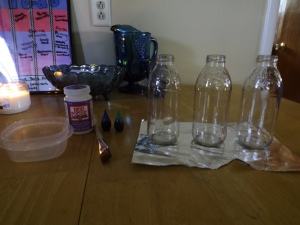
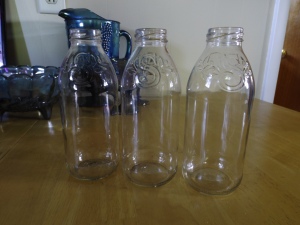
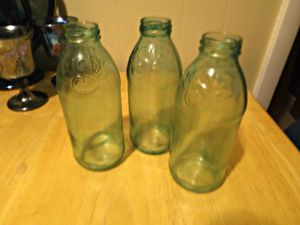
This is what they looked like after de-gunking:

Simple Colored Bottles Craft How To | Flip This Rental

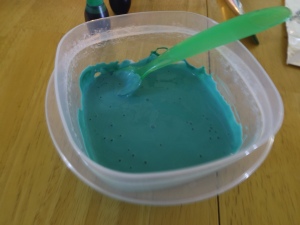
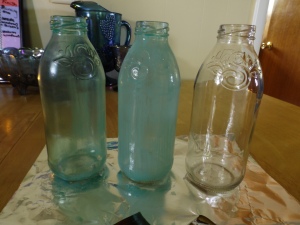
Then I mixed up a combination of mod podge and food coloring. I used 6 drops of blue and 4 drops of green. For this project I used hard coat mod podge. This is what my mod podge looked like after adding in the food coloring:

Simple Colored Bottles Craft How To | Flip This Rental

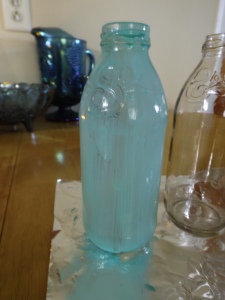
I applied the mixture to my bottles with a brush and tried to keep brush marks to a minimum.

Simple Colored Bottles Craft How To | Flip This Rental

Simple Colored Bottles Craft How To | Flip This Rental

On the left is the bottle mostly dry, the middle is just after applying mod podge. I was trying to follow a tutorial I found on Pinterest to make the bottles look like sea glass, but I didn’t have matte mod podge and used the hard coat instead. They turned out nice in the end, though. I don’t quite have a spot for them but I think maybe they can travel to school with me. Maybe I’ll make a pallet shelf for the bathroom and put them up there. The main thing is that this was a nice de-stressing craft 🙂

Simple Colored Bottles Craft How To | Flip This Rental

What kinds of things do you do to de-stress? Would you like to hear about my DIY adventures in my college apartment too? Drop by the comments and let me know what you think!

See You Around!

Lauren <3
Garage Shopping Trip

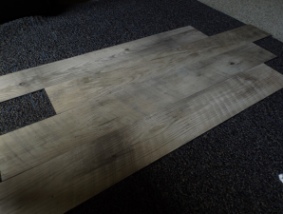
The other day Chris and I were at his parents and we took a little shopping trip through his dad’s garage. It was a complete success. We ended up with vinyl flooring to do the bathroom and the landing at the top of our entryway stairs. We also got two different sizes of white tile to do the kitchen backsplash. I’m thinking this project will have minimal costs even though we need a few more supplies to get started.

To do the bathroom we need a special glue for the vinyl we got, which Chris’s dad will have soon after he finishes another job. For the landing we need a metal strip that goes where the vinyl and carpet meet. Chris’s dad has a few pieces of it we just need to tell him our measurements so he can cut it. To do the tile we just need to get grout and mortar. I already have some leftover mortar from my mom (not sure how much we need), and Chris’s dad might have grout.

The bathroom floor is made by Mannington and is a type of luxury vinyl called Adura. Our specific floor is called Dockside Sea Shell. I love how much it looks like real wood and it’s easier to take care of than laminate wood floors. I’m thinking it will be easier to install too. In the pictures you can see that it actually has a texture to it. There might even be enough of this to do the kitchen too. Yet another great reason to paint the kitchen cabinets white because the yellowy wood of the cabinets would not look good with this gray wood look.

Garage Shopping Trip Garage Shopping Trip

The other vinyl we got is not nearly as cool, but it is still a nice looking wood vinyl. I wish there was enough to do all of the stairs but that’s unlikely. On the bright side my cat seems to like the new floors 😉

Garage Shopping Trip

When I got home I realized the tiles are actually two different colors. Uh oh. I played around with them a little bit and came up with a pattern that I think will work. The problem is they don’t quite fit, but we can always trim a little bit off the top tile.

Garage Shopping Trip

We already have the approval to put the vinyl down in the bathroom. Not sure if Chris is going to ask about the stairs landing or the backsplash, but we’ll see how it turns out. Even if he decides to ask permission I think hope these projects are a no brainer.

See You Around!

Lauren <3
5 LOGICAL Reasons to Paint Kitchen Cabinets

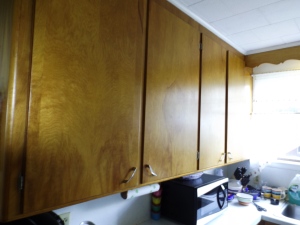
The night before Chris and I were going to tackle painting the kitchen cabinets he decided that he wanted to ask permission to paint. I got really anxious because there was always the slight chance that she would (ridiculously) say no. Mind you I already had taken off all of the upper cabinet doors along with all the hardware. Did I also mention he had no part in helping with that? Ugh. Boyfriends.

I’m not going to lie, growing up I was a rule follower and I asked permission for everything. I just couldn’t stand the thought of my beautiful white cabinets being torn from my grasp when I am so very capable of painting them myself. She didn’t say no, but she did say she would have to ask her husband. Her husband said NO. AGHHHH. I was furious because I felt like he just didn’t understand, and he hardly does much with the rentals anyway. I wanted to scream and tell her to woman up and realize she doesn’t need her husband’s approval. However that probably wouldn’t solve a thing and I would still have ugly cabinets. So instead I decided to have Chris give these reasons why they should change their minds.

5 LOGICAL Reasons to Paint Kitchen Cabinets | Flip This Rental1. Cabinet Damage

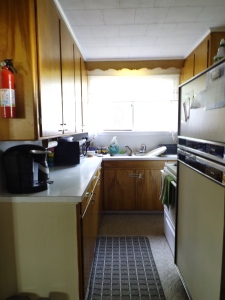
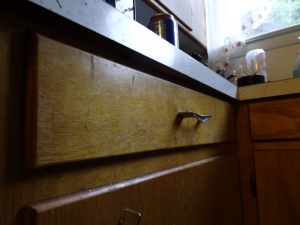
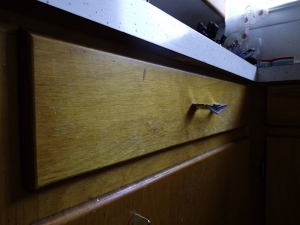
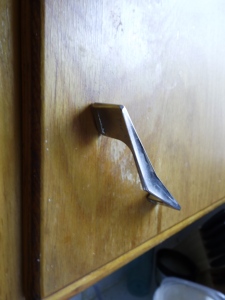
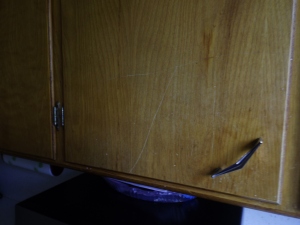
Our cabinets have several spots where they are obviously worn down. There are scratches on one cabinet door (no idea how those got there), finish worn down near handles and edges of doors/drawers. Even after I thoroughly cleaned/degreased everything twice the edges of the cabinets are gummy feeling. A few of the cabinets feel gritty and not smooth like some of the less worn down doors. This is not unusual for old cabinets, but the damage really makes the kitchen look run down.

2. Easy to Clean and Repair

Going along with the previous point, painting the cabinets will make it much easier to clean and repair any spots that get worn out. Putting myself in the landlord’s shoes I know I would want to efficiently clean and make any repairs from the time one tenant moves out, and another one moves in.

It’s harder to see dirt and grime on the cabinets the way they are now because the color of the cabinets exactly matches grease that might splatter out of a frying pan. What kinds of dirt, grime, or food do you know of that is white and will cling itself to a kitchen cabinet? none (okay maybe marshmallow fluff? 😉 ). In another setting cabinets that hide grime are a good thing because they create less work and hide the dirt. In a rental setting white cabinets make it really easy for a landlord to see how dirty the cabinets are, and to make a quick estimate of how long it will take to clean between tenants.

3. New Update for Cheap

Or in our case a new update for $0. It really cannot get any better than that. I respect it if the landlord’s are hesitant because they really like the look of wood and they don’t want to cover it up. However, we have plenty of leftover paint and primer that they already paid for to paint the walls. It would be the same amount of work if not more to sand and re-stain AND it would end up costing them more money in the long run.

5 LOGICAL Reasons to Paint Kitchen Cabinets | Flip This Rental4. White Paint Opens up the Space

The kitchen in our apartment is really small and feels very claustrophobic because of the dark colors. Using light colors tricks your mind into thinking the space is actually bigger than it is. I especially noticed this when I took the upper cabinets doors off because the insides are actually already white. A decent sized kitchen is on a lot of people’s wishlist when it comes to homes, and at least white cabinets will make it not seem so cramped. Our home is located in a residential area a block or two away from the school. This means the property should really be trying to attract small families. Families generally do a decent amount of cooking so it makes sense to have a kitchen that will fit those needs.

5. Painted Cabinets are Popular

There are images all over Pinterest of painted cabinets, how to paint cabinets, and why you should paint cabinets. These days people are ditching the wood for a crisp paint job. Brains over beauty is generally the way to go. In this case painting the cabinets white is both brains and beauty. Especially in the business of rental properties it is critical to understand what a vast majority of people will be looking for in a home, and not just a select few. I can safely say that a vast majority of people are NOT looking for retro yellowy weird wood grain cabinets.

Obviously I want my living space to be appealing to me, but I also understand that I do not own it and some day someone else will have to work their style into the home as well. Throughout all of my projects I have held this mentality and that’s why it is frustrating to me that they said no to painting the cabinets. To me it seems like a well thought out business move. Hopefully after explaining these points to them they will change their minds.

5 LOGICAL Reasons to Paint Kitchen Cabinets | Flip This Rental

If you liked this post don’t forget to share it!

See You Around!

Lauren <3
Curbside Dresser Makeover

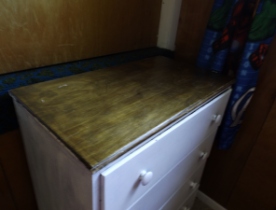
A while back the boyfriend picked up a dresser he saw on the side of the road. It was in good shape structurally but boy oh boy whoever painted this thing did NOT know how to paint. Or they were just extremely lazy. I can’t tell. Please ignore the ugly paneling and the fact that one picture is not in the same orientation as the others. Oops. #SorryNotSorry

Curbside Dresser Makeover | Flip This Rental Curbside Dresser Makeover | Flip This Rental Curbside Dresser Makeover | Flip This Rental Curbside Dresser Makeover | Flip This Rental

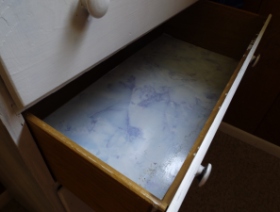
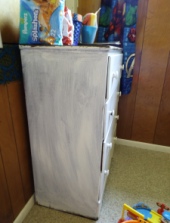
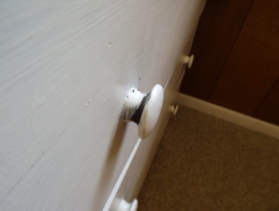
First of all that contact paper is dreadfully ugly and it was really dirty. In the second picture you can see that they painted the dresser but obviously didn’t prime or do a second coat. It’s like they got sick of it and never came back. Also it looks like towards the bottom they didn’t want to get paint on whatever surface the dresser was on so they just avoided that part. Third picture. Apparently they didn’t own a screw driver either so they just slopped some paint on the drawer pull and also didn’t look behind the front of the knob to make sure they got it all. COME ON PEOPLE. Now I almost won’t dump on the top of the dresser because I actually like the look of the wood top BUT they very sloppily painted the sides of the dresser.

Now that I’m done being angry, I’ll show you the process of making the awfulness go away.

Curbside Dresser Makeover | Flip This Rental

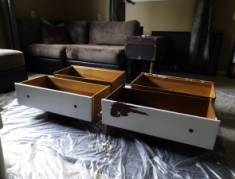
First I propped the drawers up on random objects, took the drawer pulls off, and sanded the drawers slightly. The front right drawer had a little bubble so of course I peeled it and it ended up being a lot bigger than I expected. But it wasn’t anything a little primer and paint couldn’t fix.

 Curbside Dresser Makeover | Flip This RentalCurbside Dresser Makeover | Flip This Rental

What a huge difference one coat of paint can do!

Curbside Dresser Makeover | Flip This Rental

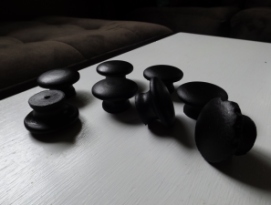
I also spray painted the knobs, and as you can see I made sure to get every angle. Eventually I plan on replacing these because the one on the very right is chipped in weird ways. Yet another baffling thing about this dresser.

Curbside Dresser Makeover | Flip This Rental Curbside Dresser Makeover | Flip This Rental

The dresser is being used in my boyfriend’s son’s room and my main motivation for fixing it up was all the hand-me-down clothes piled up in our living room. All the clothes in the dresser are hand-me-downs plus a bunch more hung up in his closet. Holy cow!

Curbside Dresser Makeover | Flip This Rental Curbside Dresser Makeover | Flip This Rental

First off, if you are wondering what the heck is behind the dresser. It’s a door. I think at one time our “duplex” was a single family home and this was a doorway that led to the basement. In order to make it a duplex they just took the rest of the stairs out and added a door. It’s really strange and there’s not really a way to make it any less strange. *sigh*

Anyway, I couldn’t really get all of the paint off the wood so I got as much as I could. I also used some leftover Restor-A-Finish to hide the scratches and brighten up the wood a little bit.

In the future I would love to paint the drawer fronts and sides red to give it a little pop. I might even change the drawer pulls to Captain America shields to go along with the Avengers theme we’ve got going on. I’m just relieved to have this checked off my to-do list!

Easy Dresser Makeover. It's amazing how far a coat of white paint and a little bit of love will go

If you liked this post don’t forget to share it! 🙂

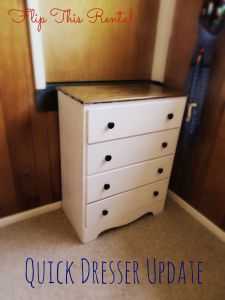
And if you want to see the next phase in this dresser makeover click here.

See You Around!

Lauren <3
Antique Chair Makeover – Stage 1


So besides being a crazy youngster that enjoys doing daring things to her rental home without asking her landlord permission, I also enjoy buying old lousy furniture and dumping money and countless hours into it. BUT the final product tends to be somewhat decent so I usually am happy. I bought an old trunk from salvation army for $10 once and turned it into a table. It cost me 3X as much to fix it up but I get a lot of compliments on it so it’s okay.

I’m currently working on an old chair my mom’s boyfriend had lying around his garage, so they kindly donated it to me. I cannot for the life of me pinpoint when it was made and it’s driving me bonkers. I wanted to paint it white, distress it, and reupholster it but I have a soft heart for antiques and decided to restore it. I don’t have a place for it in my house so I’m fixing it up and giving it back to my mom for her birthday.

            Antique Chair Makeover - Stage 1| Flip This RentalAntique Chair Makeover - Stage 1| Flip This Rental

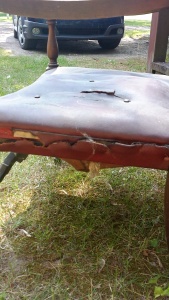
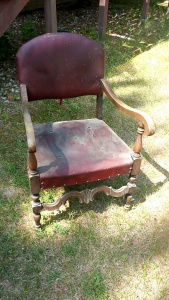
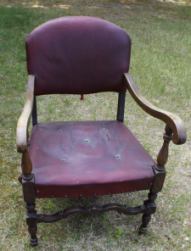
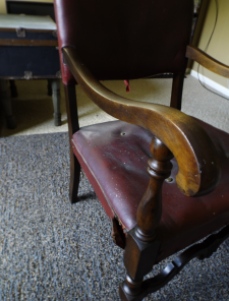
This is before I cleaned it. The wood is really worn and dirty, and the leather seats are really damaged. Poor thing needs some TLC 🙁 So far I think it’s made of dark walnut?? and that it’s really old?? maybe?

Antique Chair Makeover - Stage 1| Flip This Rental

I figured this tag on the back would make it a piece of cake to figure out how old it was, what it’s made of, and how much it’s worth.

WRONG-O. 

I searched for hours, dayssss and I can’t find a chair company/manufacturer, leather company, or anything based out of Detroit. Seriously, if you know anything about this chair tell me. Oh, it’s kind of hard to read but the right side says Detroit, Michigan 😉

The first thing I did with this chair is give it a good cleaning with some hot water, soap, and borax. The borax probably wasn’t necessary but I just love that stuff.

Antique Chair Makeover - Stage 1| Flip This Rental

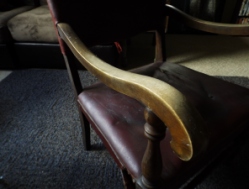
He looks a lot better after a nice bath but he’s far from a shiny diamond of a chair. Sorry chair, you’re still a lump of coal. Next I used Howard Restor-A-Finish in Dark Walnut and #0000 Steel Wool to restore the color of the wood and hydrate it. The top of the arms are really faded. There were also several scratches on the wood and the Restor-A-Finish is supposed to hide them really well.

When using the Restor-A-Finish make sure to put a drop cloth or newspaper underneath your project or apply it outside. It’s very oily and I’m sure it would make a mess if it spills. Let me tell you this stuff makes a BIG difference. You almost can’t tell that the wood was so neglected.

 Antique Chair Makeover - Stage 1| Flip This Rental

 Antique Chair Makeover - Stage 1| Flip This Rental

Antique Chair Makeover - Stage 1| Flip This Rental

Antique Chair Makeover - Stage 1| Flip This Rental

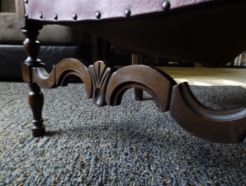
I just love how rich the wood looks after using Restor-A-Finish. It really brings out the carved details in the chair as well. This product is really easy to use and a little goes a long way. I almost wish it came in smaller containers because I don’t really know what else I’ll use it on. Maybe that’s an excuse to buy more dumpy furniture 😛

Stay tuned for the next stage in this chair’s makeover. I’m scared to pull all that leather off!

See You Around!

Lauren <3

Updating Counter Tops with Spray Paint

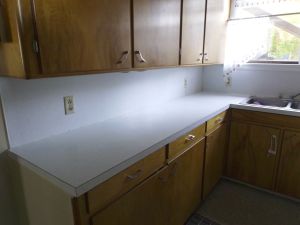
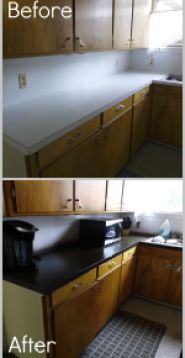
The latest home project I tackled is updating my counter tops. As you can see my counters are a very common retro white with gold specks. The edges are very worn, and have stains and cut marks where someone (myself included) used the counter as a cutting board. For this specific project I decided to go with the ask for forgiveness instead of permission approach. I assumed my landlord would gasp at the concept of spray painted counters. I’ll admit it made me a little nervous at first too.

 Updating Counter Tops with Spray Paint | Flip This Rental Updating Counter Tops with Spray Paint | Flip This Rental

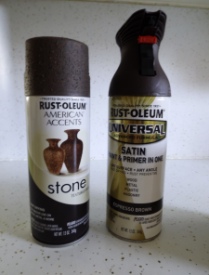
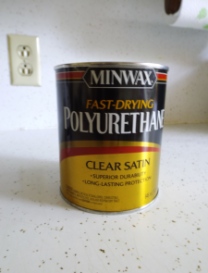
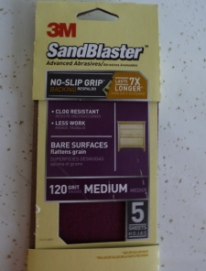
Spray painting counters is a cheap and great alternative to replacing them altogether. To begin, I cleaned the counters, let them dry, sanded them, wiped them down again, and let them dry while I was taping everything off. The supplies I used were:

Updating Counter Tops with Spray Paint | Flip This Rental  Updating Counter Tops with Spray Paint | Flip This Rental  Updating Counter Tops with Spray Paint | Flip This Rental

I had everything on hand already except the paint and the poly. I purchased two cans each of the paint and a 1qt can of poly. In the end I used 1 can of the primer/base coat and about 1 and a half cans of the textured paint.

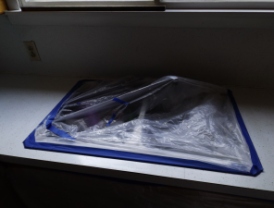
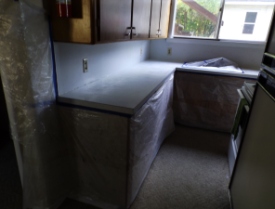
After prepping the surface tape everything off that you don’t want to get paint on. I didn’t tape off my “backsplash” because I am eventually going to redo that as well. To tape the sink off I put painters tape along the edges of the stainless steel. Only get tape on your sink and not the counter (it’s kind of tricky) otherwise when you pull it off you will see the counter show through. I was told after the fact that you can lift the sink up a smidge without having to undo all the plumbing. That would’ve been nice to know! After I taped the edges I laid a piece of the plastic drop cloth over top. To tape it down I pulled the edges tight and then put tape on it so no paint would get in.

 Updating Counter Tops with Spray Paint | Flip This RentalUpdating Counter Tops with Spray Paint | Flip This Rental

When spray painting indoors make sure you have plenty of ventilation and take breaks often if the fumes start to get to you. If you cannot get proper air flow do not spray paint inside. I worked in small sections and went near a window during my breaks for some fresh air. Also, if you have any gas appliances nearby shut them off before you begin this project!!!

Now to the fun part! Begin by spraying a thin-ish layer of the primer/base coat. Let this dry again and put another thicker coat on to make the color even. Make sure to avoid puddles or drip marks on the counter. Once this is completely dry you can add the textured spray. Make sure to shake this often or the textured particles will settle at the bottom and the finish won’t be even. I did a few coats and some touch ups to achieve an even texture. As it’s drying it will look a little splotchy, so let it dry completely before deciding to do another coat.

Updating Counter Tops with Spray Paint | Flip This Rental Updating Counter Tops with Spray Paint | Flip This Rental

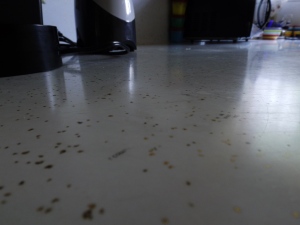
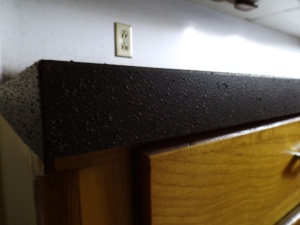
This is what the counters looked like before adding polyurethane, and an up close of the texture. I almost liked the way my cabinets looked for a hot minute after doing this update, but that minute soon passed and I once again envisioned white cabinets.

After letting the paint completely dry add the first layer of polyurethane. Let this dry for 3-4 hours and add another coat. I did 2 coats and I could still slightly feel the texture of the paint, which I liked. The directions said to sand in between coats to ensure an even finish, but I skipped that and it looks great. After the final coat of poly let sit for 24 hours before using the counters.

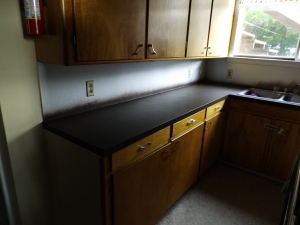
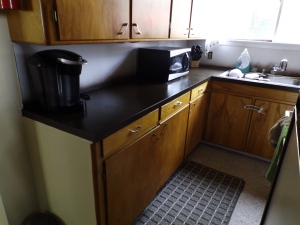
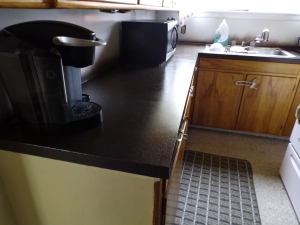
Here is the finished product!

Updating Counter Tops with Spray Paint | Flip This Rental Updating Counter Tops with Spray Paint | Flip This Rental

I absolutely love how the counters turned out and I cannot wait to add the backsplash and paint the cabinets. I was going to do paintable beadboard wallpaper, but my boyfriend’s dad might have some leftover tile that we could have fo FREE that would look nice in our kitchen. Comment below if you have any questions, want to let me know what you think, or just want to say hi!

Updating Counter Tops with Spray Paint | Flip This Rental

UPDATE: I went back and added a 3rd coat of poly because it was discoloring when wet. The color went back to normal once the wet spot dried but I was concerned that it would ruin the longevity of the finish.

UPDATE: Check out this post for an update on how my counters are holding up! (2/19/17)

See You Around!

Lauren <3

Prepping Cabinets for Paint – Step 1

Every time I go into my kitchen I let out a sigh of disappointment. My kitchen is really tiny, really grungy, and really outdated. I dream of having pretty white cabinets and counters that come clean. Here is what my kitchen looks like now so you can feel my pain and see how tiny it is 🙁

Prepping Cabinets for Paint - A Review of Mean Green | Flip This Rental

One day I realized that I can have pretty white counters and not so dreadful counter tops. I went digging on Pinterest for ideas on how to update cabinets, counters, and backsplash on the cheap. I decided it wouldn’t be too taxing to paint the cabinets since I don’t have a lot of them and the insides are already painted white (although they do need to be sanded and repainted *groan*).

The first step in creating a “work with what you’ve got” dream kitchen is degreasing cabinets thoroughly. This is an important step because if you don’t degrease then the paint and primer will have a hard time sticking and ruin your paint job, even if you sand. It would be tragic to put in all that work and still have it look like poop.

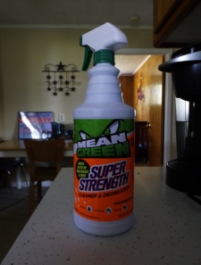
To degrease my cabinets I bought Mean Green Super Strength Cleaner & Degreaser. I usually DIY my own cleaners out of natural ingredients I keep on hand, but I had a feeling I would need something really tough since I was prepping the cabinets for paint. I like this product because it doesn’t have a powerful smell like most cleaning products and I didn’t feel like my hands were going to melt off if I got it all over. The degreaser was a fair price and I will definitely use it to clean other areas of my kitchen as well. The bottle doesn’t say that this specific product is for cabinets, but it worked great.

Prepping Cabinets for Paint - A Review of Mean Green | Flip This RentalTo degrease the cabinets I sprayed the cabinets one at a time with Mean Green and used a damp rag to scrub off the grime. The hot spots of my cabinets were the handles and along the sides of the doors/drawers. The faces of the doors weren’t too bad in most spots except near the stove and sink. It took me a few hours to do and not too much elbow grease. I didn’t keep close track of time but I would guess that time included trying to take pictures in my poorly lit kitchen. Now my cabinets are clean (but still ugly) and feel so much nicer to the touch.

Now some before and afters!

Prepping Cabinets for Paint - A Review of Mean Green | Flip This Rental Prepping Cabinets for Paint - A Review of Mean Green | Flip This Rental

Before                                                                           After

You can definitely see an improvement, and what’s left is imperfections in the wood

  Prepping Cabinets for Paint - A Review of Mean Green | Flip This RentalPrepping Cabinets for Paint - A Review of Mean Green | Flip This Rental

Before                                                    After

You can see the grime in the bottom left corner is gone and the hardware is sparkly clean. Having clean cabinets definitely shows how much abuse they have taken. Even better reason to paint!

Prepping Cabinets for Paint - A Review of Mean Green | Flip This Rental

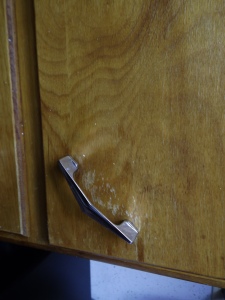
This is after I cleaned and you can see the giant scratches and how faded the finish is on the wood

Prepping Cabinets for Paint - A Review of Mean Green | Flip This Rental

Here is my cat trying to help out 😉 Say hi Eleanor

Prepping Cabinets for Paint - A Review of Mean Green | Flip This Rental

And finally my clean cabinets in the limelight. What do you think of the color and weird grain of this wood? Are you tackling a similar project? Drop by the comments and let me know what you think!

If you liked this post, check out how I cleaned my cabinet hardware here.

See You Around!

Lauren <3