The Final Piece to a Paneling Free Home

I’m moving quite slowly on progress with the house, so this weekend I finally painted little T’s bedroom!

The Final Piece to a Paneling Free Home

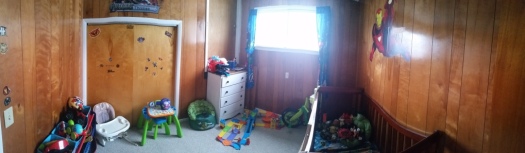
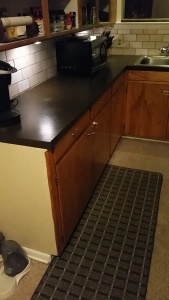
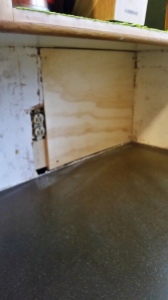
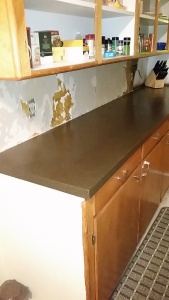
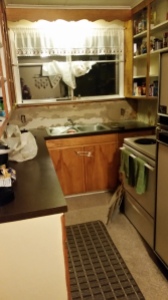
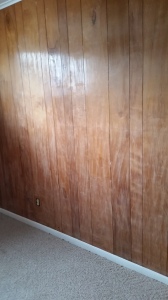
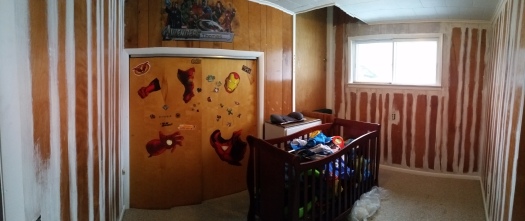
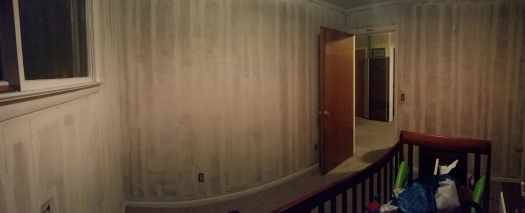
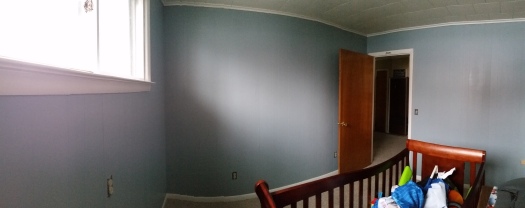
Here is the panorama of this crazy room before its kick ass makeover. Hello again weird door midway up the wall. Glad you decided to make another appearance on the blog.

The post title suggests there is literally no more paneling in my house, but I mean the paneling is painted. Then again that’s not entirely true because I’m not going to paint the closet wall until we take out the weird door and drywall it. When that happens I’ll fill in the cracks in the paneling on just that wall so it doesn’t look super mish moshy. But anyway, PROGRESS. and that is why we are gathered here today.

The Final Piece to a Paneling Free Home

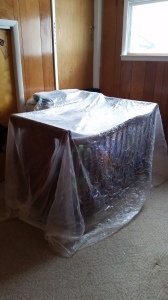
First I filled the crib up with toys, shoved it to the middle of the room, took stuff out of the room, put things in the closet, and decapitated the iron man sticker.

To prep I filled in all the holes with spackle, covered the stuff left in the room with a plastic drop cloth, and took off all the outlet covers. I then went through and sanded all the walls with 220 grit sandpaper. I was going to use my new electric sander, but I figured that would be a bit excessive for just needing to scuff the walls up a bit.

Please please do not skip the sanding step. When Chris and I painted our bedroom paneling we didn’t sand and it was a big mistake. If we nick the walls the paint scrapes right off and you can see the paneling. At the very least rough the surface up a bit even if you don’t sand the crap out of it.

The Final Piece to a Paneling Free Home

The Final Piece to a Paneling Free Home

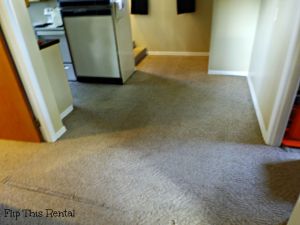
Before I started painting I wiped all the sanding dust off the walls along with any cobwebs in the corners. I also vacuumed the carpet and along the trim to make sure no dust would get into my paint.

The Final Piece to a Paneling Free Home

The Final Piece to a Paneling Free Home

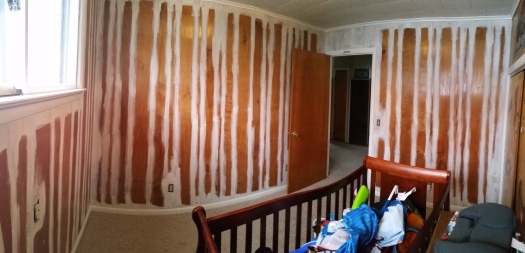
When I was cutting in I got all of the cracks because a roller doesn’t do a very good job of that. At this point I also filled in any more holes that I didn’t notice the first time around.

The Final Piece to a Paneling Free Home

After priming I saw areas where either the paneling color was showing through or it was discoloration from nicotine. In the end I decided to do one coat since that is what we did in the bedroom, and that paneling was even darker.


The Final Piece to a Paneling Free Home

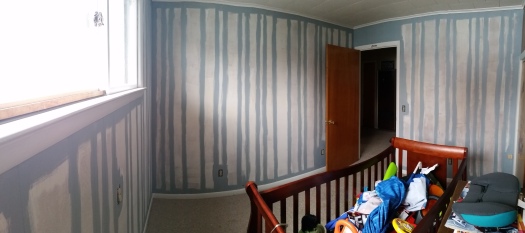
Even when I cut in with the paint I filled in all the cracks. When I started brushing on the paint I remembered how much I love this color. It’s called winter sky gray. It seems rather blue to me though which was a surprise when we first painted our bedroom. I guess it makes sense though since skys are usually blue to some extent.

The Final Piece to a Paneling Free Home

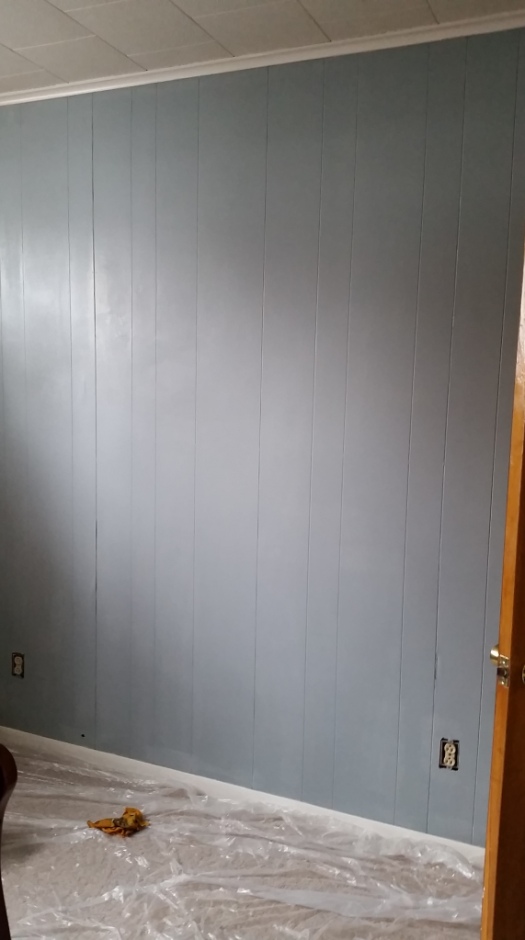
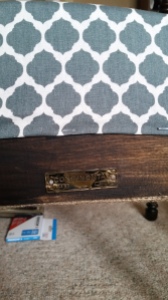
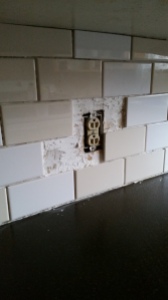
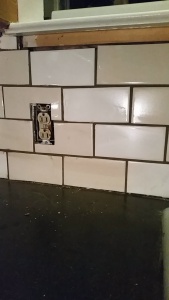
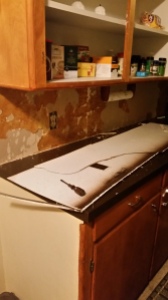
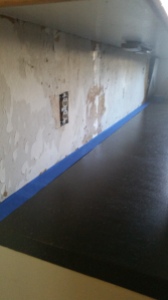
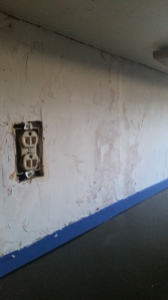
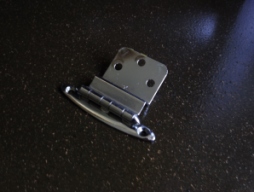
Slightly above the electrical outlet near the door you will notice some flaws in the gaps. These parts were pulling away from the wall which obviously wouldn’t look good when painted. Chris’s genius solution was to staple gun them down, and it actually worked like a gem.

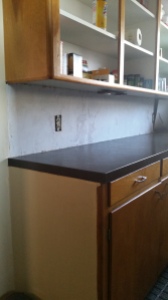
I love this picture because even though I haven’t repainted the trim you can see the crisp difference between the bluish gray wall and the white trim. Just beautiful. (excuse the splotches, the wall wasn’t done drying yet).

The Final Piece to a Paneling Free Home

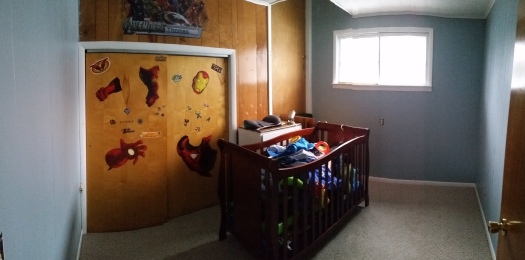
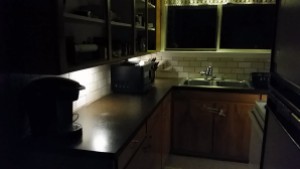
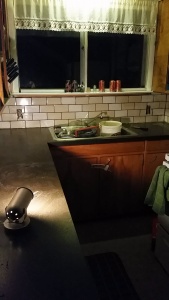
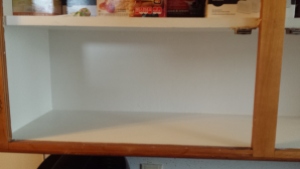
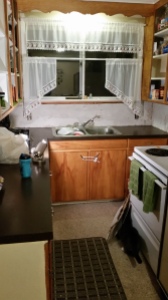
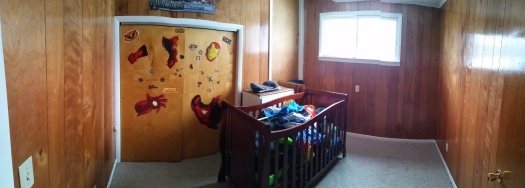
Final product with the “accent wall”. still hadn’t put the room back together yet. I love how much the painted room draws attention to the window. It’s a reminder of how much brighter the room is.

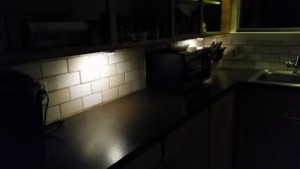
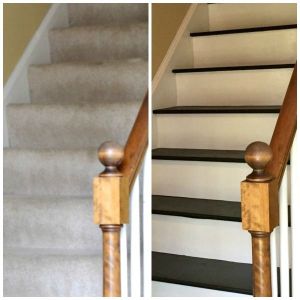
Also notice how high the top of the door goes, and that the area up there is painted. I was using a chair to paint, but couldn’t reach high enough so I asked Chris if he could reach. He just decided to open up the door and stand on the stairs landing. It’s a good thing we’re close friends with the upstairs neighbors and we keep that door unlocked. (it is set up though so both sides can be locked and not one unit has control over the door). Either way it needs to go. Sayonara door!!

The Final Piece to a Paneling Free Home

Another view and a way for me to imagine that there is absolutely no more paneling. 😀 I’m in love.

The Final Piece to a Paneling Free Home

The Final Piece to a Paneling Free Home

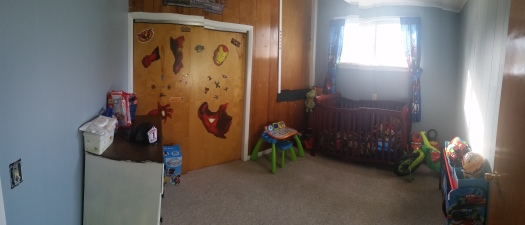
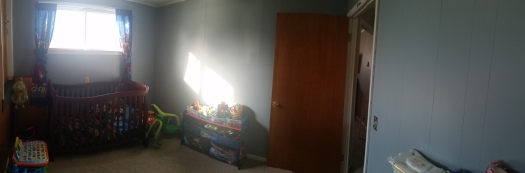
And of course some views of the room put back together/rearranged (minus the still decapitated Iron Man)

Before painting my paneling I also got some really useful information in this blog post about what to use on different types of paneling, and some tools that make it a lot easier.

Chris and I worked on this project for about a day and a half. My body was definitely sore from constantly kneeling, standing, and getting up on a chair. Maybe I’m just weak but that stuff is taxing!

I’m glad to have this project done as it’s really going to propel me into finishing my other projects and working on my time management.

What are your motivating factors?

If you want to see how I finished the white dresser, check out this post.

See You Around!

Lauren <3


Household Odds and Ends

Recently I’ve been working on a variety of small projects trying to cross things off the to-do list. However, I haven’t really had the motivation to attack items full force. Another reason I’m working on finishing things up is to get the house into normalcy before tearing it up again.

The biggest thing I’ve been focusing on is the kitchen. I put the window trim back on, caulked the back splash, painted underneath the upper cabinets, painted another shelf in the cabinets, and put up under cabinet lighting.

Household Odds and Ends Household Odds and Ends Household Odds and Ends

Above is the progression of under the cabinets from nasty to crisp and clean. I wanted to repaint before I put up the new lights.

Household Odds and Ends

Household Odds and Ends Household Odds and Ends

I’m proud I finally got these lights up, and with how clean the kitchen is. We haven’t done all the dishes in a LONG time. The lights make it so much easier to see when cooking in the kitchen at night. (Get my stupid Spongebob reference?)

Household Odds and Ends Household Odds and Ends

I also found this list I made a while ago with all the things I wanted to do to the house. The unit we currently live in anyway. The picture on the right is when I went through and checked off everything that I had done. It’s interesting to see how I removed some items from my thought process, and what new items I added. It just goes to show that as projects are completed the vision changes.

After finding this I went and remade the list adding on the tasks for the upstairs unit, and I have yet to make a list for the exterior. I have mentioned some of my ideas in a blog post though I think.

Last but not least I started another small project. One of our upstairs neighbors wanted me to update this little box he has, and make it look a little closer to what I think it was supposed to look like anyway. From what I could find online, these boxes are usually dark

Household Odds and Ends
The neighbor’s box is on the right, and Chris’s is on the left. The hardware on the right box is skeletons and pirate like, and the left box has lion’s heads.

I will make a separate post for that project when it’s all done.

Hopefully soon I’ll get an awesome grasp on my time management and go Gung ho on the house projects without getting behind on homework or sleep. That’d be the dream. Spring is coming up fast and I’m getting anxious that I won’t get very many of my winter projects done.

We still haven’t talked to the landlords about buying the property yet. Read: Chris is taking his sweet time setting up a meeting time. Which is holding me back on wanting to start any new house projects. I don’t want to get mid project, be let down, and not finish a project mid chaos. Worst case scenario people.

What have you been putting off? Are you still going full force on new years resolutions/goals? (I’m trying, I really am)

See You Around!

Lauren <3

Alternative Winter Break

On January 2nd I began my alternative winter break to the Mississippi Gulf Coast to work with Habitat for Humanity.

I went on this trip through a program called alternative breaks where college students choose to spend part of their vacation volunteering and serving others. A nonprofit organization called Break Away created alternative breaks and focuses on active citizenship and direct service.

There are several alternative break programs at colleges throughout the United States, but each campus runs their program a little different. At my school, alternative breaks are run through our volunteer center. How the program works is students can choose from at least 10 different social justice issues. At the time of sign up students don’t know where they will be going, only what topic they will focus on. There are 10 participant spots, and 2 site leader spots available for each topic.

Sign ups open at 7:30 A.M on a specified date, and the spots fill up UNDER 3 MINUTES. Some would even say they fill up within 30 seconds. For my break there were 18 topics x 12 spots for each topic = 216 people!

641 students participated, 55 trips went out, 24 states served 36 cites served, and two international trips.

I was lucky enough to get into my top pick – Affordable Housing. Before we went on our break we had weekly meetings for several weeks to learn about affordable housing, the area we would be serving, and our community partner.

Alternative Winter Break Alternative Winter Break Alternative Winter Break

HFH was working on creating a subdivision which will have approximately 13 houses. Currently the above three houses are the only buildings on the cul de sac. The green house is extremely close to being finished, and the yellow house is about halfway done.

Throughout the week I learned how to install bathroom mirrors and hardware, install window sills and aprons (which required learning how to use a nail gun and a jigsaw), use a paint sprayer to spray doors and trim, and use a table saw. I also learned how to properly stabilize an extension ladder in order to climb all the way up and do some caulking.

Alternative Winter Break

Whenever I look at that picture I never think I’m up that high. Then I go back to the picture of the yellow house above and realize how high off the ground the houses are.

Besides the things that I got to do, our group learned how to use a miter saw, install baseboards, install flooring, paint, caulk, put together scaffolding, and I’m sure even more.

During our lunch time we also got to talk to the site supervisor about the issue of affordable housing in the south. After hurricane Katrina real estate prices skyrocketed along with insurance prices. Flood zones also changed and therefore new houses being built had to be elevated even more.

Affordable housing and poverty were problems in Mississippi before Katrina, and 11 years later damage still exists in many places. From what I gathered, the damage left is more due to poverty than natural disaster.

This trip inspired me to come back and volunteer with my local Habitat for Humanity to further work on the issue of affordable housing. According to the U.S. Census between 2009 and 2013 31.5% of the people in my county were living below the poverty line compared to Michigan’s 16.8%. What’s even crazier is the county we worked in had 15.9% people below the poverty line compared to Mississippi’s 22.7%.

But besides all the knowledge and skillz I gained, we also had a hell of a good time!

This is the day “the (construction) boys” brought us crawfish to try.

Alternative Winter Break

Alternative Winter Break

On of the guys wearing the hat his squirrel friend (girlfriend) got him for Christmas

Alternative Winter Break

and of course a lovely fam pic in our matching shirts and coordinating flannels

Alternative Winter Break Alternative Winter Break

The back says “A house is made of walls and beams, a home is made of love and dreams”

We also got to make several pit stops on the way down to Mississippi including:

The University of Alabama Tuscaloosa

Alternative Winter Break

The Iron man statue in Birmingham

Alternative Winter Break

The Edmund Pettus bridge and Brown Chapel church in Selma

Alternative Winter Break Alternative Winter Break Alternative Winter Break

There was also this awesome mural on a building just down the road from the bridge

Alternative Winter Break

The world’s largest rocker in Gulf Port, Mississippi

Alternative Winter Break

Toured New Orleans on a gorgeous 70 degree day.

Alternative Winter Break Alternative Winter Break

And last but not least we stopped at a gas station on our way home and saw this.

Alternative Winter Break

I had such an incredible time giving back to the community while getting to know a great group of people and travel some new states. I couldn’t have asked for a better last week of winter break (okay minus the almost 24 hour van ride home because of stupid Indiana and it’s snow… sorry Indiana).

If you want to learn more about Break Away and the alternative breaks program as a whole, click here.

If you want to learn more about Central Michigan University’s alternative breaks and other volunteer programs click here.

Where is somewhere you have been wanting to travel? Have you had a cool volunteer experience too? Tell me about it!

This was a long post, but thanks for hanging in there and listening about my trip. As always…

See You Around!

Lauren <3


2016 Goals

2016 is a year I’m planning to be straight fire. I went on an awesome week long trip down south over break and I’m refreshed and inspired to tackle this new year’s goals (I’ll post about my trip next week).

When the new year rolls around I like to create a somewhat small list of goals. Some people like to make resolutions and say “new year, new me”. But eventually the newness wears off and “goals” disappear. I like to make realistic achievable goals because they don’t have to be made at the beginning of the year.

I write my priorities at the beginning of the year, and as the year goes on I add to the list or change it as necessary.

Three categories I want to address are home projects, financial goals, and educational goals

Home Projects for Spring/Summer

As a little bit of background, Chris and I are seriously considering buying the house we are currently renting. We haven’t sat down and talked to the landlords about the details yet, but if I run the numbers and it’s a good deal we will be taking the first leap into real estate investing! That being said, there are some major projects I want to get done to improve the house. I really want to focus on curb appeal this spring and summer (whether or not we are buying the house) so the projects will include:

  • Get rid of moss
  • Plant grass seed
  • Contact the village to level our driveway (it’s actually an alleyway)
  • Fix garage door
  • Plant flowers etc. for more privacy and aesthetic
  • Get rid of junk pile by garage
  • Ask landlords to clean stuff out of garage to make room for work space or storage
  • Power wash house
  • Paint house
  • Repair deck and paint or stain
  • Paint doors
  • Paint shutters and overhangs

2016 Goals

Not so pretty, huh?

Financial Goals

  • Buy the house
  • Save money for kayaks
  • Create and use a budget
  • Save money and/or find loans for a down payment if necessary
  • Apply to scholarships for school next year

Educational/Other Goals

  • Look into more information for applying to the Master’s in Public Administration
  • Make the Dean’s list Spring 2016 and Fall 2016
  • Meet 2 real estate investors in my area
  • Go to a real estate investing conference (already registered for one)

One way this year I’m going to try to constantly keep my priorities in mind will be by making a vision board with actual pictures of what I want my life to look like.

I will also go and type out more detailed step by steps to achieving my goals as well as creating realistic deadlines.

Overall I would say my goals are mostly aimed at honing in on what makes me happy and planning for the future.

What are your goals for 2016? Do you make goals or resolutions?

See you around!

Lauren <3

Antique Chair Revival

As I mentioned recently, I’m updating a chair for my mom, and the most difficult part was I could not save the old fabric as a template. This was challenging, but I will show you in this post how I reupholstered my chair without using a pre-existing template.

When I first got the chair I cleaned it and used some Restor-A-Finish on it. You can check out the first stages of that here.

Antique Chair Revival

The picture above is what the chair looked like in the very beginning before I cleaned it.

The next step in the process was to completely gut it and take all the old fabric off. There were a million and one nails on this thing and some of them were underneath a layer of fabric. This made it impossible to pull the fabric off without ripping it.

Another reason I couldn’t use the old material as a template is because it wouldn’t lie flat in order to cut the new fabric in the same way.

I also wanted to upholster the chair differently to leave more of the wood exposed. The old upholstery didn’t do the beautiful chair justice.

So, the point is it IS possible to reupholster a chair with no previous template to go off of. No matter what your reason is, I just happen to have a few. A lot of blog posts I read on reupholstering made it seem like “FOR THE LOVE OF GOD PLEASE SAVE THE OLD FABRIC OR YOU WILL DIE”. Which now having done this chair, that’s a hunk of bologna. You might cry, but you won’t die.

Anyway, so after I wrestled with this thing for a while the chair was down to this stage:

Antique Chair Revival

Underneath the upholstery there was a wool and straw filler. Below that it had burlap on the seat, backrest, and underneath (pictured above). I took this off because I would be adding a thick cushion, and the straw was all over it and messy.

Antique Chair Revival

Underneath the burlap was burlap straps. I left these on because they are the support of the seat which go over the springs on the inside. At this stage, I vacuumed the whole chair really well to get any dirt and straw that was leftover.

One strap wasn’t nailed down on one side so I stapled that back down.

The front and back of the chair wasn’t stained where the old fabric was, and the sides of the chair were sort of stained.

To make the color all look even I got a stain to match closely with the existing color and re-stained the whole chair. I went to my local store that sells General Finishes products, and apparently I’m lucky because there aren’t many retailers around here even in bigger towns. I told the lady about my project, and she helped me pick a matching finish that would work well. In the end, I chose Brown Mahogany in the water based stain.

Antique Chair Revival

Here is a picture where you can see the contrast with the stained areas.

To prep the chair for stain I sanded the whole thing down with 180 grit first followed by 220.

Antique Chair Revival Antique Chair Revival

After the first layer of stain you can tell that the unstained parts are starting to more closely match the rest of the chair.

When I went back over the chair the second and third times I only went over the areas that were lighter in order to try to get a more uniform look.

After staining, I was ready to cut my cushions. To do this I measured the width of the top part of the seat, and the bottom part of the seat because they weren’t the same length. I then cut on an angle from the top to bottom on both sides making a trapezoid.

For the back cushion, I first measured the highest part at the top of the backrest and the lowest part at the bottom. This gave me a rectangle. Then I held the cushion against the chair like so:

Antique Chair Revival

After I held the cushion up you can see where I made my marks with a sharpie. Then I took my box cutter and made the rounded top.

The next step after making my cushions is adding the fabric. I chose the gray patterned fabric for the seat and back.The burlap is for underneath and behind the chair.

Antique Chair Revival

First I decided to upholster under the chair. To do this I had to cut out little squares where the fabric had to go around the legs. This reminded me of my high school math days and terrified me. You know those math problems where you have to find the area of a square with pieces cut out? That’s what this felt like at first.

Once I stopped being caught up on perfection and stepped back to think I figured it out as I went. Just hold the fabric up to the edge of the leg and make a mark where it needs to be cut. Or measure how long it needs to be.

Instead of cutting the whole piece I needed, I just measured and stapled as I went along and this made it pretty easy. I left enough excess to tuck the edge under so it was clean cut. My tip to you is to always air on the side of caution even if you measure the cuts. Cut less first and go back later rather than cutting too much to begin with.

I used this same technique to upholster the seat and back, with some adjustment to how I did the back.

Antique Chair Revival

Pictured above is the underneath of the chair reupholstered.

Antique Chair Revival

For the back of the chair, the first thing I did was cut out a chunk of burlap and stapled it to the back. To staple the fabric around the top of the chair I cut a piece that was approximately the right size leaving a little extra. This is the only time I used the old upholstery as a “template”.

Antique Chair Revival

Then I used a combination of tucking and stapling in the best way possible to get a tight, clean look.

The same thing with the seat in the back you can see a few weird folds, but that’s because there was no other way to get as precise of a look.

Antique Chair Revival

Here is the side view where you can see the combination of stapling and tucking.

Antique Chair Revival

The finished view of the front! This is my favorite view.

Antique Chair Revival

And I was even able to nail the original tag back on 🙂 I tried so darn hard to save that.

This thing was basically a giant pain in my butt almost the entire time I was working on it, but I am really happy to have restored a classic piece of furniture. I think I will take on some more upholstery projects in the future, but only if they are more simple to upholster.

Here is my materials list and cost breakdown:

  • Chair – Free!
  • General Finishes Water Based Stain in Brown Mahogany – $11.31
  • 1 yd burlap fabric – $4
  • 3 yds gray patterned fabric – $12/yd = $36
  • two 2 in dense cushions – $15/ea = $30
  • 5/16″ Staples – $4.23

This project in total would cost about $85, but I got some serious deals at JoAnn’s when I bought my fabric and cushions so it cost me a little over $60.

I delivered it to my mom when Chris and I went over to her boyfriend’s house for Christmas. She was so excited, and loves how it looks! I told her if she ever wants to get rid of the chair, it has to come back to me.

Antique Chair Revival Antique Chair Revival

The before and after still amaze me!

Would you attempt an upholstery project without a template?

See You Around!

Lauren <3

DIY Ceramic Tile Backsplash

Today is the day I share with you our brand new tile backsplash, and the steps it took to install it. Our kitchen is yet another step closer to being awesome, and it almost doesn’t visually suck anymore.

We were very lucky to get most of our materials free. Below are the list of materials you would need. The only things we had to buy are the items I indicated with a price. Clicking the material links will take you to sources of where to purchase/ where I did purchase the items.

Materials:

My Project Cost:  $37.50 (Accounting for selling the joint compound leftovers and not accounting for sales tax)

Project Value/Potential Cost: $251.53

NOW. The cost will vary depending on the type of materials you buy, and what tools you already own. I just wanted to see with the almost exact products I used, including their sizes, how much this project could have cost me.

If you missed my post of how I prepped my walls check that out here.

I mentioned I was going to explain how we filled in the hole in our backsplash wall, but I can’t really do that because Chris did it without me. Not complaining, but he didn’t take pictures and he didn’t really explain it to me very well. But, I’m assuming most people don’t have that issue and it’s mostly a case by case thing anyway.

DIY Ceramic Tile Backsplash

The next thing I did was lay out several tiles in my pattern on the counter. This way after we put the mastic on the wall we wouldn’t have to scramble to get tiles up, and it would help us engrave the pattern into our brain.

DIY Ceramic Tile Backsplash

DIY Ceramic Tile Backsplash

As we went along we used 1/8″ spacers in most places to keep everything even. In some places we didn’t use them because the tile cuts weren’t 100% even so it looked a little weird using a spacer, or the spacer wouldn’t stay put.

You can see in the picture above that we just tiled around the outlets. This is because we didn’t have the proper tools to make the types of cuts we needed. This can sometimes be avoided by laying out a pattern in a way that doesn’t have weird cuts.

We left all the spots around the outlets without tile, and took tiles to Chris’s brother’s house to have him cut them (since he had the right tools). Afterwards we then reapplied some mastic on the wall and to the tiles.

DIY Ceramic Tile Backsplash

Here is what the tile looked like from a distance once we put it all up.

Then we let it sit for longer than the recommended amount of time before we grouted. We definitely did not choose the best timing to decide to grout. It was around 11:00 PM when we started. We would’ve done it during the day but Chris had Little T over night and we had to wait until he went to bed. 2 year old boys are not very good at entertaining themselves when house work is going on.

Another problem we ran into was rock hard grout. We had to chisel away at the chunk to get usable grout which ended up having little chunky pieces even after we mixed it with water.

If we had started doing this during the day we would have said screw it and just went to buy a new bag of grout but we were tired, wanted to get it done, and it was so late so nowhere close was open. This made it a pain in the behind to apply, but overall didn’t really hinder the way the grout looked.

DIY Ceramic Tile Backsplash

Here’s the grout right after we applied it and before we wiped anything off. Do you like our light strategy? We had to be super quiet because our house only has one heat source and we couldn’t shut Little T’s door all the way because it would get too cold in his room. So instead of turning the kitchen light on and risking waking him up, we just used this and moved it around.

DIY Ceramic Tile Backsplash

This picture is after I wiped everything down with a damp cloth to clean the grout lines up, but not necessarily to get the tile perfectly clean (I have yet to do that).

DIY Ceramic Tile Backsplash

Here is a close up of an area that I got pretty clean.

I really liked the light look of the tile without the grout, and I was a little nervous about what the tile would look like with the dark grout. However, I really like the way it turned out! I think it goes quite nicely with the counter tops and the tile doesn’t stick out as being too modern.

DIY Ceramic Tile Backsplash

As a reminder that is what the kitchen looked like originally.

DIY Ceramic Tile Backsplash

This is what it looks like now. It’s a little discombobulated, but with some new flooring and painted white cabinets it will look prim and proper.

My main suggestion would be to make sure your materials aren’t going to cause you any headache. I’m all about reusing materials so they don’t go to waste but I think I much rather would have bought new grout. Cutting the tiles wasn’t a bad choice, but it was a little nerve wracking that everything wasn’t completely straight as this was my first time doing tile.

The most frustrating part was trying to find the right time to do the project, and I could have benefited from slightly better planning. Overall, I’m satisfied and this was a much needed update.

Have a good holiday, and see you around!

Lauren <3


Winter Projects

Seeing as it is already winter and I have a break and new semester coming up I figure I should create a list of winter projects to accomplish before spring. I also think hope I’m going to have a lot of exterior work to do when the weather gets nice, and I don’t want to be stuck inside.

First things first: kitchen backsplash. The walls are prepped and the hole is filled. I’m going home and should be starting the tile tonight! As a refresher here is what the layout will look like except not so tall.

Winter Projects

I would also like to replace the carpet in the kitchen with the same plank vinyl we used in the bathroom. The catch with this is we are going to tell our landlords we’ll only do it if we can paint the cabinets white, which I also want to complete before spring. The only way it would backfire is if they say no to both. Honestly I wouldn’t be surprised by that at this point. Just imagine this floor:

Winter Projects

In this kitchen:

Winter Projects

Also imagine the new spray painted countertops, ceramic backsplash, and white cabinets. I know, it’s a stretch.

I am currently in the process of scraping the peeling paint out of the old cabinets and repainting the insides. This takes forever but I’m at least hoping to have the upper cabinets done by spring. Here is a crisply painted cabinet innard for your viewing pleasure:

Winter Projects

Another project I’ve had on my mind is ripping the carpet off the entry way landing and replacing it with vinyl. If the stairs have good wood underneath I might stain them instead. Think something like this:

Winter Projects
Source: To Simply Inspire

There is a huge run in our carpet outside of the bathroom and I would like to get the carpet stretched so that problem is fixed. Chris’s dad installs flooring and I think we could convince him to fix it for us. You can see the run in the picture below. I think it’s worse now than it was then. (This is from when I cleaned my carpet)

Winter Projects

Maybe this one is adding too many to the pile but I would love to build shelves the whole height of our small entry closet. Currently it has one shelf and that’s really not doing us any good. At the least I want to add in a couple more shelves. This is the hot mess I’m dealing with currently:

Winter Projects

I had Chris send me that picture so sorry for the quality and also sorry for the fall wreath that’s still hanging out. whoops… I should probably take that down.

Honestly the amount of major projects left in the apartment is becoming minimal. Chris and I are getting a little more serious about looking at buying the place,  especially since I will be living there full time starting in May. Our expenses will be smaller and we’ll have extra money to invest. So far it seems like a good idea but we need to look into the details.

I can just imagine the hilarity of showing you the before pictures of the upstairs. It’s a million times worse than what we started with in our unit. Although I think I might like the layout better.

What are your plans for the winter?

See You Around!

Lauren <3

Prepping Walls for Backsplash

A project I am currently working on is prepping walls for backsplash in the kitchen. This means that soon we will have beautiful tile in our kitchen. yeeee.

Prepping Walls for Backsplash

Here is what the backsplash looked like after spray painting my counters. I knew I would be tearing off the laminate backsplash and replacing it with tile eventually, so I didn’t bother avoiding overspray. It seems likes I’ve lived with this ombre look for ages now.

One night I just decided to start ripping tell Chris to start ripping.
Prepping Walls for Backsplash
I unscrewed the outlet covers, and Chris pried away. This section came off in a couple pieces then I had to peel off some of the paper glue backing (the orangey yellow stuff)
Prepping Walls for Backsplash
I tried to get most of the excess backing off to try to help get the wall a little flatter but I didn’t worry about it too much since I also put joint compound on it to smooth it out even better. This was way easier than peeling and sanding until my brain went dead.

Before I applied the joint compound I used a box cutter to cut away all the caulk from the counter.
Prepping Walls for Backsplash
First I taped off the counter as well as where the backsplash and painted wall met because these surfaces are already the way I want them.

To apply the joint compound I used a putty knife and went to town. I tried applying thin layers and only using what I needed to even everything out, but still have everything coated.
Prepping Walls for Backsplash
Here’s what the wall looks like after the new layer. Once the compound dried I sanded it lightly to get rid of any ridges. You can kind of see the ridges in the photo below.

Prepping Walls for Backsplash

You might have noticed in the pictures in the right hand side there is a broken piece of backsplash hanging out. Behind it there isn’t any wall there and it is an access to the outside water spigot. We figure we don’t need it so we will be putting a board up there and patching the hole up. I’ll explain in detail that process when I post about the actual tile job.

Here is the other section of the backsplash which was done at a different time. Chris also had to pull out a piece of the window trim in order to get the laminate out.
Prepping Walls for Backsplash Prepping Walls for Backsplash
It’s amazing how much cleaner and brighter it all looks. I don’t even mind the unfinished look because at least I’m making progress and it will be gorgeous soon enough.

I came up with a unique way to get a beautiful design with the free tile we were given. I’d love to share it now but instead I think I’ll make you wait until next week. 😉

See you around!

Lauren <3

Click here to see how I tiled the backsplash.

China Cabinet Makeover Plans & Poll

Recently I bought a china cabinet off of Craigslist, and I am now trying to decide the direction I want to go to restore it to it’s mid-century glory (possibly with a modern twist).

I’m so glad to have gotten this cabinet with very little hassle, and only a little bit of stress. I didn’t even have to drive far to pick it up either, which was a huge bonus.

China Cabinet Makeover Plans & Poll
She’s in pretty good shape, and I like her the way she is, but I feel like with a little elbow grease she could be totally fabulous for her age. Before I get into my plans (and you share your thoughts), let me show you the details.

China Cabinet Makeover Plans & Poll

First off this is a cabinet made by Stanley furniture or, as the label says, “Distinctive Furniture by Stanley”. I found a lot of other cabinets by them online which weren’t selling for a ton of money, but I didn’t find very many exact models as mine online that included prices. However, I did find a listing on eBay for around $600!! I think that seller might have been insane. I bought mine for $75. Maybe people just aren’t selling this cabinet.

China Cabinet Makeover Plans & Poll

There are two doors on the sides and three drawers in the middle. You can also see in this picture that the color is a little faded and not even. I love the lines in the doors, and the drawer knobs but they could use a little sparkle.

 imageChina Cabinet Makeover Plans & Poll

Here is a close up of the hardware and the faded coloring of the door.

China Cabinet Makeover Plans & Poll
In the first drawer is this nice separator for silverware. The other two are just plain old drawers.

China Cabinet Makeover Plans & Poll

The cabinet on the left has this shelf, and the right cabinet does not have a shelf.

China Cabinet Makeover Plans & Poll

The back of the whole cabinet is a sheet of fake wood veneer 🙁

China Cabinet Makeover Plans & Poll

One of the shelves has this deep scratch which I will probably fill in

China Cabinet Makeover Plans & Poll

And the top has quite a few water ring stains.

The Plans

I know for sure I want to stain the piece using a gel stain by General Finishes. I’m not quite sure which color I want to use yet, but I’m leaning towards Java (a super popular color), Brown Mahogany, or Antique Walnut.

China Cabinet Plans and Poll
Photo Credit: The Weathered Door

This is an example of the java stain on a mid century credenza.

Brown Mahogony Brown Mahogany

Here are two examples of the Brown Mahogany stain. These examples also show you how much of a difference there can be between pieces depending on the wood and the amount of stain used. I’m assuming they only used one coat on the piece on the right, and two coats on the left. One of the reasons I’m having such a hard time deciding is because of the variation in all of the pieces I’ve seen.

This is an example of the antique Walnut from Niagara Furniture Painting.

All of these colors are pretty similar, so I’m not sure if it even matters which one I pick. I don’t want to stray too far from the original finish of the cabinet, and I don’t want it to be too dark. I do like the red tint that the cabinet already has in it, but I wouldn’t want much more. Also, I would like it if the grain was emphasized more than it is right now.

Now, the next decision I have to make is if I want to paint the back or not. Since the backing is a fake wood veneer I’m not sure how well it will take stain, or if it will end up looking too different than the rest of the cabinet since the grain is obviously different. I think painting the back a light gray would make the glass pop out more. I was thinking General Finishes seagull gray milk paint.

Seagull Gray Dresser
Photo Credit: Mary Beth’s Place

Seagull Gray

Last but not least I want to update the hardware with Rub N Buff Antique Gold

Antique Gold
Photo Credit: The Painted Chandelier

I think it will really make the hardware pop and show off that mid-century modern style especially if I achieve a distressed look and let some of the darker parts of the pulls show through.

Your Turn

so let me know what you think:

#1: The Stain

  • Java
  • Brown Mahogany
  • Antique Walnut
  • Another color?

#2 To Paint or Nah

  • Yes, paint the back
  • No, don’t
  • Yes, but paint it a different color

#3 Rub N’ Buff

  • Yes, use Antique Gold
  • No, don’t use it at all
  • Yes, but use a different color

Feel free to add any additional thoughts or give me other suggestions that I haven’t already mentioned.

See You Around!

Lauren <3

Cleaning Cabinet Hardware Naturally

Once upon a time in an insane land far away, I thought my landlords were going to let me paint my cabinets. In some fantasy I’m still holding onto hope they will. I feel like a broken record at this point, repeating my wishes constantly.

Because I thought they were going to say yes, I spent the time and energy taking all the upper cabinet doors off, labeling them with sticky notes, and cleaning the hardware. I put all the hardware in separate baggies with numbers that correspond with the cabinet they go on.

 Cleaning Cabinet Hardware | Super easy technique for cleaning hardware with items you probably already have Cleaning Cabinet Hardware | Super easy technique for cleaning hardware with items you probably already have

To clean the door’s hardware I put them in separate containers to clean them. I sprinkled baking soda on them before covering them in distilled white vinegar and let them soak for a few hours.

Cleaning Cabinet Hardware | Super easy technique for cleaning hardware with items you probably already have Cleaning Cabinet Hardware | Super easy technique for cleaning hardware with items you probably already have

After soaking I scrubbed the hardware with an SOS pad and rinsed. The baking soda and vinegar really did a good job of loosening up the gunk that was caked on. If you’re in the process of revamping your cabinets and are reusing your hardware I really recommend doing this step. You can really get into every crevice when the hardware is not on the door.

Cleaning Cabinet Hardware | Super easy technique for cleaning hardware with items you probably already have

Here are a few side by sides of how much of a difference this can make. Plus, a reminder at how horribly disgusting my cabinets are.

Cleaning Cabinet Hardware | Super easy technique for cleaning hardware with items you probably already have Cleaning Cabinet Hardware | Super easy technique for cleaning hardware with items you probably already have

Now I sit and wait until my wish comes true. My cabinets are without doors, and the insides are begging me to paint them. I’ve done a few of the inside shelves as you may have already seen here, and I’m slowly painting them while I wait. I hope I don’t finish all the insides of the cabinets and clean all of the hardware before I get to paint. At least I will have something to keep me busy in the mean time.

When is the last time you thought about cleaning your hardware? Do you get impatient waiting to do your next big project, and how do you deal with the anticipation?

See You Around!

Lauren <3