Upcycled Trunk Side Table and Blanket Storage

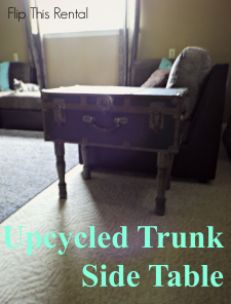
I completed my trunk table long before my blogging days, but I thought I’d share it with you since I receive a lot of compliments on it. This wasn’t a project I planned out and needed to go find the supplies for. I think the best projects aren’t planned because you find a piece of inspiration and just run with it. I found my trunk at Salvation Army piled in with some other luggage. It was $10 and I instantly knew it would be a killer table… with a lot of love that is (I typically buy things of this nature if you couldn’t already tell).

Upcycled Trunk Side Table and Blanket Storage | Flip This Rental

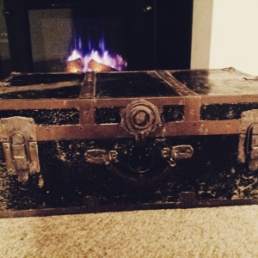
A photo I shared on Instagram that makes this trashy trunk look way more glam than it actually was.

Upcycled Trunk Side Table and Blanket Storage | Flip This Rental

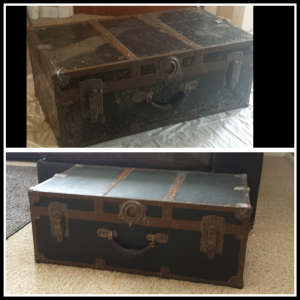
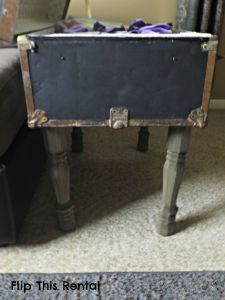
The first photo was after I cleaned this beast and the second photo was after I slapped on a coat of chalkboard paint I had on hand. I thought about writing on it with chalk, but I decided that didn’t really go with my style. I also thought about painting the brown metal parts, but I didn’t have a good color for it and I thought it made the trunk look just shabby enough with the fresh paint. Still, I want to go back and clean it up a little bit more because there are some rusty spots that don’t look so hot.

Upcycled Trunk Side Table and Blanket Storage | Flip This Rental

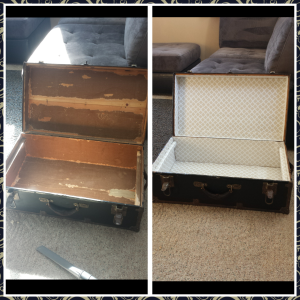
The inside of the trunk had ugly contact paper and smelled mustier than a century old mummy. I scraped as much of the paper out as I could and vacuumed the rest. To get the smell out I put cat litter in the box. I heard that will trap all the smells and when you dump it out the smell will be gone. It worked I think but then it just smelled like dusty cat litter.

The new inside of the trunk is shelf liner but I totally bought the wrong kind. I bought the squishy stuff not the plain paper kind. I was in a rush and I really liked the design on it, but it cost like $10 and I ended up having to buy two rolls of it. Seriously a dumb mistake. I used mod podge to stick the shelf liner in so then my trunk smelled like glue instead of cat litter. I think that’s a good thing? Eventually I sprayed Febreze in it and it took the smell away. 🙂

Upcycled Trunk Side Table and Blanket Storage | Flip This Rental

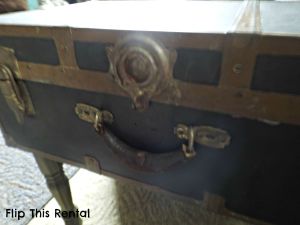
An up close of the front hardware. This is one of my favorite parts about the piece.

Upcycled Trunk Side Table and Blanket Storage | Flip This Rental

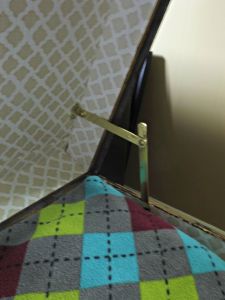
I added this on so the lid would stay open while grabbing out blankets.

Upcycled Trunk Side Table and Blanket Storage | Flip This Rental

I measured how tall I wanted the legs to be based on the height of the couch. Then I stained them using the vinegar and steel wool technique except I used the kind with soap in it and tried to rinse out the soap. I don’t recommend that. You can buy plain steel wool at the hardware store.

Upcycled Trunk Side Table and Blanket Storage | Flip This Rental

Upcycled Trunk Side Table and Blanket Storage | Flip This Rental

So what do you think? Were my expensive mistakes still worth it?

See You Around!

Lauren <3

Simple Colored Bottles Craft

Lately I’ve been stressed out about finishing projects around the house before I move back to school in the fall. During time off of school I live at home with my boyfriend, Chris, and during the school year I live on campus with friends. Last year was my first year so I lived in a dorm with two other girls. This year I will be living in an apartment with those two girls plus 3 other roommates. I come home quite often since I don’t live far from the college, but this year I want to make a point to relax on the weekends instead of worrying about homework or trying to do major home improvement projects.

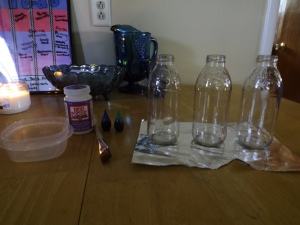
Today I did a simple craft to take my mind off the things I feel like I “have” to do. For this craft you will need:

Bottles
Mod podge
Paintbrush
Food coloring

Simple Colored Bottles Craft How To | Flip This Rental

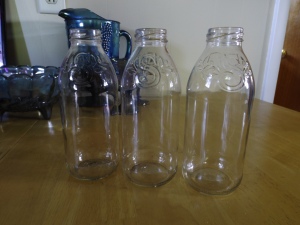
You can use old bottles for this craft such as snapple bottles, starbucks iced coffee bottles, or you can buy some from a craft store. I had a few snapple bottles on hand so I decided to use those. (I’m saving my starbucks bottles for a coffee candle craft 😉 )

If you are reusing bottles you will need to peel the label off and get off any extra gunk. I used a mixture of mostly baking soda and a little bit of vegetable oil and scrubbed the bottles with paper towel.

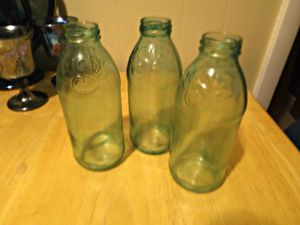
This is what they looked like after de-gunking:

Simple Colored Bottles Craft How To | Flip This Rental

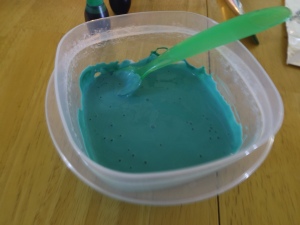
Then I mixed up a combination of mod podge and food coloring. I used 6 drops of blue and 4 drops of green. For this project I used hard coat mod podge. This is what my mod podge looked like after adding in the food coloring:

Simple Colored Bottles Craft How To | Flip This Rental

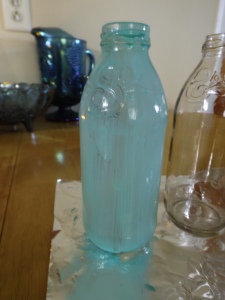
I applied the mixture to my bottles with a brush and tried to keep brush marks to a minimum.

Simple Colored Bottles Craft How To | Flip This Rental

Simple Colored Bottles Craft How To | Flip This Rental

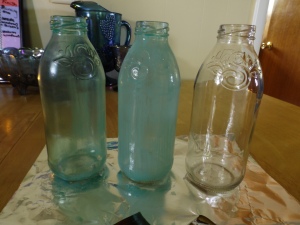
On the left is the bottle mostly dry, the middle is just after applying mod podge. I was trying to follow a tutorial I found on Pinterest to make the bottles look like sea glass, but I didn’t have matte mod podge and used the hard coat instead. They turned out nice in the end, though. I don’t quite have a spot for them but I think maybe they can travel to school with me. Maybe I’ll make a pallet shelf for the bathroom and put them up there. The main thing is that this was a nice de-stressing craft 🙂

Simple Colored Bottles Craft How To | Flip This Rental

What kinds of things do you do to de-stress? Would you like to hear about my DIY adventures in my college apartment too? Drop by the comments and let me know what you think!

See You Around!

Lauren <3
Curbside Dresser Makeover

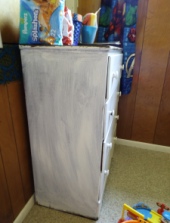
A while back the boyfriend picked up a dresser he saw on the side of the road. It was in good shape structurally but boy oh boy whoever painted this thing did NOT know how to paint. Or they were just extremely lazy. I can’t tell. Please ignore the ugly paneling and the fact that one picture is not in the same orientation as the others. Oops. #SorryNotSorry

Curbside Dresser Makeover | Flip This Rental Curbside Dresser Makeover | Flip This Rental Curbside Dresser Makeover | Flip This Rental Curbside Dresser Makeover | Flip This Rental

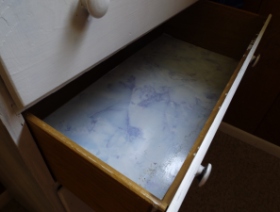
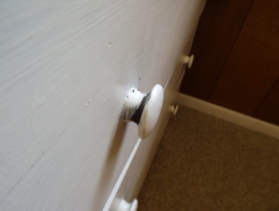
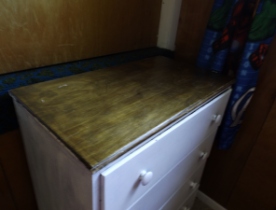
First of all that contact paper is dreadfully ugly and it was really dirty. In the second picture you can see that they painted the dresser but obviously didn’t prime or do a second coat. It’s like they got sick of it and never came back. Also it looks like towards the bottom they didn’t want to get paint on whatever surface the dresser was on so they just avoided that part. Third picture. Apparently they didn’t own a screw driver either so they just slopped some paint on the drawer pull and also didn’t look behind the front of the knob to make sure they got it all. COME ON PEOPLE. Now I almost won’t dump on the top of the dresser because I actually like the look of the wood top BUT they very sloppily painted the sides of the dresser.

Now that I’m done being angry, I’ll show you the process of making the awfulness go away.

Curbside Dresser Makeover | Flip This Rental

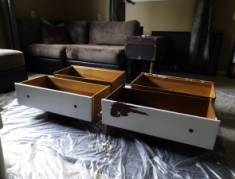
First I propped the drawers up on random objects, took the drawer pulls off, and sanded the drawers slightly. The front right drawer had a little bubble so of course I peeled it and it ended up being a lot bigger than I expected. But it wasn’t anything a little primer and paint couldn’t fix.

 Curbside Dresser Makeover | Flip This RentalCurbside Dresser Makeover | Flip This Rental

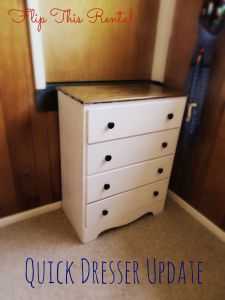
What a huge difference one coat of paint can do!

Curbside Dresser Makeover | Flip This Rental

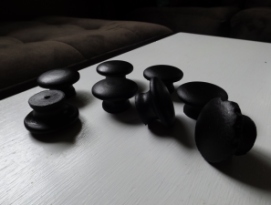
I also spray painted the knobs, and as you can see I made sure to get every angle. Eventually I plan on replacing these because the one on the very right is chipped in weird ways. Yet another baffling thing about this dresser.

Curbside Dresser Makeover | Flip This Rental Curbside Dresser Makeover | Flip This Rental

The dresser is being used in my boyfriend’s son’s room and my main motivation for fixing it up was all the hand-me-down clothes piled up in our living room. All the clothes in the dresser are hand-me-downs plus a bunch more hung up in his closet. Holy cow!

Curbside Dresser Makeover | Flip This Rental Curbside Dresser Makeover | Flip This Rental

First off, if you are wondering what the heck is behind the dresser. It’s a door. I think at one time our “duplex” was a single family home and this was a doorway that led to the basement. In order to make it a duplex they just took the rest of the stairs out and added a door. It’s really strange and there’s not really a way to make it any less strange. *sigh*

Anyway, I couldn’t really get all of the paint off the wood so I got as much as I could. I also used some leftover Restor-A-Finish to hide the scratches and brighten up the wood a little bit.

In the future I would love to paint the drawer fronts and sides red to give it a little pop. I might even change the drawer pulls to Captain America shields to go along with the Avengers theme we’ve got going on. I’m just relieved to have this checked off my to-do list!

Easy Dresser Makeover. It's amazing how far a coat of white paint and a little bit of love will go

If you liked this post don’t forget to share it! 🙂

And if you want to see the next phase in this dresser makeover click here.

See You Around!

Lauren <3
Antique Chair Makeover – Stage 1


So besides being a crazy youngster that enjoys doing daring things to her rental home without asking her landlord permission, I also enjoy buying old lousy furniture and dumping money and countless hours into it. BUT the final product tends to be somewhat decent so I usually am happy. I bought an old trunk from salvation army for $10 once and turned it into a table. It cost me 3X as much to fix it up but I get a lot of compliments on it so it’s okay.

I’m currently working on an old chair my mom’s boyfriend had lying around his garage, so they kindly donated it to me. I cannot for the life of me pinpoint when it was made and it’s driving me bonkers. I wanted to paint it white, distress it, and reupholster it but I have a soft heart for antiques and decided to restore it. I don’t have a place for it in my house so I’m fixing it up and giving it back to my mom for her birthday.

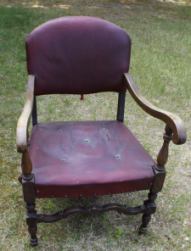
            Antique Chair Makeover - Stage 1| Flip This RentalAntique Chair Makeover - Stage 1| Flip This Rental

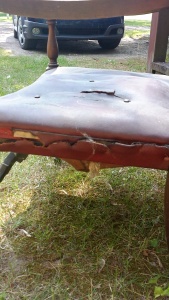
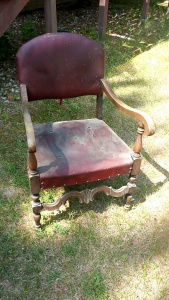
This is before I cleaned it. The wood is really worn and dirty, and the leather seats are really damaged. Poor thing needs some TLC 🙁 So far I think it’s made of dark walnut?? and that it’s really old?? maybe?

Antique Chair Makeover - Stage 1| Flip This Rental

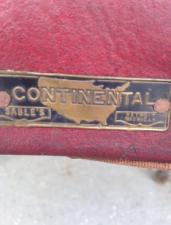
I figured this tag on the back would make it a piece of cake to figure out how old it was, what it’s made of, and how much it’s worth.

WRONG-O. 

I searched for hours, dayssss and I can’t find a chair company/manufacturer, leather company, or anything based out of Detroit. Seriously, if you know anything about this chair tell me. Oh, it’s kind of hard to read but the right side says Detroit, Michigan 😉

The first thing I did with this chair is give it a good cleaning with some hot water, soap, and borax. The borax probably wasn’t necessary but I just love that stuff.

Antique Chair Makeover - Stage 1| Flip This Rental

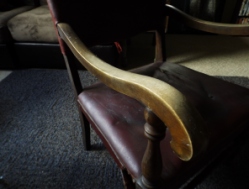
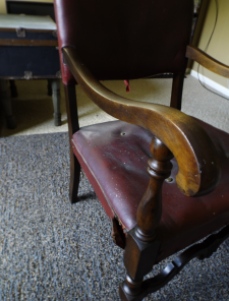
He looks a lot better after a nice bath but he’s far from a shiny diamond of a chair. Sorry chair, you’re still a lump of coal. Next I used Howard Restor-A-Finish in Dark Walnut and #0000 Steel Wool to restore the color of the wood and hydrate it. The top of the arms are really faded. There were also several scratches on the wood and the Restor-A-Finish is supposed to hide them really well.

When using the Restor-A-Finish make sure to put a drop cloth or newspaper underneath your project or apply it outside. It’s very oily and I’m sure it would make a mess if it spills. Let me tell you this stuff makes a BIG difference. You almost can’t tell that the wood was so neglected.

 Antique Chair Makeover - Stage 1| Flip This Rental

 Antique Chair Makeover - Stage 1| Flip This Rental

Antique Chair Makeover - Stage 1| Flip This Rental

Antique Chair Makeover - Stage 1| Flip This Rental

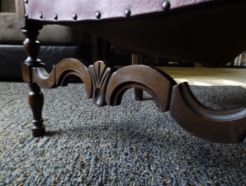
I just love how rich the wood looks after using Restor-A-Finish. It really brings out the carved details in the chair as well. This product is really easy to use and a little goes a long way. I almost wish it came in smaller containers because I don’t really know what else I’ll use it on. Maybe that’s an excuse to buy more dumpy furniture 😛

Stay tuned for the next stage in this chair’s makeover. I’m scared to pull all that leather off!

See You Around!

Lauren <3