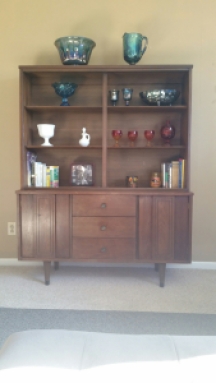
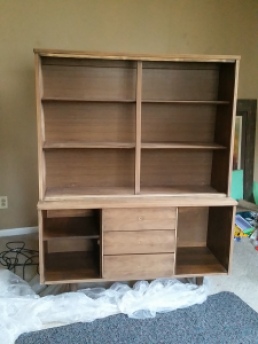
Wow, I can’t believe it has been over two weeks since I posted last! Whoops. But I’ll make it up to you this week by showing you my finished china cabinet! A few months ago (4 months to be exact) I shared my ideas for updating the cabinet and asked your opinions on what I should choose. I ended up choosing to stain the piece in General Finishes Java Gel Stain. Many of the pieces I saw were extremely dark, but I did see one that was lighter and I absolutely loved it. I figured I would only do one coat and that would be light enough and let the red tone of the wood show through.
To do this project I purchased:
- GF Java Gel Stain (1 qt): $26.67
- GF Gel Topcoat in Satin (1 qt): $26.67
- Shop Towels: 3 rolls for $5.98
- Mineral Spirits: $4
- Foam Brush: $2?
I already had on hand:
- Plastic drop cloth
- Rub N Buff Antique Gold
- Gloves
- One foam brush
- Ridgid random orbital sander
- 80 and 220 grit sandpaper
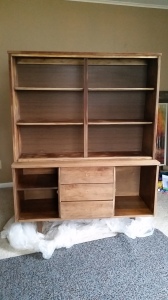
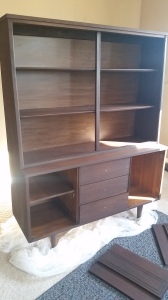
Here is what I started with:
If you want to see more in depth pictures, there are some in the post I linked to above.
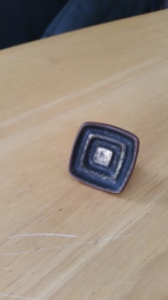
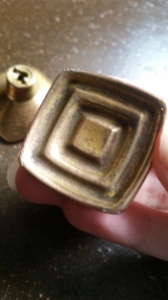
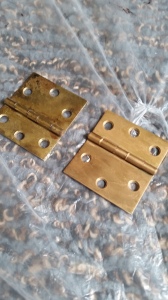
I cleaned the drawer pulls by soaking them in baking soda and vinegar then scrubbing with an SOS pad.
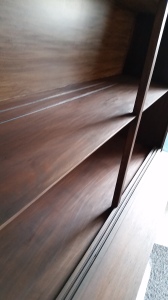
Next, I sanded the crap out of the whole thing (minus inside the cabinets and the faux wood backing). I used my Ridgid random orbital sander with an 80 grit sanding pad. I wanted to sand down to the bare wood in order to keep the piece from getting too dark. Another reason was due to scratches on the cabinet doors and shelves, along with some nasty water rings on the top. I didn’t want to have to fill the scratches in with wood filler.
After I sanded everything with 80 grit I hand sanded with 220 grit to smooth it back out. General Finishes has great videos that I would recommend watching if you are going to use their products. I watched this video on how to apply Gel Stain and topcoat. It also explained not to go any farther than a certain grit or the pores of the wood will be closed and won’t accept the color as well.
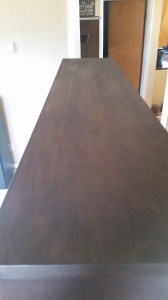
After sanding I wiped the entire piece down with Mineral Spirits to clean the dust off and prep the wood. For water based stains use a mixture of water and denatured alcohol.
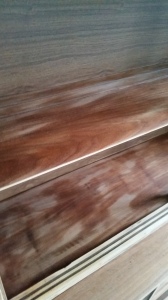
You can see in the pictures above how the mineral spirits bring out the red color in the wood. It dries pretty fast so it was hard to get a good picture.
General Finishes also recommends wiping down the surface with mineral spirits right before applying the stain. This helps the stain glide across the wood since it is so thick.
I then used a foam brush to dapple the stain onto the cabinet. Then I used a rag to spread the finish out evenly and wipe any excess off. Work in small sections so the product doesn’t dry out before you get a chance to wipe off the excess.
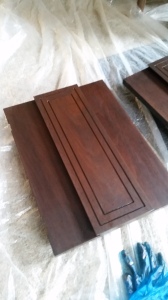
Here are some pictures once I got the stain on:
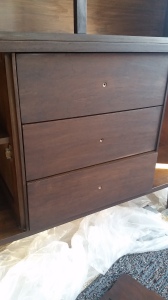
I let the stain dry for a full day before applying the gel top coat. To apply the topcoat I got a new foam brush and brushed on the product in a very thin layer. I went quickly at first to get it on the surface then went back slowly to make sure the lines were even.
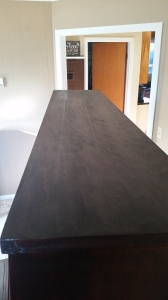
You can see in the pictures above how much richer the color is, and how the wood grain stands out after applying the topcoat. (The left picture is without topcoat).
General Finishes recommends putting more than one coat of topcoat on and sanding with a fine grit in between coats. This is because the first coat of topcoat is likely to lift the stain and create a grainy look. I didn’t have this problem so I just stuck with one coat. I also didn’t want to have to do any more sanding.
As I mentioned before, I cleaned the drawer pulls and did not use Rub n Buff on them. However, I couldn’t get the door hinges as clean as I wanted so I decided to use Rub N Buff on them.
This china cabinet also whispered to me how much it would love having little gold feet. Sooo I used some Rub N Buff on the black part on the legs.
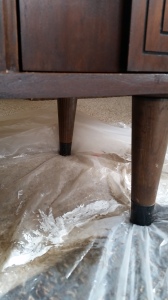
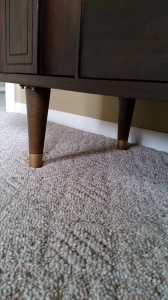
Great thinking, cabinet! I love your little gold feet.
Here are the after pictures!
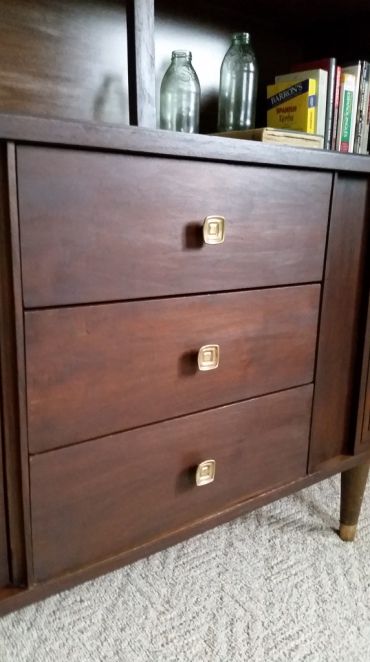
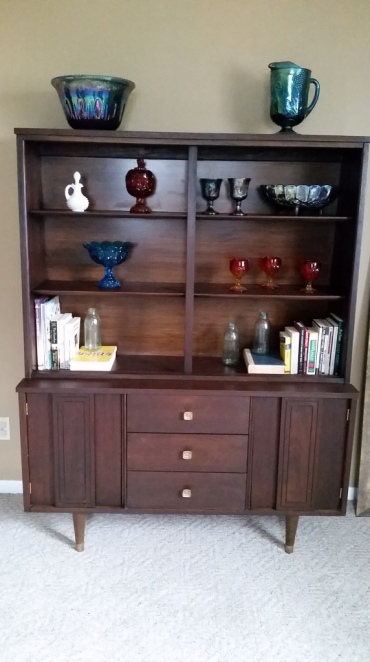
I love how much depth this stain has to it. It’s so rich looking, and it was very simple to use. I was shocked by the price of the stain when I bought it, but I hardly made a dent in the can. A little bit goes a long way, which I noticed even with the water based stain I’ve used on two other projects. And for an oil based stain, it didn’t have too much smell to it. I did have the windows open, though.
I was not compensated by General Finishes in any way for writing this post, and all of the opinions are my own. However, they did follow me on Instagram. score!


So what do you think? Did I make a good color choice? Would you say this is a proper restoration?
Eventually I think I would like to sell this baby, but for now I’m just going to enjoy the product of my hard work.
See You Around!
Lauren <3


