DIY Staircase Update

About a month ago I texted my landlord about ripping up the carpet on the entry stairs and replacing it with some vinyl. It took her about a week to respond, so I figured the answer would be no as it usually is.

Quite the contrary, she texted back and said sure! That surprised me. Having permission to sporadically change things in the house is very exciting.

I started ripping the carpet up within half an hour of getting her text.

DIY Staircase Update

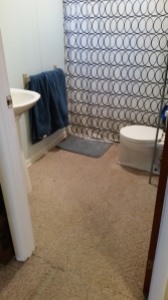
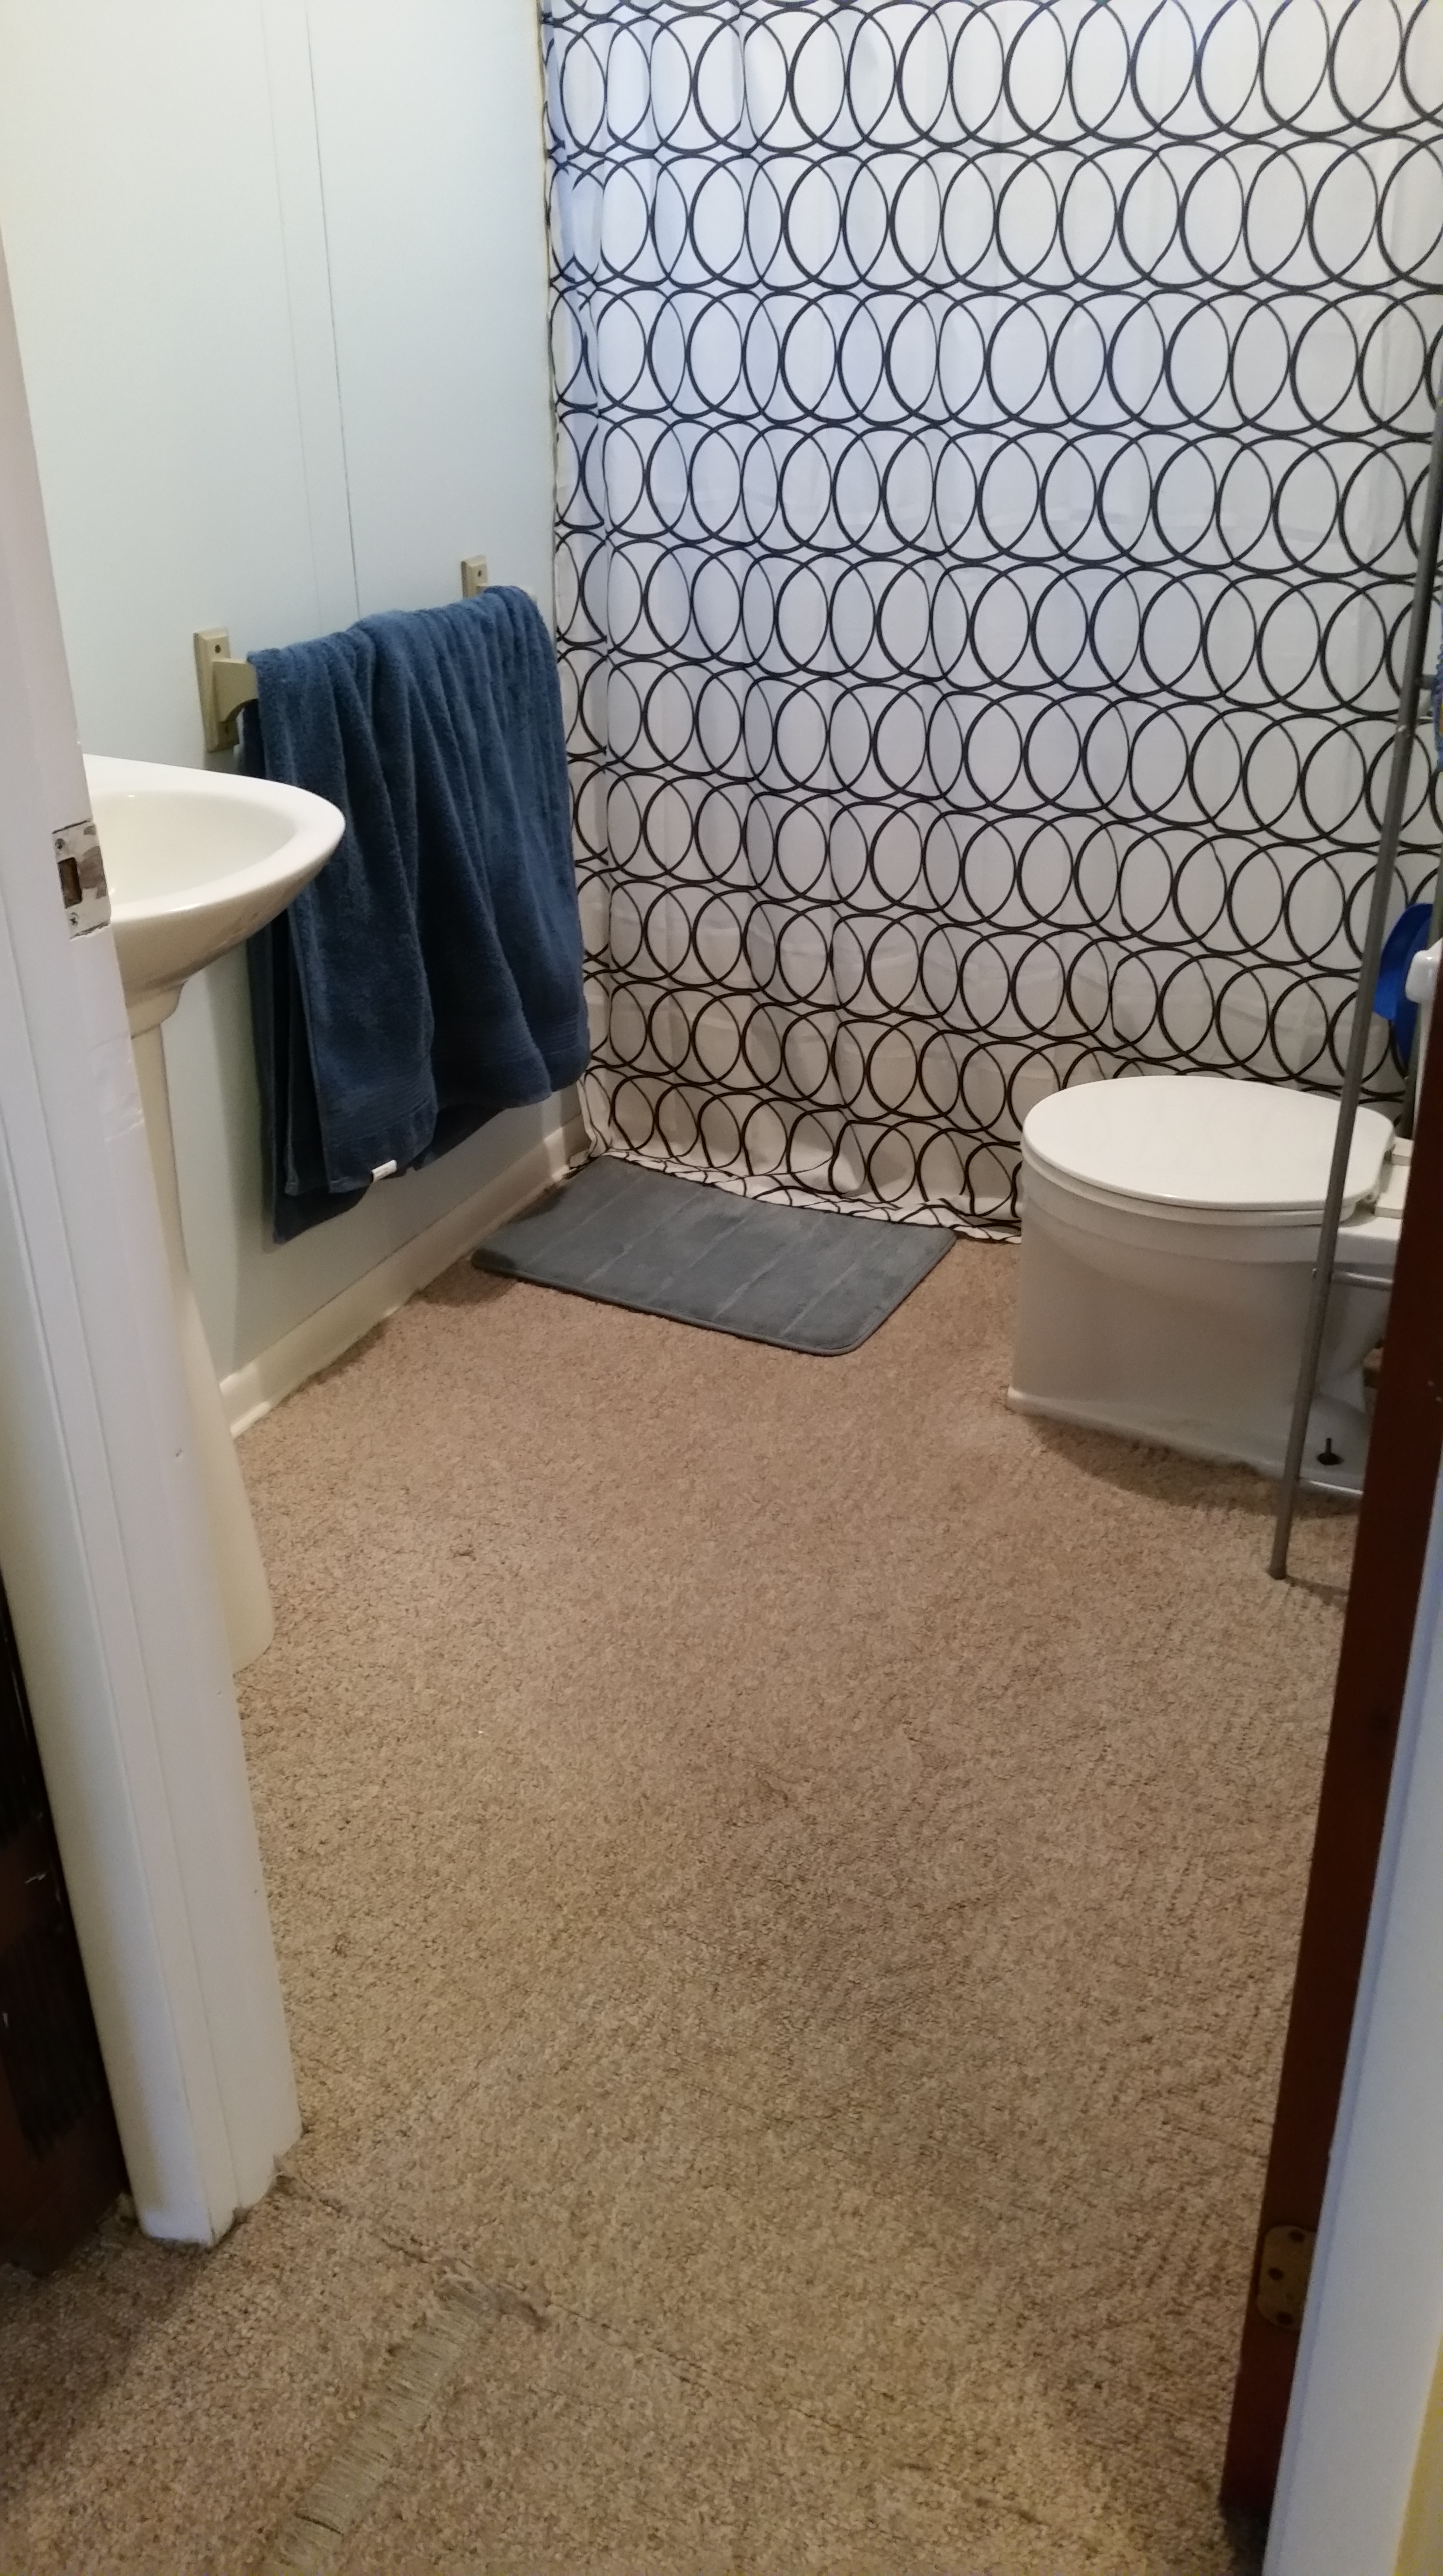
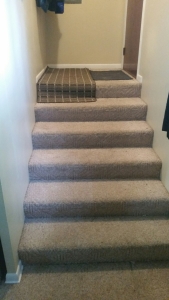
Here’s what we started with. The big rug is usually in the kitchen, but it’s been up there a while because spring tracks a lot of mud in, and it’s annoying having to vacuum the landing all the time.

DIY Staircase Update

We also track in a lot of pine needles which hurt like a SOB to step on when they’re stuck in the carpet.

Since I had permission from the landlord and was raring to go, I didn’t bother telling Chris before I started destroying the carpet. I was so sick of it and wasn’t going to wait any longer.

DIY Staircase Update

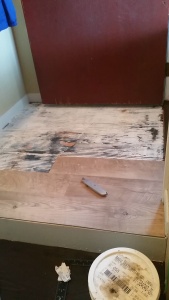
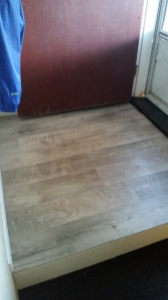
The first thing I found was the landing is made of plywood and covered in that black stuff. I think the black stuff is some sort of non-slip sand adhesive. Then I kept pulling up the carpet and got this piece of joy.

DIY Staircase Update

Nice pine steps and risers! Yay.

After ripping the carpet and padding off I pulled out all the tack strips and staples from the stairs. I didn’t pull all the staples from the landing because I’m going to cover it with vinyl, and the stairs will be painted and stained with General Finishes Java Gel. Instead, I pulled all the padding out of the staples and hammered them down.

One issue that I ran into with the tack strips is that I don’t own a crowbar. Instead, I just used a hammer and flathead screwdriver. Just wedge the screwdriver under the strip where the nail is and use the hammer to wiggle it under further. Then use the leverage and pull up on the strip (by pushing down on the screwdriver). It’s kind of a pain in the butt on some of them, but it works.

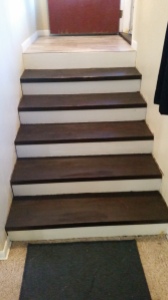
After getting all the staples off the steps they were ready to be sanded in preparation for stain. The picture below is before sanding.

DIY Staircase Update

I took my Ridgid random orbital sander to the steps with an 80 grit sanding pad. Since I have an orbital sander (which is round) I couldn’t get all the way to the edges of the stairs very well which left some paint. I went back by hand to try to get as much off as I could, but it wasn’t very efficient.

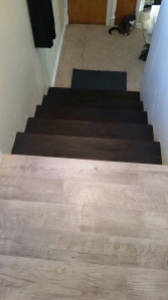
The picture below is after sanding. It’s a little hard to compare because of the opposite angles, but they’re a lot cleaner with fewer paint splatters.

DIY Staircase Update

Next, I cleaned the steps off with a shop towel and some mineral spirits. Then I applied mineral spirits to each step right before I stained. General finishes recommends this to help the stain go on smoothly.

Make sure to apply stain to every other step so that the stairs are still usable while the stain dries (6-8 hours).
DIY Staircase Update
And then here’s a picture of them all stained.
DIY Staircase Update

After the stain dried, I taped the stairs off to paint the risers.
DIY Staircase Update
I also used paper so I wouldn’t get paint on the steps. As you can see in the picture, I didn’t tape off the risers when I stained. I figured it would be easy to paint over. It seemed that it actually was easier to cover the paint with gel stain than the other way around.

Before priming I sanded the risers by hand with 80 grit sandpaper.
DIY Staircase Update
After the first coat of primer I went back and filled in the holes with spackle. Then I sanded lightly and did another coat. I like to wait until I prime to fill in the holes because it makes them a lot more visible.
DIY Staircase Update
After two coats of primer I applied two coats of paint.

I also sanded and repainted the trim by the landing to make sure it looks crisp before installing the vinyl
 imageDIY Staircase Update

I’ve repainted this trim probably twice already, but it gets dingy pretty quickly and the new floor will be lower than the carpet.

Before putting in the new vinyl I also wanted to stain the threshold of the front door to match the steps.
DIY Staircase Update DIY Staircase Update

Since the stairs are going to be a different color than the vinyl on the landing, I wanted to make sure the entry looks as cohesive as possible.

And of course, since stairs are high traffic I added a coat of General Finishes Gel Topcoat.

And after several days of putting it off, we finally got around to laying the vinyl on the landing! It’s really easy to do, and I was going to attempt doing it myself. Chris wanted me to wait until he would be around to help me though, which honestly was a good idea. Laying the floor and cutting the boards isn’t too bad when it’s just straight cuts, but having to work around the trim pieces was really frustrating for me. I explain in this post how we laid the floor in our bathroom, and what exactly we used if you’re interested 😀

DIY Staircase Update

Chris did up until this point on the landing, and I got to do the rest until the trim on the other side of the door. I didn’t get to do much cutting when we did the bathroom floor, so I’m glad I got to try it out.

DIY Staircase Update DIY Staircase Update

DIY Staircase Update DIY Staircase Update

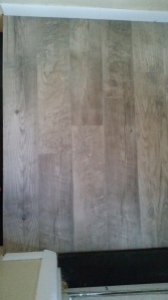
I am so obsessed with how this project turned out. The entry is so much brighter and spacious now that the carpet is gone. And it’s going to  be way easier to keep it clean. No more lugging the vacuum all the way up the steps!

DIY Staircase Update DIY Staircase Update

If you like this post let me know, and feel free to pass it along!

See You Around!

Lauren <3


DIY Plank Vinyl Floor – Bathroom Update

I am so excited to finally have this project done. I’ve been waiting at least a couple of months to put the new bathroom floor in, and we finally had time to do it! On Halloween weekend nonetheless, but it was worth it 😀

As you may know if you’ve been following along, we got free Mannington Adura floors from Chris’s dad who installs floors for a living and had leftovers from a job! This stuff is awesome. I can already tell it’s going to be really durable, and it’s absolutely gorgeous. The style and color is called Dockside Seashell. This whole name confused me when we first got it, but I’ll break it down. Mannington is the brand, Adura is a type of “luxury vinyl”, Dockside is the style/grain on the wood, and Seashell is the gray color.

DIY Plank Vinyl Floor - Bathroom Update

Just a reminder, above is what my bathroom looked like before in all its carpeted glory.

DIY Plank Vinyl Floor - Bathroom Update

Here is what we found when we moved the toilet. A nasty wax ring, and a nasty unpainted wall! woo. I honestly wasn’t surprised one bit. Grossed out? Yes. Surprised? No.

 DIY Plank Vinyl Floor - Bathroom UpdateDIY Plank Vinyl Floor - Bathroom Update

The next step was removing the carpet, and the layer underneath. Luckily the floor that was under the carpet was in good shape and we didn’t have to remove it all the way down to the concrete.

Next we pulled the tack strips up, swept and cleaned the floor thoroughly before we laid the glue down.

DIY Plank Vinyl Floor - Bathroom Update

To lay the glue down we started with just one side of the room so it was easier to work. There are instructions that come with the glue but basically you just dump some glue on the floor and use a trowel to spread it around. Then you put a fan on it and wait until it gets tacky or until it is mostly clear. You want to be able to adjust the pieces a little bit, but not enough for them to slide around on you while you work.

To start the floor we put a full size board in the top left corner. Then we cut a board to fit in the space below. The remaining piece from the second board is then put at the top in the next row. Just keep alternating like this and you will get a floor with a good pattern. This is what the professional told us to do, I wouldn’t make this stuff up! 😛

DIY Plank Vinyl Floor - Bathroom Update

To cut the boards we just used a square and a box knife. In some cases we had to measure the length of the board we needed, but most of the time it was easier to put the board next to where it needed to be laid and make a mark with the knife of where to cut. Generally the boards just need to be scored with the knife, and you can snap it.

DIY Plank Vinyl Floor - Bathroom Update

Above is where we stopped before laying more glue. Once the rest of the floor was ready to be done Chris sat on the boards we already put in place, and cut the boards on top of a cardboard box.

DIY Plank Vinyl Floor - Bathroom Update

When we got to this point Chris had to measure how wide of a piece he needed and cut the boards long way. This was pretty difficult using the square, but I imagine there is an easier way to do it so the cut is even the whole way down. We had a little bit of a struggle, but overall it ended up fine.

DIY Plank Vinyl Floor - Bathroom Update

After the floor was all down there were still a few things I wanted to fix before putting everything back together. One of the things was painting this wall! I couldn’t put the toilet back knowing that this monstrosity was behind it. It just wouldn’t feel like a complete reno. Also notice the rotted out trim in the corner.. we’ll get to that in a bit 😉

The first thing I did was wipe the nastiness off the wall with a hot rag.

DIY Plank Vinyl Floor - Bathroom Update DIY Plank Vinyl Floor - Bathroom Update

Then I sanded the wall so the paint was able to stick well, primed it, and then painted it!

Notice the rotted trim looks different? I used Durham’s Rock Hard Water Putty to fill in the holes and prevent the wood from rotting further. It is a powdered material, and you just add water to activate it. Mix it up and apply it to the surface. I just used my hands since that seemed easiest. This stuff is moldable, sandable, and paintable. And since it comes in powdered form you don’t have to worry about it setting up in the container. It’s super cheap too and I already have other plans for it around the house 😀 I think this is my new favorite home improvement product.

DIY Plank Vinyl Floor - Bathroom Update

The other thing we did was get rid of the yucky wax seal, and instead of replacing it with another wax seal we opted for a universal reusable seal. It was like $7, and is somewhat adjustable. The whole thing was too tall so we just removed a layer of the spongy stuff in the middle.

DIY Plank Vinyl Floor - Bathroom Update DIY Plank Vinyl Floor - Bathroom Update

The last thing I decided to do was quickly go over the trim with a coat of paint. I’ve painted the bathroom trim before, but now the floor height is lower and some ugly areas were uncovered. As usual I sanded and wiped it down first.

DIY Plank Vinyl Floor - Bathroom Update

The trim looks as fresh as it’s good ole pal the floor. 😉

Now are you ready for the finished product??? are you sure?? okay, here it is!! 😀

DIY Plank Vinyl Floor - Bathroom Update

It’s everything I dreamed and more. No joke. I feel like it just makes the space feel so much bigger, brighter, and lighter. It’s amazing.

The bathroom has come such a long way since we moved in and I think it’s becoming one of my favorite spots in the house if it wasn’t already. I can’t wait to show the landlords the results.

Next my plans are to re caulk the shower, and paint the new trim piece between the carpet and the vinyl. I also need to look into cosmetic fixes for the shower surround.

DIY Plank Vinyl Floor - Bathroom Update DIY Plank Vinyl Floor - Bathroom Update

Here’s a side by side just as a reminder 🙂

Do you love it too? Do you feel like you could tackle a similar project after reading this post? What’s your favorite flooring?

See You Around!

Lauren <3