5 Tips For Simple Furniture Painting

Sometimes we tackle projects because we want to test out a new idea, or spend some time doing something we enjoy, but we don’t necessarily expect them to be easy or quick. Other times we know a project will make a big impact in our home but we don’t want to have all the fuss that goes with it, so we put it off.

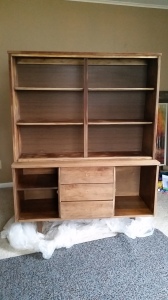
One of my friends, Jake, has two dressers that didn’t go with the rest of the pieces he owns, so last spring we began throwing around ideas on how to refinish them. The project kept getting put off because we’re both busy people, and we had to be creative in figuring out a decent workspace.

Now Jake is moving to Chicago in less than a month, so I knew we needed to get our act together and get this project done. I wanted him to be able to have furniture he loves to take with him to a new place and have a fresh start.

While doing this project, I was conscious about the things that make a project less daunting, and these are the 5 tips I wanted to share with you!

1. Listen to Your Piece

This first tip I think really applies to houses, but can also apply to furniture as well. In a house, we take clues from the architecture to guide us to different design choices. I think in some ways furniture does the same thing. Maybe this is me justifying laziness, but after a while it becomes clear how I want to refinish a piece. Whether it’s paint, stain, fun details, or new hardware.

This time I didn’t have the furniture in my house to stare at nonstop so it was a little trickier. Jake didn’t really know what his style was, or more accurately how to explain it. To find the best fit, I took cues from the other objects he has in his apartment. He likes clean lines, silver metals, and doesn’t mind dark colors. Overall, he’s drawn to a crisp look with some texture thrown in here and there.
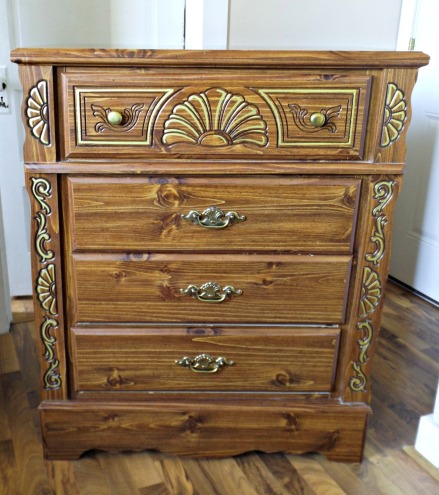
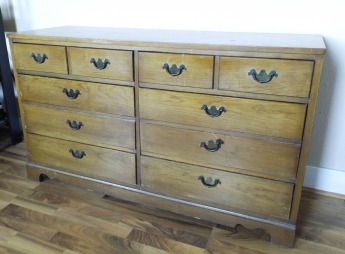
5 Tips For Simple Furniture Painting 5 Tips For Simple Furniture Painting
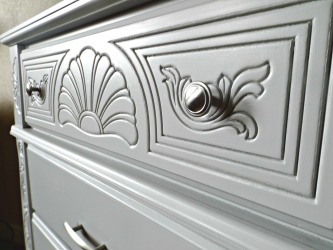
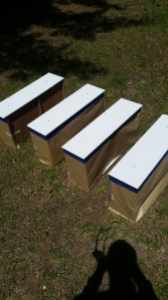
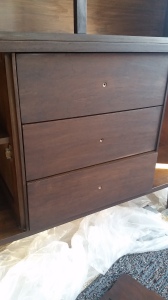
As you can see, both dressers have outdated hardware that doesn’t go along with Jake’s aesthetic. One of the first things we decided was to replace the hardware with matching hardware for both dressers.

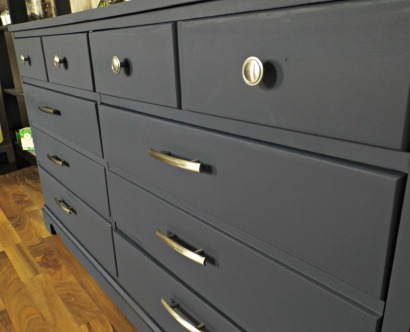
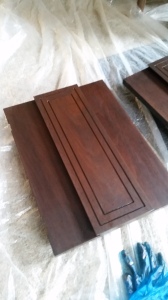
The dressers don’t have anywhere close to the same style so I thought it made the most sense to paint them different colors. I knew I wanted to use General Finishes and Jake decided seagull gray milk paint for the tall dresser, and midnight blue chalk style paint for the long dresser.

2. Use Sprayer Without Paint

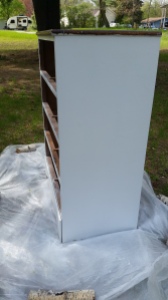
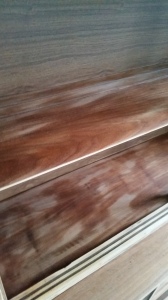
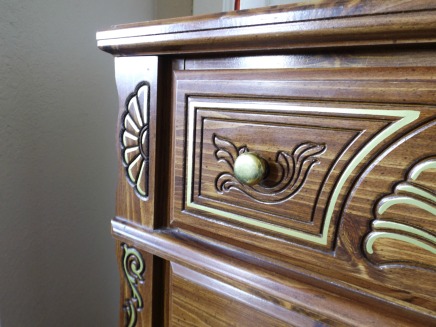
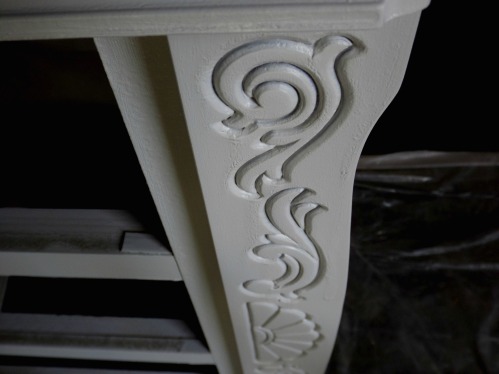
After sanding the tall dresser I kind of hit a wall of oh crap how are we going to get all the dust out of these details? And then I was like oh! Canned air. And then I was like OH. I can just use my sprayer without paint to do the same thing.

I’ve never heard of anyone else doing this so maybe it’s just too obvious to blog about, but it was definitely an aha moment for me.
5 Tips For Simple Furniture Painting

3. Paint Consistency and Spraying Technique

I didn’t have any issues with the long dresser, likely because that is the second one we painted. However, there were some flukes with the tall dresser painted with milk paint.

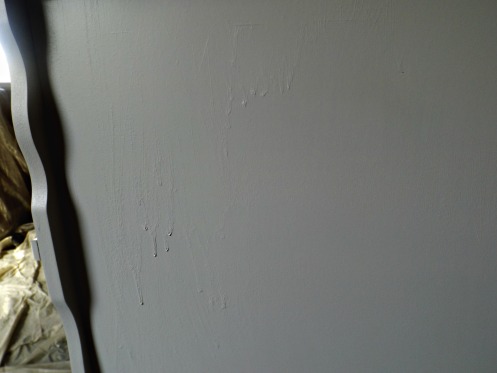
I have a HomeRight Finish Max HVLP sprayer and in the manual, it says to thin paint out so that it runs through the cup that comes with the sprayer in 25 to 40 seconds. When I timed it, my paint was running through closer to 25 seconds, but I was ending up with drip marks.
5 Tips For Simple Furniture Painting

I didn’t troubleshoot all the possible issues, but I think it was because my paint seemed a little runny. It also could have been because I was applying too much paint at once and standing too close to the piece. These are some general rules I like to keep in mind when I’m spraying to avoid issues like this:

  • Make sure your paint is a good consistency
  • spray in even strokes, starting the spray away from the piece then moving across
  • Let go of the trigger after each spray to avoid moving too quickly and creating areas with too much paint
  • Don’t stand too close (or too far) from the piece. I generally stand about a foot or so away.
5 Tips For Simple Furniture Painting

4. Fixing Mistakes, Don’t Panic!

However, if you do mess up (like I did) don’t freak out! Whether it’s drip marks, accidentally touching the wet paint, or dirt in wet paint these are all fixable. In spots like the ledges of the drawer frames I wiped drips off because it wasn’t going to affect the finish. In spots like the side of the dresser, I just left them to sand (gently) before doing another coat. It would also be beneficial to just tap the drip with your finger so you don’t have as much to sand out.

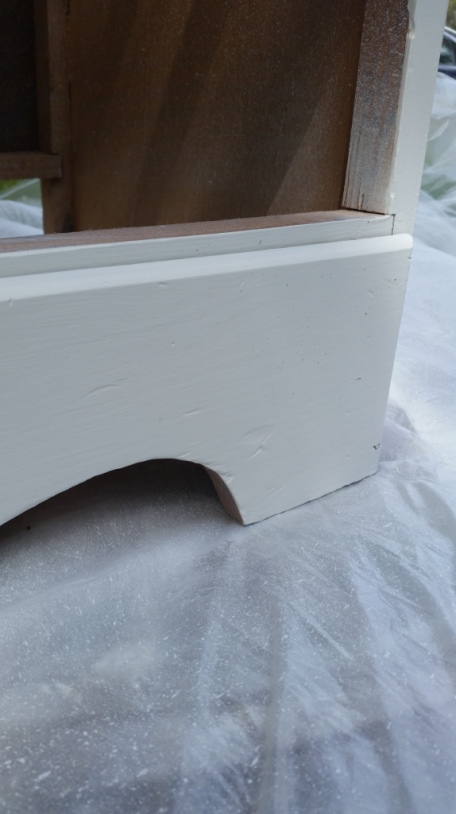
One of us also bumped the bottom corner but I left it that way because I didn’t want to put too much paint on one area and end up with even more drips. I think it’s just easier to apply more paint than have to sand it off and then apply more paint.

I didn’t get any dirt in the piece this time but that is a super easy fix. Just wait until the paint dries and knock it out with a dry cloth. This shouldn’t mess with the finish at all.

5. Work with a Friend!

Typically I do projects on my own at my own leisure unless I am frustrated and need help. In this case, I felt there was more of a time crunch with the big move coming really soon. I didn’t want the project to take any longer than necessary so Jake could focus on packing and making the transition to Chicago.

That being said, it was so much faster to have an extra set of hands throughout the entire process. It’s also great because you have someone else to blame if things go wrong. Just kidding… sort of. If you’re looking for a project to go smoothly and take less time, definitely enlist help.

The project start to finish took a weekend and I wasn’t completely drained by the end. We bought supplies Friday night and worked from about noon to seven on both Saturday and Sunday. So really we put in about 14 hours, maybe less, since I didn’t really account for eating. Although I don’t think we really had any down time for paint and wood filler to dry.

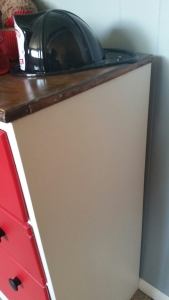
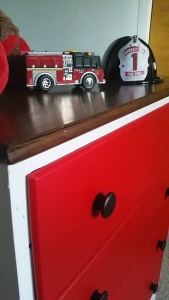
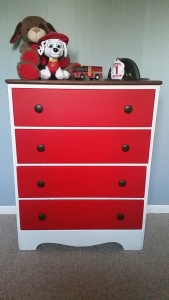
So there you have it! 5 easy tips to make painting simpler and hopefully to help you gain some motivation instead of putting a project off. Now what you’ve probably been waiting for… before and after photos!


5 Tips For Simple Furniture Painting

5 Tips For Simple Furniture Painting

5 Tips For Simple Furniture Painting

5 Tips For Simple Furniture Painting
Have you ever tried any of these tips for painting furniture or have any other tips I didn’t mention? Let me know in the comments! 🙂

See You Around!

Lauren <3
5 Tips For Simple Furniture Painting

If you liked this post, you may also want to check out this post.

DIY Staircase Update

About a month ago I texted my landlord about ripping up the carpet on the entry stairs and replacing it with some vinyl. It took her about a week to respond, so I figured the answer would be no as it usually is.

Quite the contrary, she texted back and said sure! That surprised me. Having permission to sporadically change things in the house is very exciting.

I started ripping the carpet up within half an hour of getting her text.

DIY Staircase Update

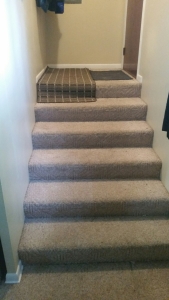
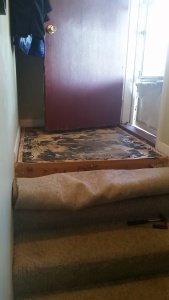
Here’s what we started with. The big rug is usually in the kitchen, but it’s been up there a while because spring tracks a lot of mud in, and it’s annoying having to vacuum the landing all the time.

DIY Staircase Update

We also track in a lot of pine needles which hurt like a SOB to step on when they’re stuck in the carpet.

Since I had permission from the landlord and was raring to go, I didn’t bother telling Chris before I started destroying the carpet. I was so sick of it and wasn’t going to wait any longer.

DIY Staircase Update

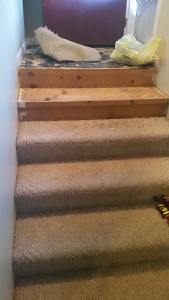
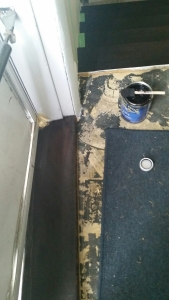
The first thing I found was the landing is made of plywood and covered in that black stuff. I think the black stuff is some sort of non-slip sand adhesive. Then I kept pulling up the carpet and got this piece of joy.

DIY Staircase Update

Nice pine steps and risers! Yay.

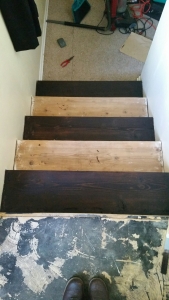
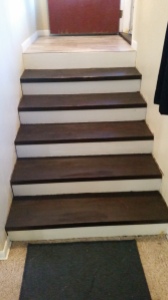
After ripping the carpet and padding off I pulled out all the tack strips and staples from the stairs. I didn’t pull all the staples from the landing because I’m going to cover it with vinyl, and the stairs will be painted and stained with General Finishes Java Gel. Instead, I pulled all the padding out of the staples and hammered them down.

One issue that I ran into with the tack strips is that I don’t own a crowbar. Instead, I just used a hammer and flathead screwdriver. Just wedge the screwdriver under the strip where the nail is and use the hammer to wiggle it under further. Then use the leverage and pull up on the strip (by pushing down on the screwdriver). It’s kind of a pain in the butt on some of them, but it works.

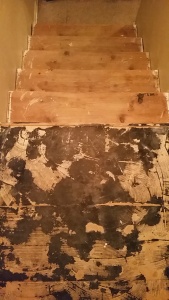
After getting all the staples off the steps they were ready to be sanded in preparation for stain. The picture below is before sanding.

DIY Staircase Update

I took my Ridgid random orbital sander to the steps with an 80 grit sanding pad. Since I have an orbital sander (which is round) I couldn’t get all the way to the edges of the stairs very well which left some paint. I went back by hand to try to get as much off as I could, but it wasn’t very efficient.

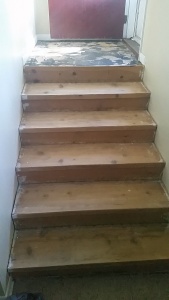
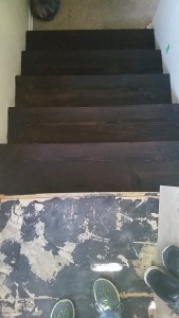
The picture below is after sanding. It’s a little hard to compare because of the opposite angles, but they’re a lot cleaner with fewer paint splatters.

DIY Staircase Update

Next, I cleaned the steps off with a shop towel and some mineral spirits. Then I applied mineral spirits to each step right before I stained. General finishes recommends this to help the stain go on smoothly.

Make sure to apply stain to every other step so that the stairs are still usable while the stain dries (6-8 hours).
DIY Staircase Update
And then here’s a picture of them all stained.
DIY Staircase Update

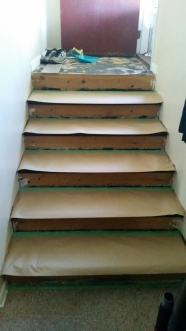
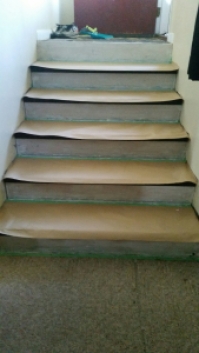
After the stain dried, I taped the stairs off to paint the risers.
DIY Staircase Update
I also used paper so I wouldn’t get paint on the steps. As you can see in the picture, I didn’t tape off the risers when I stained. I figured it would be easy to paint over. It seemed that it actually was easier to cover the paint with gel stain than the other way around.

Before priming I sanded the risers by hand with 80 grit sandpaper.
DIY Staircase Update
After the first coat of primer I went back and filled in the holes with spackle. Then I sanded lightly and did another coat. I like to wait until I prime to fill in the holes because it makes them a lot more visible.
DIY Staircase Update
After two coats of primer I applied two coats of paint.

I also sanded and repainted the trim by the landing to make sure it looks crisp before installing the vinyl
 imageDIY Staircase Update

I’ve repainted this trim probably twice already, but it gets dingy pretty quickly and the new floor will be lower than the carpet.

Before putting in the new vinyl I also wanted to stain the threshold of the front door to match the steps.
DIY Staircase Update DIY Staircase Update

Since the stairs are going to be a different color than the vinyl on the landing, I wanted to make sure the entry looks as cohesive as possible.

And of course, since stairs are high traffic I added a coat of General Finishes Gel Topcoat.

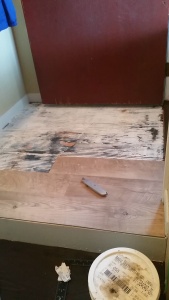
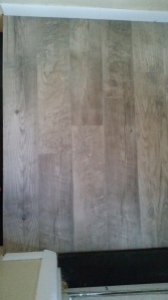
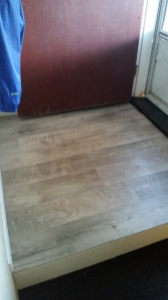
And after several days of putting it off, we finally got around to laying the vinyl on the landing! It’s really easy to do, and I was going to attempt doing it myself. Chris wanted me to wait until he would be around to help me though, which honestly was a good idea. Laying the floor and cutting the boards isn’t too bad when it’s just straight cuts, but having to work around the trim pieces was really frustrating for me. I explain in this post how we laid the floor in our bathroom, and what exactly we used if you’re interested 😀

DIY Staircase Update

Chris did up until this point on the landing, and I got to do the rest until the trim on the other side of the door. I didn’t get to do much cutting when we did the bathroom floor, so I’m glad I got to try it out.

DIY Staircase Update DIY Staircase Update

DIY Staircase Update DIY Staircase Update

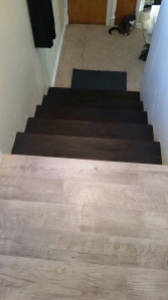
I am so obsessed with how this project turned out. The entry is so much brighter and spacious now that the carpet is gone. And it’s going to  be way easier to keep it clean. No more lugging the vacuum all the way up the steps!

DIY Staircase Update DIY Staircase Update

If you like this post let me know, and feel free to pass it along!

See You Around!

Lauren <3


Dresser Phase 2

A while back I added some paint to a dresser, and meanwhile bickered up a storm about the idiot that did such a horrible paint job. Turns out Chris got this dresser from one of his friends, and the truth is he just didn’t care enough about this dresser to take the time to do the job right (sorry not sorry, Mike. It looked like crap).

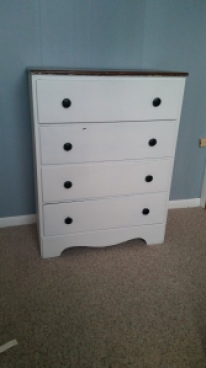
In phase 1 I added a coat of white paint to the whole thing (minus the wood top) including the insides of the drawers. And we can’t forget about that God awful contact paper I removed. Lastly, I gave the drawer pulls a nice coat of black spray paint.

Dresser Phase 2

Dresser Phase 2

I also attempted to remove some of the paint from the wood top.

Dresser Phase 2

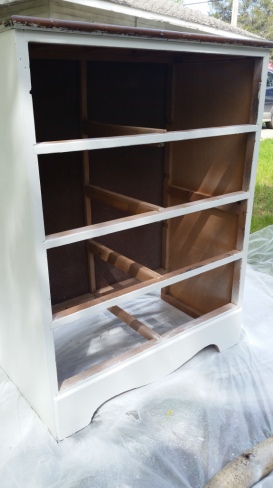
In phase two, this is what I started with.

Dresser Phase 2

Dresser Phase 2

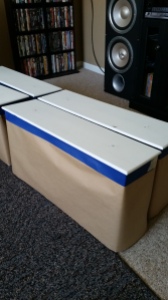
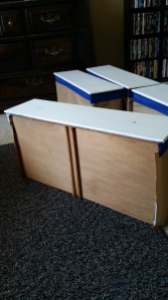
In this stage, the first thing I did was pull all the drawers out and tape off the top. Then I gave the dresser one last coat of white paint with my Home Right Finish Max HVLP Sprayer.

Dresser Phase 2

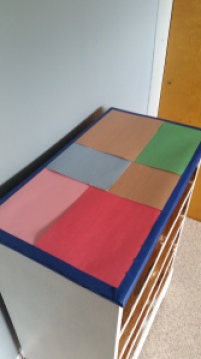
We didn’t have any newspaper, so I used what we had which is colored construction paper.

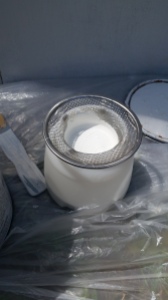
To get everything prepped I made sure to strain my paint since it was leftover from other projects. I bought this sink strainer from Dollar General and it fits perfectly into my sprayer’s container!

Dresser Phase 2

Typically paint needs to be thinned to avoid clogging the sprayer. The Home Right Finish Max comes with a viscosity cup, and depending on how quickly the paint runs out that will tell you if it needs to be thinned more. For water based paints it is perfectly okay to thin with water.

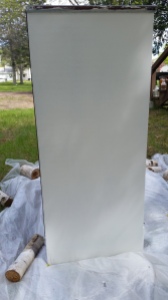
Here’s what she looks like with the fresh coat of white!

Dresser Phase 2

Dresser Phase 2 Dresser Phase 2

I’m not sure what’s up with the left side of the dresser, but the color looks off compared to the right side. In the before pictures it’s also obvious that it was harder to get good coverage. Not sure why, but now the only difference is the color slightly.

Dresser Phase 2

It’s a little hard to see, but in the picture above the wind knocked some dirt into my paint job! I waited until everything dried and just wiped it off with a dry rag. Good as new.

To give this bland dresser some character I painted the drawers with General Finishes Holiday Red Milk Paint. T’s bedroom is (mostly) Avenger themed and I thought this color would go perfectly.

The night before painting these drawers I bought a roll of masking paper and taped the three sides of the drawers I didn’t want painted.

Dresser Phase 2

I didn’t tape the bottoms because no one will see the paint on them during general use.

Dresser Phase 2

Originally I set the drawers up like the photo below, but when I started spraying nothing came out. The sprayer can be tilted somewhat, but not to this extent.

Dresser Phase 2

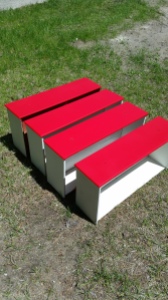
Instead I used an outdoor table with a drop cloth and set the drawers on top. That worked perfectly, but I should have laid the paper side down. As you can see with the third drawer from the left in the picture above, there is some of the drawer peeping through. This is because the paper wasn’t quite long enough. When I laid the drawers down the paper sunk more and I got overs spray inside the drawers. It will be an easy fix to sand them down a little and go over it with a brush and some white paint, but it could have been avoided.

Dresser Phase 2 Dresser Phase 2

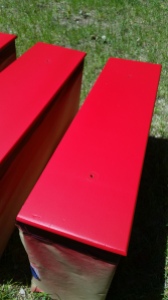
Here are the drawers with their fresh coat of red. I think the picture on the right gives the most accurate representation of what this color looks like in real life.

Next I set out to remove more paint from the edges of the wood top. To do this I taped the painted part off and used a cotton ball with rubbing alcohol. Some areas came right off, and others I just had to scrape a little with my fingernail.

 Dresser Phase 2Dresser Phase 2

You can see there are only tiny little flecks left.

Dresser Phase 2

The front had even more paint, and now there’s none!

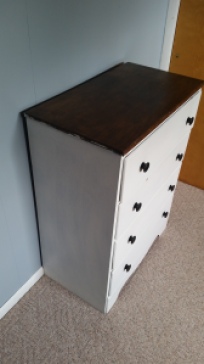
Last but not least this baby got a fresh coat of stain on top with some leftover General Finishes water based stain in Brown Mahogany.

Dresser Phase 2

The final product is exactly what I had in mind, and I absolutely love it! Even though his room is (mostly) Avengers themed I had to style the dresser up with some of  little T’s firefighter gear. I don’t recall mentioning this on the blog, but Chris is a firefighter 🙂

Dresser Phase 2

Even though red is a vibrant color I can think of so many styles this dresser could go along with, even in just a kid’s room.

As a side note, this is not a sponsored post in any way. This is the first project I used my Home Right Finish Max for and it worked like a charm. This is also the first time I used General Finishes Milk Paint, and I love it just as much as their other products I have tried (Gel Stain and Topcoat, and Water Based Stain).

What style would you use this dresser with? As always feel free to leave me a question or comment, I would love to hear what you have to say 🙂

See You Around!

Lauren <3

Mid Century Modern China Cabinet

Wow, I can’t believe it has been over two weeks since I posted last! Whoops. But I’ll make it up to you this week by showing you my finished china cabinet! A few months ago (4 months to be exact) I shared my ideas for updating the cabinet and asked your opinions on what I should choose. I ended up choosing to stain the piece in General Finishes Java Gel Stain. Many of the pieces I saw were extremely dark, but I did see one that was lighter and I absolutely loved it. I figured I would only do one coat and that would be light enough and let the red tone of the wood show through.

To do this project I purchased:

  • GF Java Gel Stain (1 qt): $26.67
  • GF Gel Topcoat in Satin (1 qt): $26.67
  • Shop Towels: 3 rolls for $5.98
  • Mineral Spirits: $4
  • Foam Brush: $2?

I already had on hand:

  • Plastic drop cloth
  • Rub N Buff Antique Gold
  • Gloves
  • One foam brush
  • Ridgid random orbital sander
  • 80 and 220 grit sandpaper

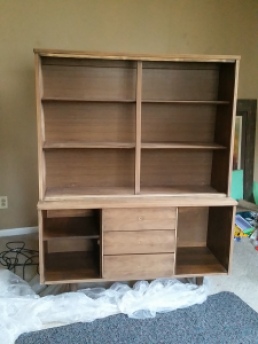
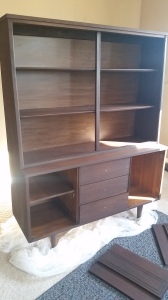
Here is what I started with:

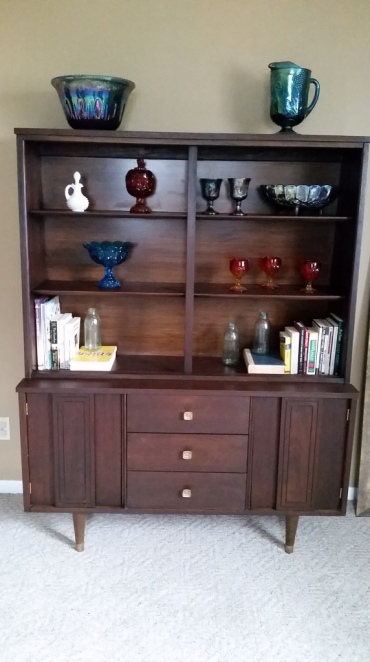
Distinctive Furniture by Stanley mid century modern china cabinet; cabinet restoration

If you want to see more in depth pictures, there are some in the post I linked to above.

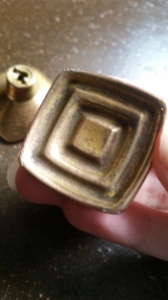
I cleaned the drawer pulls by soaking them in baking soda and vinegar then scrubbing with an SOS pad.

Mid Century Modern China Cabinet | Hardware Mid Century Modern China Cabinet | Hardware

Next, I sanded the crap out of the whole thing (minus inside the cabinets and the faux wood backing). I used my Ridgid random orbital sander with an 80 grit sanding pad. I wanted to sand down to the bare wood in order to keep the piece from getting too dark. Another reason was due to scratches on the cabinet doors and shelves, along with some nasty water rings on the top. I didn’t want to have to fill the scratches in with wood filler.

After I sanded everything with 80 grit I hand sanded with 220 grit to smooth it back out. General Finishes has great videos that I would recommend watching if you are going to use their products. I watched this video on how to apply Gel Stain and topcoat. It also explained not to go any farther than a certain grit or the pores of the wood will be closed and won’t accept the color as well.

Mid Century Modern China Cabinet

After sanding I wiped the entire piece down with Mineral Spirits to clean the dust off and prep the wood. For water based stains use a mixture of water and denatured alcohol.

Mid Century Modern China Cabinet Mid Century Modern China Cabinet

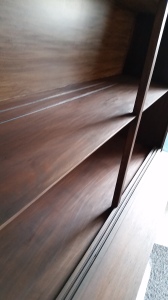
You can see in the pictures above how the mineral spirits bring out the red color in the wood. It dries pretty fast so it was hard to get a good picture.

General Finishes also recommends wiping down the surface with mineral spirits right before applying the stain. This helps the stain glide across the wood since it is so thick.

I then used a foam brush to dapple the stain onto the cabinet. Then I used a rag to spread the finish out evenly and wipe any excess off. Work in small sections so the product doesn’t dry out before you get a chance to wipe off the excess.

Here are some pictures once I got the stain on:

Mid Century Modern China Cabinet Mid Century Modern China Cabinet

Mid Century Modern China Cabinet Mid Century Modern China Cabinet

I let the stain dry for a full day before applying the gel top coat. To apply the topcoat I got a new foam brush and brushed on the product in a very thin layer. I went quickly at first to get it on the surface then went back slowly to make sure the lines were even.

Mid Century Modern China Cabinet Mid Century Modern China Cabinet

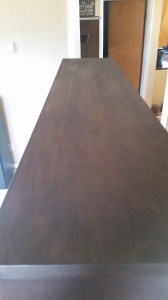
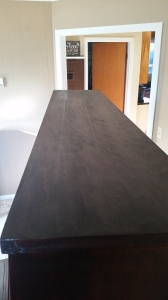
You can see in the pictures above how much richer the color is, and how the wood grain stands out after applying the topcoat. (The left picture is without topcoat).

General Finishes recommends putting more than one coat of topcoat on and sanding with a fine grit in between coats. This is because the first coat of topcoat is likely to lift the stain and create a grainy look. I didn’t have this problem so I just stuck with one coat. I also didn’t want to have to do any more sanding.

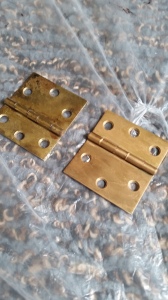
As I mentioned before, I cleaned the drawer pulls and did not use Rub n Buff on them. However, I couldn’t get the door hinges as clean as I wanted so I decided to use Rub N Buff on them.

Mid Century Modern China Cabinet

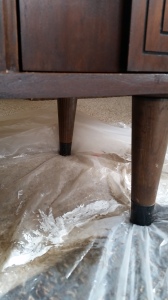
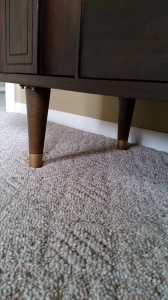
This china cabinet also whispered to me how much it would love having little gold feet. Sooo I used some Rub N Buff on the black part on the legs.

Mid Century Modern China Cabinet Mid Century Modern China Cabinet

Great thinking, cabinet! I love your little gold feet.

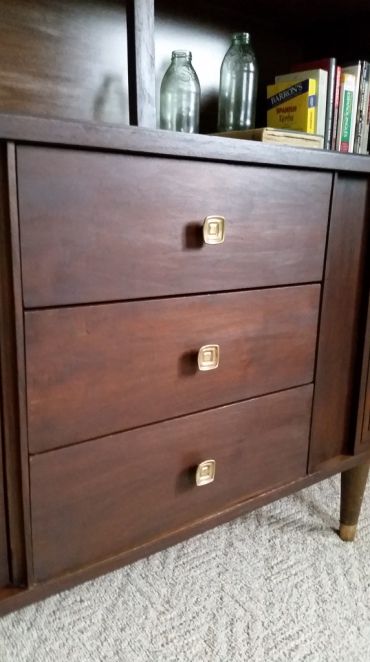
Here are the after pictures!

Mid Century Modern China Cabinet

Mid Century Modern China Cabinet

I love how much depth this stain has to it. It’s so rich looking, and it was very simple to use. I was shocked by the price of the stain when I bought it, but I hardly made a dent in the can. A little bit goes a long way, which I noticed even with the water based stain I’ve used on two other projects. And for an oil based stain, it didn’t have too much smell to it. I did have the windows open, though.

I was not compensated by General Finishes in any way for writing this post, and all of the opinions are my own. However, they did follow me on Instagram. score! 

Mid Century Modern China Cabinet Mid Century Modern China Cabinet

So what do you think? Did I make a good color choice? Would you say this is a proper restoration?

Eventually I think I would like to sell this baby, but for now I’m just going to enjoy the product of my hard work.

See You Around!

Lauren <3

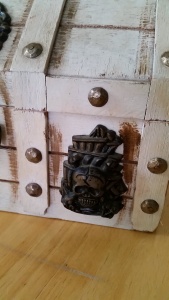
Treasure Chest – X Marks the Spot

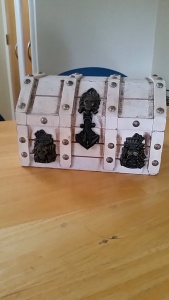
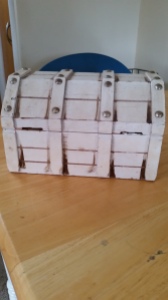
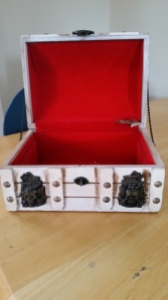
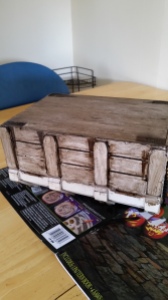
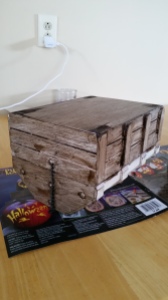
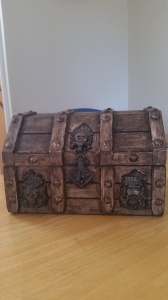
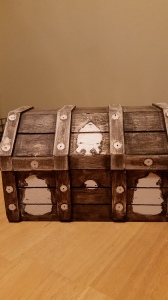
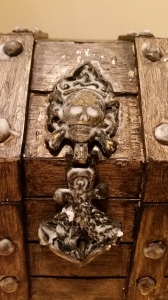
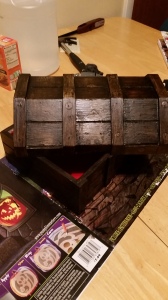
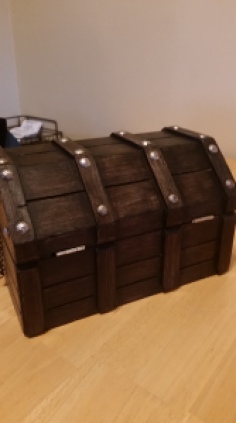
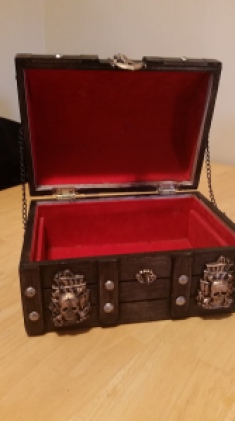
A while back I mentioned a treasure chest looking box I was restoring for a friend. I finally finished it and he was so happy with the way it turned out.

My advice to you is to avoid minuscule details AT ALL COSTS. Does this mean I’m suggesting you shouldn’t do projects with small details? YES. Are you going to want to do one anyway? Probably. In those instances where you (and I) are crazy enough to take on such a stupid thing, work smarter and minimize your frustrations.

At first I tried to work around the hardware because I thought I wouldn’t be able to get it off. Then I got really frustrated and realized maybe I should at least try taking it off. My life became SO much easier.

But anyway, here are some before pictures

Treasure Chest - X Marks the Spot Treasure Chest - X Marks the Spot

Treasure Chest - X Marks the Spot Treasure Chest - X Marks the Spot

A lot of people told me that they thought it looked okay beforehand. However, up close the stained areas look pretty whack and careless. The hardware definitely needed to be cleaned too.

Also, notice how the left hinge is missing and part of the felt in the box is messed up

The first thing I did was sand the box down really well. I didn’t bother going down to the wood because I figured the General Finishes stain would cover it up. This is what the box looked like after the first coat

Treasure Chest - X Marks the Spot Treasure Chest - X Marks the Spot

Then after the second coat

Treasure Chest - X Marks the Spot

I used a rag and tried to work around the hardware but I couldn’t get the stain to even out. At first I used q-tips to get the cracks (which I’ll admit was pretty resourceful), but it wasn’t getting the results I was looking for.

So then I said screw it and grabbed a screwdriver (no pun intended) and pried all the itty bitty nails off.

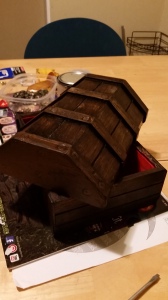
This is what the box looked like after I got all the hardware off and sanded it down some more.

Treasure Chest - X Marks the Spot

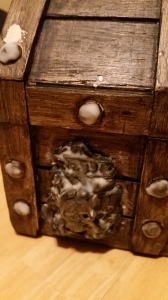
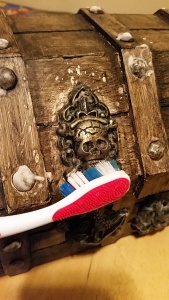
Before I took everything off I tried to clean the hardware with a baking soda and vinegar paste. Needless to say that was a pain in the ass. But I found it hilarious that I was brushing the skeletons teeth :p

Treasure Chest - X Marks the Spot Treasure Chest - X Marks the Spot Treasure Chest - X Marks the Spot

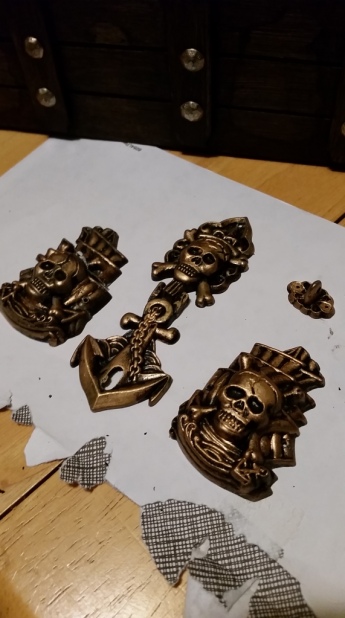
Once I took the hardware off I tried to soak everything in a baking soda and vinegar mixture then scrub the dinginess off. It wasn’t really achieving the look I wanted so I pulled out the Rub-N-Buff in antique gold. It looks soooo much better and still has some of the black showing through.

Treasure Chest - X Marks the Spot

Once I got the hardware off I also got foam brushes to make the stain look even and get in the cracks.

Treasure Chest - X Marks the Spot Treasure Chest - X Marks the Spot

I bought new hinges since one was missing and cut away the velvety liner along the two separate pieces to make it look cleaner.

Treasure Chest - X Marks the Spot Treasure Chest - X Marks the Spot

Here is the box after I put it all back together.

Treasure Chest - X Marks the Spot

This actually turned out to be a fun little project and I made some money on it which made it even better. Again I don’t recommend torturing yourself with tiny little detailed projects, but I GUESS it might turn out okay.

This summer hopefully I’ll be able to flip some furniture as well as doing furniture for friends and family on a larger scale than this box.

If you liked this post I would appreciate it if you would be so kind to pass it along.

See You Around!

Lauren <3


Antique Chair Revival

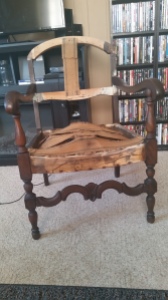
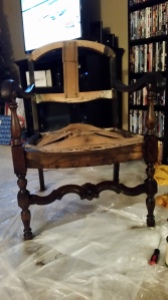
As I mentioned recently, I’m updating a chair for my mom, and the most difficult part was I could not save the old fabric as a template. This was challenging, but I will show you in this post how I reupholstered my chair without using a pre-existing template.

When I first got the chair I cleaned it and used some Restor-A-Finish on it. You can check out the first stages of that here.

Antique Chair Revival

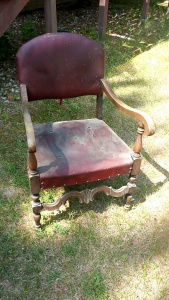
The picture above is what the chair looked like in the very beginning before I cleaned it.

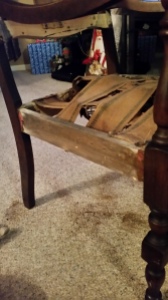
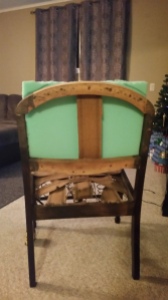
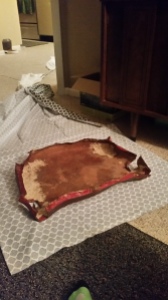
The next step in the process was to completely gut it and take all the old fabric off. There were a million and one nails on this thing and some of them were underneath a layer of fabric. This made it impossible to pull the fabric off without ripping it.

Another reason I couldn’t use the old material as a template is because it wouldn’t lie flat in order to cut the new fabric in the same way.

I also wanted to upholster the chair differently to leave more of the wood exposed. The old upholstery didn’t do the beautiful chair justice.

So, the point is it IS possible to reupholster a chair with no previous template to go off of. No matter what your reason is, I just happen to have a few. A lot of blog posts I read on reupholstering made it seem like “FOR THE LOVE OF GOD PLEASE SAVE THE OLD FABRIC OR YOU WILL DIE”. Which now having done this chair, that’s a hunk of bologna. You might cry, but you won’t die.

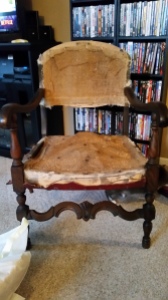
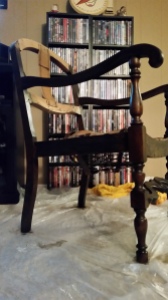
Anyway, so after I wrestled with this thing for a while the chair was down to this stage:

Antique Chair Revival

Underneath the upholstery there was a wool and straw filler. Below that it had burlap on the seat, backrest, and underneath (pictured above). I took this off because I would be adding a thick cushion, and the straw was all over it and messy.

Antique Chair Revival

Underneath the burlap was burlap straps. I left these on because they are the support of the seat which go over the springs on the inside. At this stage, I vacuumed the whole chair really well to get any dirt and straw that was leftover.

One strap wasn’t nailed down on one side so I stapled that back down.

The front and back of the chair wasn’t stained where the old fabric was, and the sides of the chair were sort of stained.

To make the color all look even I got a stain to match closely with the existing color and re-stained the whole chair. I went to my local store that sells General Finishes products, and apparently I’m lucky because there aren’t many retailers around here even in bigger towns. I told the lady about my project, and she helped me pick a matching finish that would work well. In the end, I chose Brown Mahogany in the water based stain.

Antique Chair Revival

Here is a picture where you can see the contrast with the stained areas.

To prep the chair for stain I sanded the whole thing down with 180 grit first followed by 220.

Antique Chair Revival Antique Chair Revival

After the first layer of stain you can tell that the unstained parts are starting to more closely match the rest of the chair.

When I went back over the chair the second and third times I only went over the areas that were lighter in order to try to get a more uniform look.

After staining, I was ready to cut my cushions. To do this I measured the width of the top part of the seat, and the bottom part of the seat because they weren’t the same length. I then cut on an angle from the top to bottom on both sides making a trapezoid.

For the back cushion, I first measured the highest part at the top of the backrest and the lowest part at the bottom. This gave me a rectangle. Then I held the cushion against the chair like so:

Antique Chair Revival

After I held the cushion up you can see where I made my marks with a sharpie. Then I took my box cutter and made the rounded top.

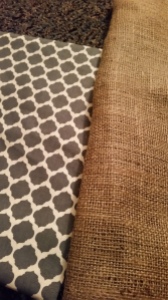
The next step after making my cushions is adding the fabric. I chose the gray patterned fabric for the seat and back.The burlap is for underneath and behind the chair.

Antique Chair Revival

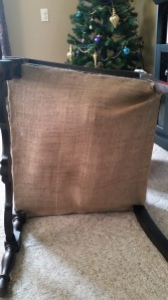
First I decided to upholster under the chair. To do this I had to cut out little squares where the fabric had to go around the legs. This reminded me of my high school math days and terrified me. You know those math problems where you have to find the area of a square with pieces cut out? That’s what this felt like at first.
Once I stopped being caught up on perfection and stepped back to think I figured it out as I went. Just hold the fabric up to the edge of the leg and make a mark where it needs to be cut. Or measure how long it needs to be.
Instead of cutting the whole piece I needed, I just measured and stapled as I went along and this made it pretty easy. I left enough excess to tuck the edge under so it was clean cut. My tip to you is to always air on the side of caution even if you measure the cuts. Cut less first and go back later rather than cutting too much to begin with.

I used this same technique to upholster the seat and back, with some adjustment to how I did the back.

Antique Chair Revival

Pictured above is the underneath of the chair reupholstered.

Antique Chair Revival

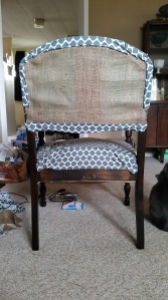
For the back of the chair, the first thing I did was cut out a chunk of burlap and stapled it to the back. To staple the fabric around the top of the chair I cut a piece that was approximately the right size leaving a little extra. This is the only time I used the old upholstery as a “template”.

Antique Chair Revival

Then I used a combination of tucking and stapling in the best way possible to get a tight, clean look.

The same thing with the seat in the back you can see a few weird folds, but that’s because there was no other way to get as precise of a look.

Antique Chair Revival

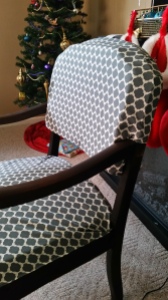
Here is the side view where you can see the combination of stapling and tucking.

Antique Chair Revival

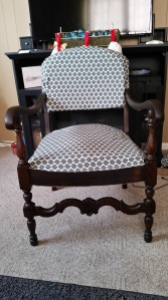
The finished view of the front! This is my favorite view.

Antique Chair Revival

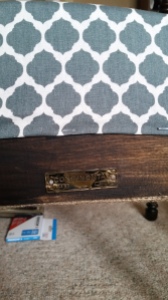
And I was even able to nail the original tag back on 🙂 I tried so darn hard to save that.

This thing was basically a giant pain in my butt almost the entire time I was working on it, but I am really happy to have restored a classic piece of furniture. I think I will take on some more upholstery projects in the future, but only if they are more simple to upholster.

Here is my materials list and cost breakdown:

  • Chair – Free!
  • General Finishes Water Based Stain in Brown Mahogany – $11.31
  • 1 yd burlap fabric – $4
  • 3 yds gray patterned fabric – $12/yd = $36
  • two 2 in dense cushions – $15/ea = $30
  • 5/16″ Staples – $4.23

This project in total would cost about $85, but I got some serious deals at JoAnn’s when I bought my fabric and cushions so it cost me a little over $60.

I delivered it to my mom when Chris and I went over to her boyfriend’s house for Christmas. She was so excited, and loves how it looks! I told her if she ever wants to get rid of the chair, it has to come back to me.

Antique Chair Revival Antique Chair Revival

The before and after still amaze me!

Would you attempt an upholstery project without a template?

See You Around!

Lauren <3

China Cabinet Makeover Plans & Poll

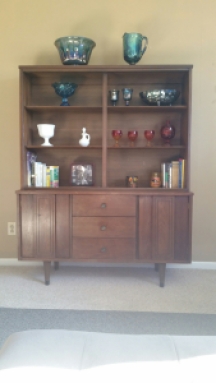
Recently I bought a china cabinet off of Craigslist, and I am now trying to decide the direction I want to go to restore it to it’s mid-century glory (possibly with a modern twist).

I’m so glad to have gotten this cabinet with very little hassle, and only a little bit of stress. I didn’t even have to drive far to pick it up either, which was a huge bonus.

China Cabinet Makeover Plans & Poll
She’s in pretty good shape, and I like her the way she is, but I feel like with a little elbow grease she could be totally fabulous for her age. Before I get into my plans (and you share your thoughts), let me show you the details.

China Cabinet Makeover Plans & Poll

First off this is a cabinet made by Stanley furniture or, as the label says, “Distinctive Furniture by Stanley”. I found a lot of other cabinets by them online which weren’t selling for a ton of money, but I didn’t find very many exact models as mine online that included prices. However, I did find a listing on eBay for around $600!! I think that seller might have been insane. I bought mine for $75. Maybe people just aren’t selling this cabinet.

China Cabinet Makeover Plans & Poll

There are two doors on the sides and three drawers in the middle. You can also see in this picture that the color is a little faded and not even. I love the lines in the doors, and the drawer knobs but they could use a little sparkle.

 imageChina Cabinet Makeover Plans & Poll

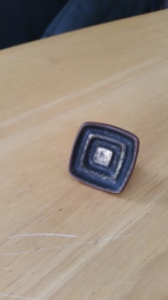
Here is a close up of the hardware and the faded coloring of the door.

China Cabinet Makeover Plans & Poll
In the first drawer is this nice separator for silverware. The other two are just plain old drawers.

China Cabinet Makeover Plans & Poll

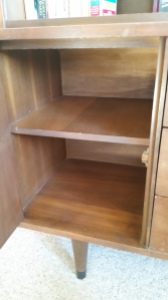
The cabinet on the left has this shelf, and the right cabinet does not have a shelf.

China Cabinet Makeover Plans & Poll

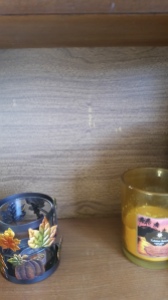
The back of the whole cabinet is a sheet of fake wood veneer 🙁

China Cabinet Makeover Plans & Poll

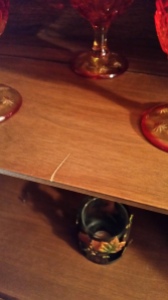
One of the shelves has this deep scratch which I will probably fill in

China Cabinet Makeover Plans & Poll

And the top has quite a few water ring stains.

The Plans

I know for sure I want to stain the piece using a gel stain by General Finishes. I’m not quite sure which color I want to use yet, but I’m leaning towards Java (a super popular color), Brown Mahogany, or Antique Walnut.

China Cabinet Plans and Poll
Photo Credit: The Weathered Door

This is an example of the java stain on a mid century credenza.

Brown Mahogony Brown Mahogany

Here are two examples of the Brown Mahogany stain. These examples also show you how much of a difference there can be between pieces depending on the wood and the amount of stain used. I’m assuming they only used one coat on the piece on the right, and two coats on the left. One of the reasons I’m having such a hard time deciding is because of the variation in all of the pieces I’ve seen.

This is an example of the antique Walnut from Niagara Furniture Painting.

All of these colors are pretty similar, so I’m not sure if it even matters which one I pick. I don’t want to stray too far from the original finish of the cabinet, and I don’t want it to be too dark. I do like the red tint that the cabinet already has in it, but I wouldn’t want much more. Also, I would like it if the grain was emphasized more than it is right now.

Now, the next decision I have to make is if I want to paint the back or not. Since the backing is a fake wood veneer I’m not sure how well it will take stain, or if it will end up looking too different than the rest of the cabinet since the grain is obviously different. I think painting the back a light gray would make the glass pop out more. I was thinking General Finishes seagull gray milk paint.

Seagull Gray Dresser
Photo Credit: Mary Beth’s Place

Seagull Gray

Last but not least I want to update the hardware with Rub N Buff Antique Gold

Antique Gold
Photo Credit: The Painted Chandelier

I think it will really make the hardware pop and show off that mid-century modern style especially if I achieve a distressed look and let some of the darker parts of the pulls show through.

Your Turn

so let me know what you think:

#1: The Stain

  • Java
  • Brown Mahogany
  • Antique Walnut
  • Another color?

#2 To Paint or Nah

  • Yes, paint the back
  • No, don’t
  • Yes, but paint it a different color

#3 Rub N’ Buff

  • Yes, use Antique Gold
  • No, don’t use it at all
  • Yes, but use a different color

Feel free to add any additional thoughts or give me other suggestions that I haven’t already mentioned.

See You Around!

Lauren <3