Updating Counter Tops with Spray Paint

The latest home project I tackled is updating my counter tops. As you can see my counters are a very common retro white with gold specks. The edges are very worn, and have stains and cut marks where someone (myself included) used the counter as a cutting board. For this specific project I decided to go with the ask for forgiveness instead of permission approach. I assumed my landlord would gasp at the concept of spray painted counters. I’ll admit it made me a little nervous at first too.

 Updating Counter Tops with Spray Paint | Flip This Rental Updating Counter Tops with Spray Paint | Flip This Rental

Spray painting counters is a cheap and great alternative to replacing them altogether. To begin, I cleaned the counters, let them dry, sanded them, wiped them down again, and let them dry while I was taping everything off. The supplies I used were:

Updating Counter Tops with Spray Paint | Flip This Rental  Updating Counter Tops with Spray Paint | Flip This Rental  Updating Counter Tops with Spray Paint | Flip This Rental

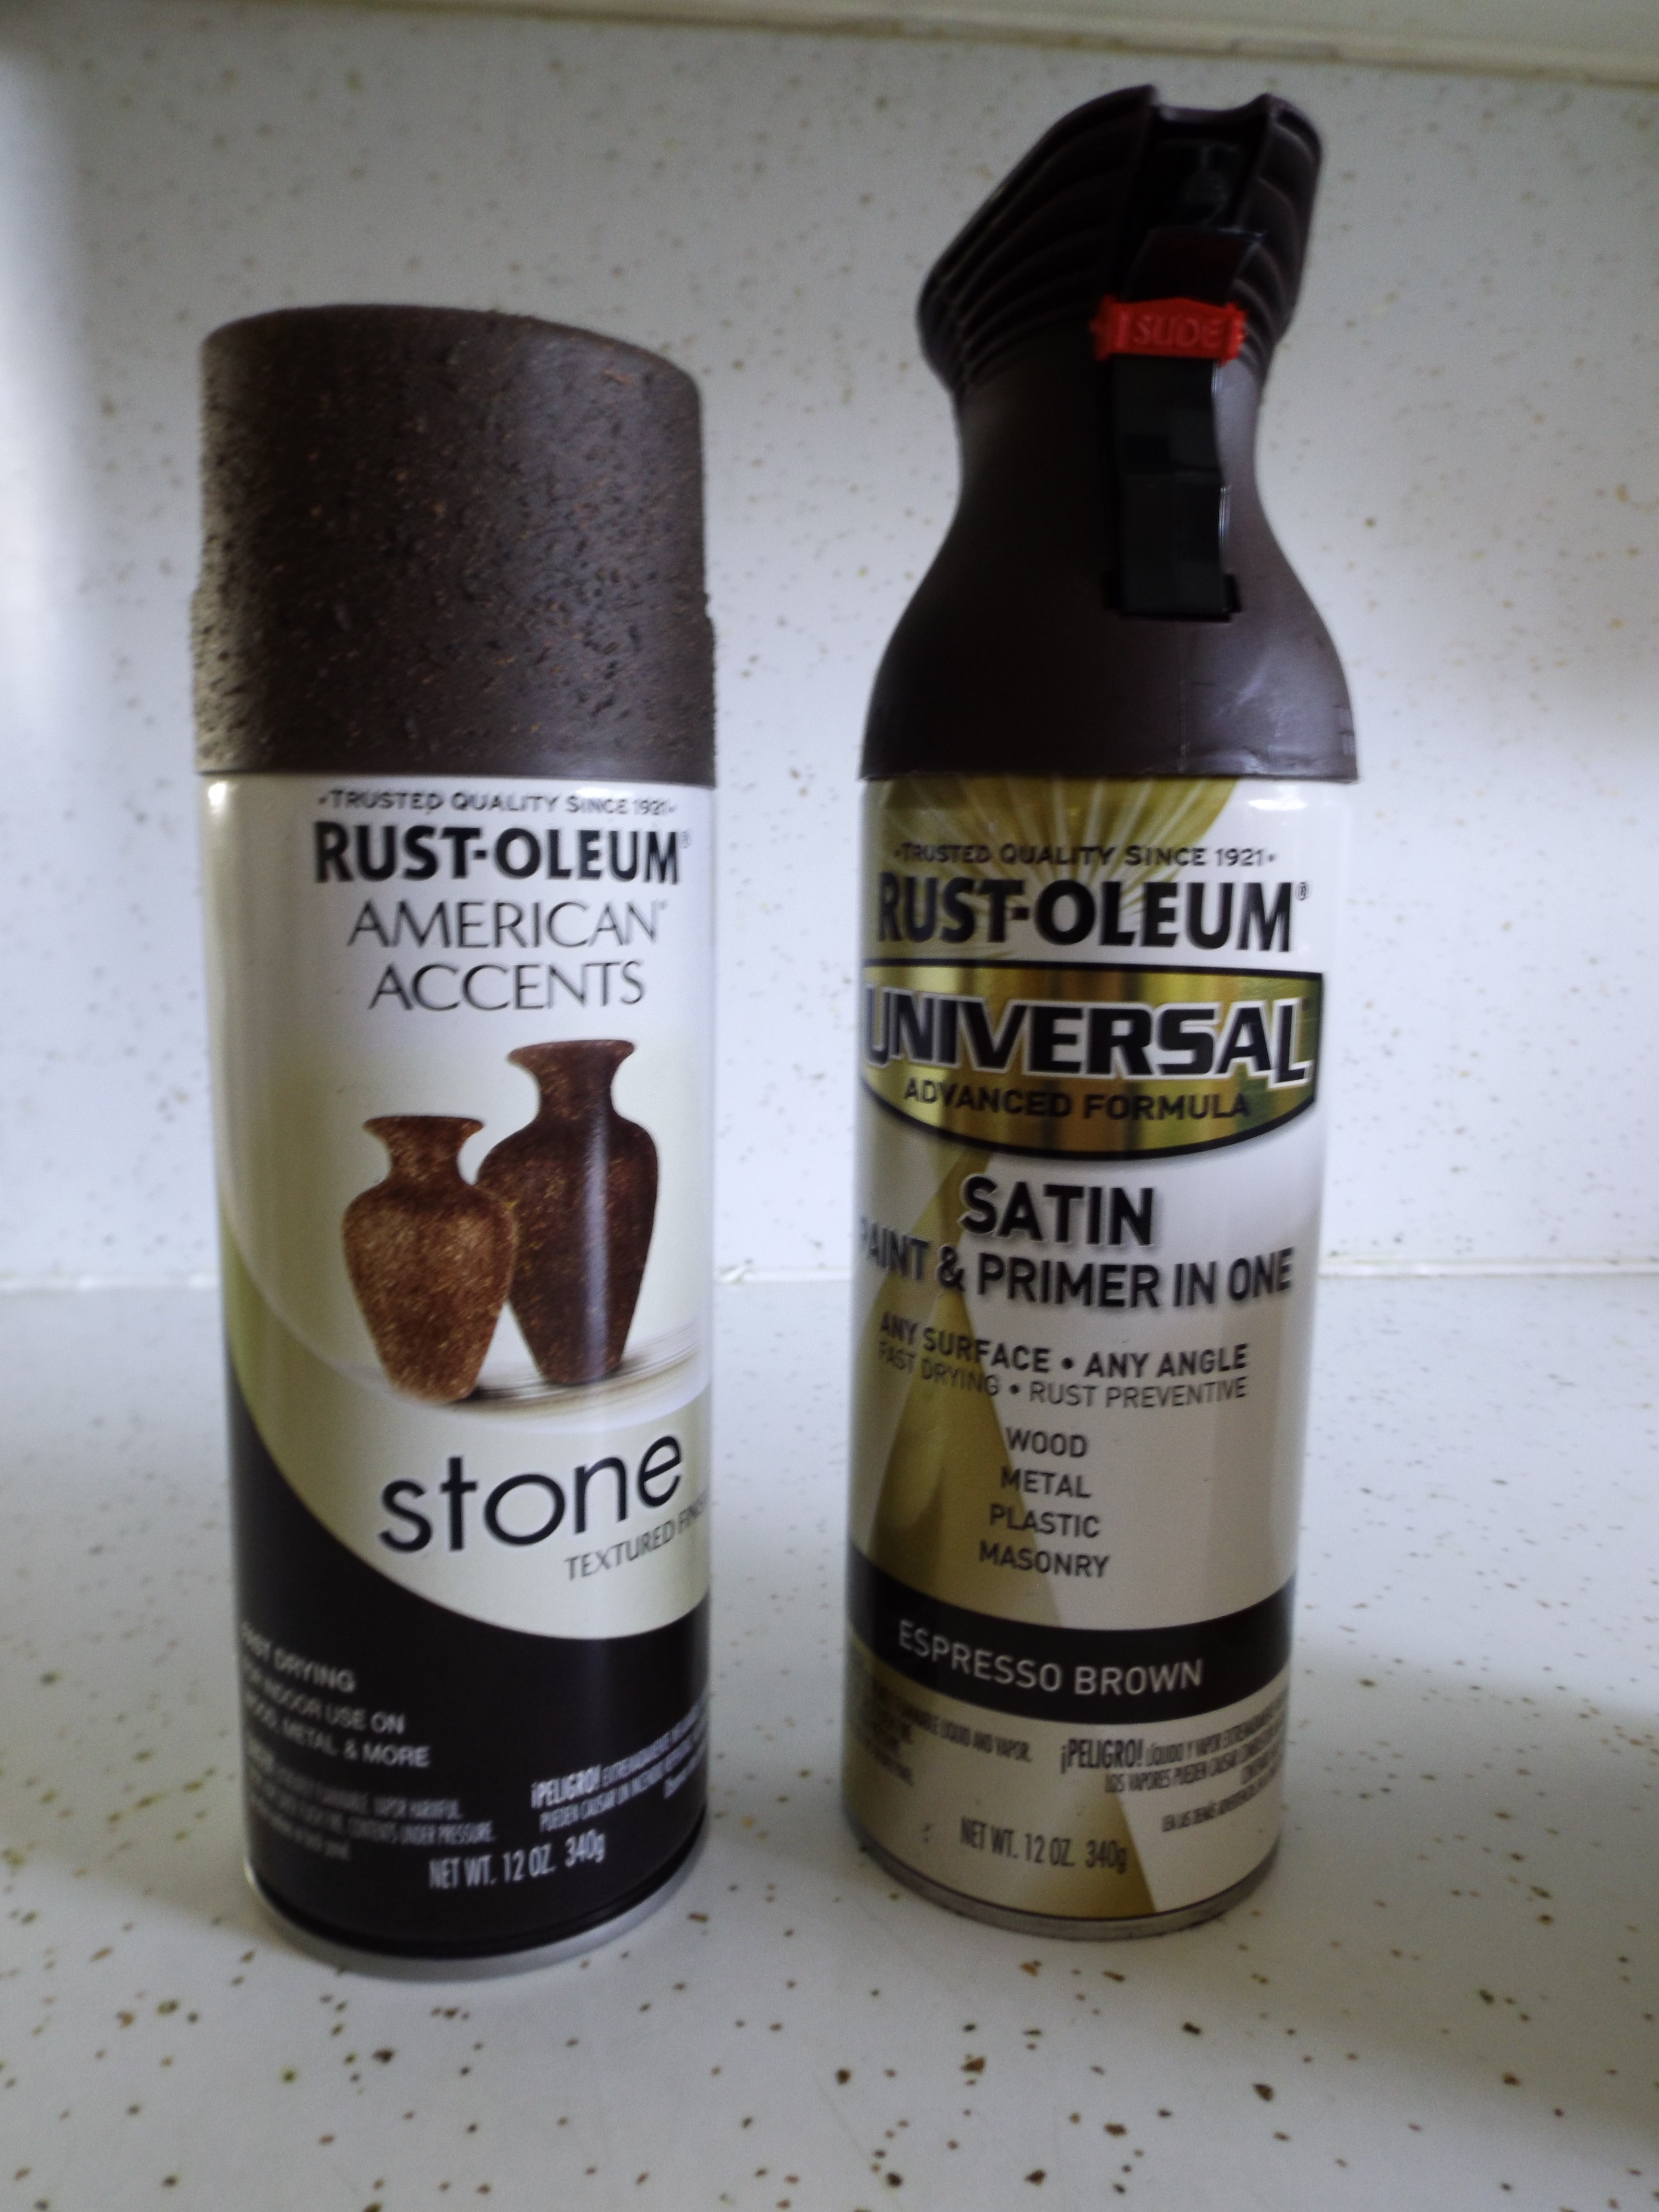
I had everything on hand already except the paint and the poly. I purchased two cans each of the paint and a 1qt can of poly. In the end I used 1 can of the primer/base coat and about 1 and a half cans of the textured paint.

After prepping the surface tape everything off that you don’t want to get paint on. I didn’t tape off my “backsplash” because I am eventually going to redo that as well. To tape the sink off I put painters tape along the edges of the stainless steel. Only get tape on your sink and not the counter (it’s kind of tricky) otherwise when you pull it off you will see the counter show through. I was told after the fact that you can lift the sink up a smidge without having to undo all the plumbing. That would’ve been nice to know! After I taped the edges I laid a piece of the plastic drop cloth over top. To tape it down I pulled the edges tight and then put tape on it so no paint would get in.

 Updating Counter Tops with Spray Paint | Flip This RentalUpdating Counter Tops with Spray Paint | Flip This Rental

When spray painting indoors make sure you have plenty of ventilation and take breaks often if the fumes start to get to you. If you cannot get proper air flow do not spray paint inside. I worked in small sections and went near a window during my breaks for some fresh air. Also, if you have any gas appliances nearby shut them off before you begin this project!!!

Now to the fun part! Begin by spraying a thin-ish layer of the primer/base coat. Let this dry again and put another thicker coat on to make the color even. Make sure to avoid puddles or drip marks on the counter. Once this is completely dry you can add the textured spray. Make sure to shake this often or the textured particles will settle at the bottom and the finish won’t be even. I did a few coats and some touch ups to achieve an even texture. As it’s drying it will look a little splotchy, so let it dry completely before deciding to do another coat.

Updating Counter Tops with Spray Paint | Flip This Rental Updating Counter Tops with Spray Paint | Flip This Rental

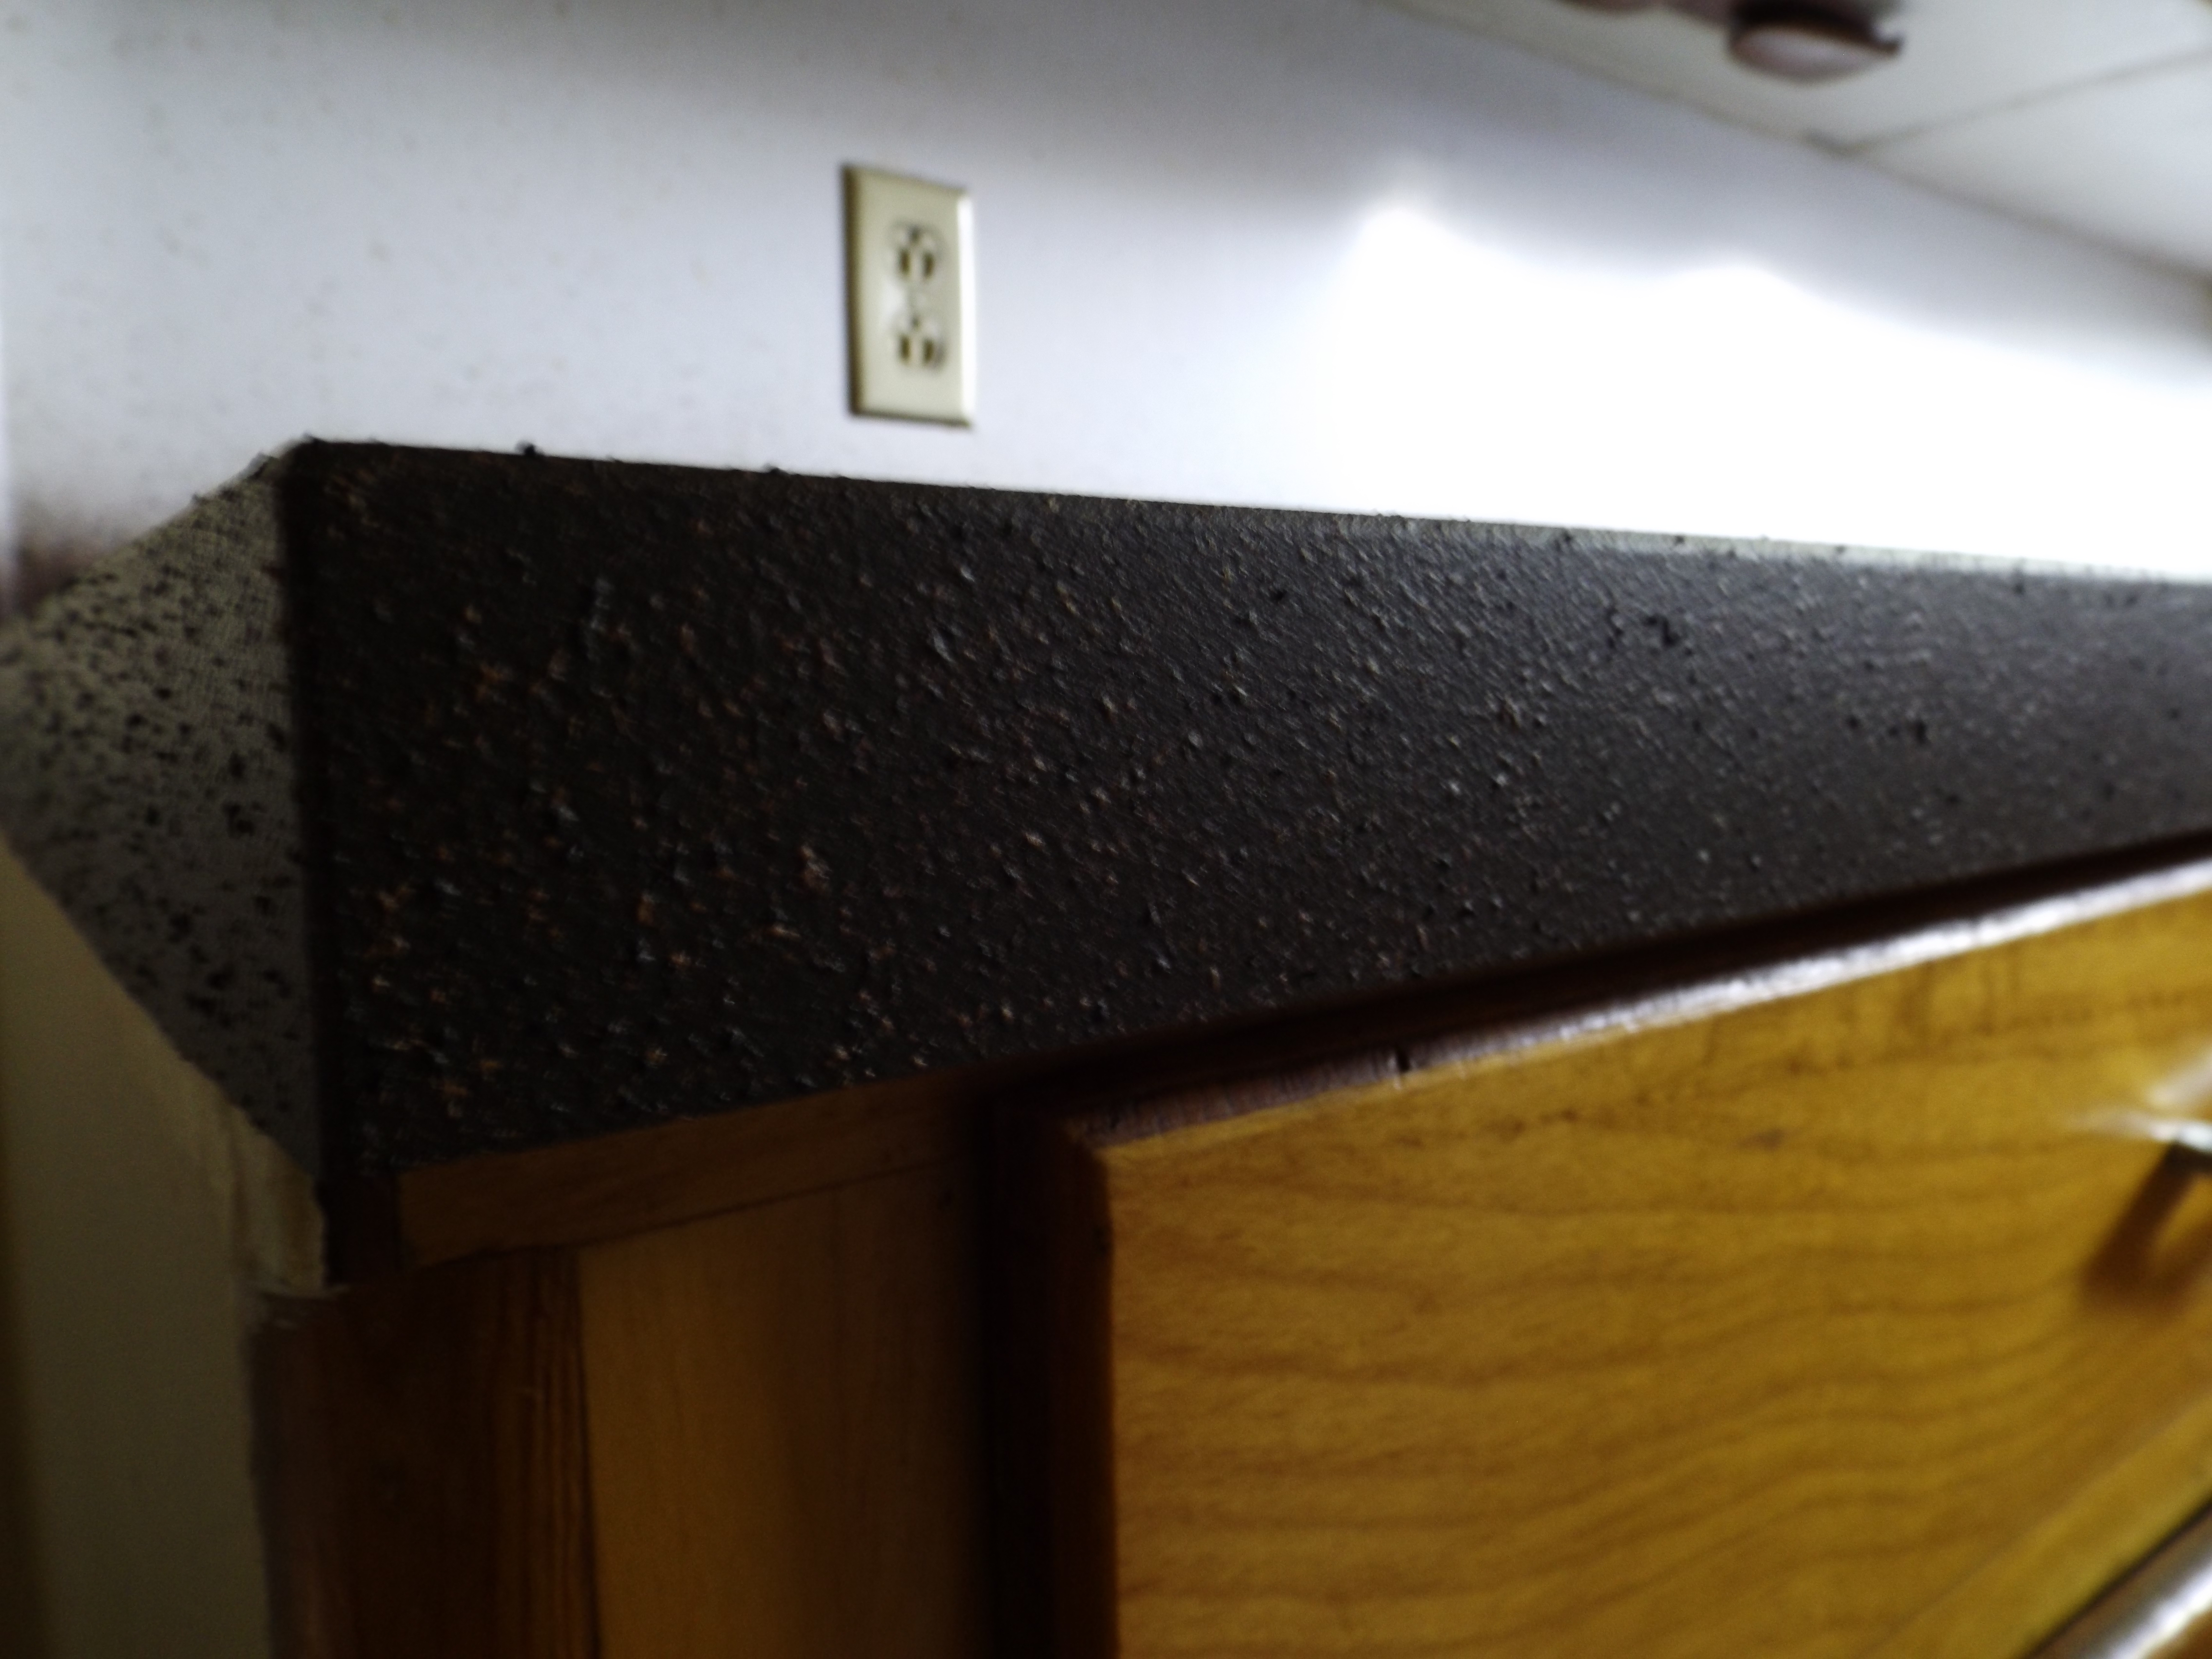
This is what the counters looked like before adding polyurethane, and an up close of the texture. I almost liked the way my cabinets looked for a hot minute after doing this update, but that minute soon passed and I once again envisioned white cabinets.

After letting the paint completely dry add the first layer of polyurethane. Let this dry for 3-4 hours and add another coat. I did 2 coats and I could still slightly feel the texture of the paint, which I liked. The directions said to sand in between coats to ensure an even finish, but I skipped that and it looks great. After the final coat of poly let sit for 24 hours before using the counters.

Here is the finished product!

Updating Counter Tops with Spray Paint | Flip This Rental Updating Counter Tops with Spray Paint | Flip This Rental

I absolutely love how the counters turned out and I cannot wait to add the backsplash and paint the cabinets. I was going to do paintable beadboard wallpaper, but my boyfriend’s dad might have some leftover tile that we could have fo FREE that would look nice in our kitchen. Comment below if you have any questions, want to let me know what you think, or just want to say hi!

Updating Counter Tops with Spray Paint | Flip This Rental

UPDATE: I went back and added a 3rd coat of poly because it was discoloring when wet. The color went back to normal once the wet spot dried but I was concerned that it would ruin the longevity of the finish.

UPDATE: Check out this post for an update on how my counters are holding up! (2/19/17)

See You Around!

Lauren <3

Prepping Cabinets for Paint – Step 1

Every time I go into my kitchen I let out a sigh of disappointment. My kitchen is really tiny, really grungy, and really outdated. I dream of having pretty white cabinets and counters that come clean. Here is what my kitchen looks like now so you can feel my pain and see how tiny it is 🙁

Prepping Cabinets for Paint - A Review of Mean Green | Flip This Rental

One day I realized that I can have pretty white counters and not so dreadful counter tops. I went digging on Pinterest for ideas on how to update cabinets, counters, and backsplash on the cheap. I decided it wouldn’t be too taxing to paint the cabinets since I don’t have a lot of them and the insides are already painted white (although they do need to be sanded and repainted *groan*).

The first step in creating a “work with what you’ve got” dream kitchen is degreasing cabinets thoroughly. This is an important step because if you don’t degrease then the paint and primer will have a hard time sticking and ruin your paint job, even if you sand. It would be tragic to put in all that work and still have it look like poop.

To degrease my cabinets I bought Mean Green Super Strength Cleaner & Degreaser. I usually DIY my own cleaners out of natural ingredients I keep on hand, but I had a feeling I would need something really tough since I was prepping the cabinets for paint. I like this product because it doesn’t have a powerful smell like most cleaning products and I didn’t feel like my hands were going to melt off if I got it all over. The degreaser was a fair price and I will definitely use it to clean other areas of my kitchen as well. The bottle doesn’t say that this specific product is for cabinets, but it worked great.

Prepping Cabinets for Paint - A Review of Mean Green | Flip This RentalTo degrease the cabinets I sprayed the cabinets one at a time with Mean Green and used a damp rag to scrub off the grime. The hot spots of my cabinets were the handles and along the sides of the doors/drawers. The faces of the doors weren’t too bad in most spots except near the stove and sink. It took me a few hours to do and not too much elbow grease. I didn’t keep close track of time but I would guess that time included trying to take pictures in my poorly lit kitchen. Now my cabinets are clean (but still ugly) and feel so much nicer to the touch.

Now some before and afters!

Prepping Cabinets for Paint - A Review of Mean Green | Flip This Rental Prepping Cabinets for Paint - A Review of Mean Green | Flip This Rental

Before                                                                           After

You can definitely see an improvement, and what’s left is imperfections in the wood

  Prepping Cabinets for Paint - A Review of Mean Green | Flip This RentalPrepping Cabinets for Paint - A Review of Mean Green | Flip This Rental

Before                                                    After

You can see the grime in the bottom left corner is gone and the hardware is sparkly clean. Having clean cabinets definitely shows how much abuse they have taken. Even better reason to paint!

Prepping Cabinets for Paint - A Review of Mean Green | Flip This Rental

This is after I cleaned and you can see the giant scratches and how faded the finish is on the wood

Prepping Cabinets for Paint - A Review of Mean Green | Flip This Rental

Here is my cat trying to help out 😉 Say hi Eleanor

Prepping Cabinets for Paint - A Review of Mean Green | Flip This Rental

And finally my clean cabinets in the limelight. What do you think of the color and weird grain of this wood? Are you tackling a similar project? Drop by the comments and let me know what you think!

If you liked this post, check out how I cleaned my cabinet hardware here.

See You Around!

Lauren <3