DIY Carpet Cleaning – From Drab to Shag {A Tale of the Dirtiest of Carpets}

Can I use shag to describe my newly cleaned carpets even though I do not in fact have shag carpet? I think so. Moving on. Cleaning my carpets is something I put on my to-do list for this month and in reality it has been on my wish list for a LONG time. I put it on an official to-do list because I’ve waited long enough and school is starting very soon. I don’t own a carpet cleaner so I had to borrow one from a family member. This is one of the reasons I had to wait so long.

I cleaned my carpets on a few different days. The first day I did my entryway/stairs, kitchen, dining room, and bathroom. The second day I did the second bedroom, and the last day I did the living room and master bedroom. These days totally were not consecutive. Whoops.

DIY Carpet Cleaning | From Drab to Shag {A Tale of the Dirtiest of Carpets} | Flip This Rental DIY Carpet Cleaning | From Drab to Shag {A Tale of the Dirtiest of Carpets} | Flip This Rental

Even though the lighting is different in these photos you can still see how much smaller and less noticeable the stain is. This was probably the dirtiest area in our whole house. Below is a view of the dining room from the living room. I might do this area again in the future because the nastiness isn’t completely gone 🙁

DIY Carpet Cleaning | From Drab to Shag {A Tale of the Dirtiest of Carpets} | Flip This Rental DIY Carpet Cleaning | From Drab to Shag {A Tale of the Dirtiest of Carpets} | Flip This Rental

When I first started cleaning the carpets I didn’t really see a huge difference in most of the spots. That is until I dumped the first bucket of dirty water. Ho-ly COW. I am shocked at how disgusting that water was, and there was sediment along the bottom of the bucket too. I even vacuumed before I started. My hypothesis is that the carpets don’t look much different because I only cleaned a surface layer of dirt off. There was so much grime that I couldn’t get deep into the fibers of my carpet. The areas I cleaned the first day took 3 or 4 gallons of water with about 2oz of cleaner for each gallon.

DIY Carpet Cleaning | From Drab to Shag {A Tale of the Dirtiest of Carpets} | Flip This Rental DIY Carpet Cleaning | From Drab to Shag {A Tale of the Dirtiest of Carpets} | Flip This Rental

The cleaner I used is Bissell Febreze Oxy Carpet Cleaner in the Hawaiin Aloha scent. I didn’t buy this product I borrowed it along with the carpet cleaner. The hyperlink goes to Walmart if you want more information on the product. Even though I couldn’t see too much of a difference on most spots on my carpet I definitely noticed a difference on how it felt when I was walking around on it. The carpet was kind of scratchy and grimy feeling before. Now it feels soft and my feet don’t pick up dirt as I’m walking around. Even right after I vacuumed my feet would still pick up pieces of dirt.

DIY Carpet Cleaning | From Drab to Shag {A Tale of the Dirtiest of Carpets} | Flip This Rental DIY Carpet Cleaning | From Drab to Shag {A Tale of the Dirtiest of Carpets} | Flip This Rental

Above is the one spot in my house that I avoid touching at ALL COSTS. You can see that it is between the shower and the toilet which to begin with means there will be water. Then you add on that this is also the spot where we keep the plunger and toilet bowl cleaner. AND ITS CARPETED. Pretty please don’t barf all over your computer or phone or whatever else at the thought of how gross that is.

I used the attachment on the carpet cleaner to get into this corner and I think it did a pretty decent job of getting a lot of the grime out. I think the edges along the wall and bathtub are stained that way for the rest of the carpet’s life. Originally, I wasn’t planning on cleaning the bathroom carpets since we will be tearing it out soon and replacing it with vinyl planks. If you haven’t heard about that yet check it out here. However, I don’t know when we will be replacing the floor and just in case it doesn’t happen for a while it would be nice to have clean carpets in the mean time.

  DIY Carpet Cleaning | From Drab to Shag {A Tale of the Dirtiest of Carpets} | Flip This RentalDIY Carpet Cleaning | From Drab to Shag {A Tale of the Dirtiest of Carpets} | Flip This Rental

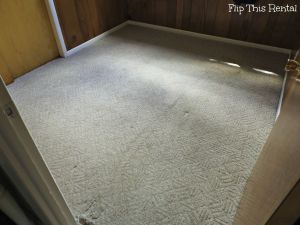
Little T’s bedroom before and after. Again, not much of a difference but you can see in the middle of the room on the left there was a dark spot that was removed (not just the lighting I promise :p).

DIY Carpet Cleaning | From Drab to Shag {A Tale of the Dirtiest of Carpets} | Flip This Rental DIY Carpet Cleaning | From Drab to Shag {A Tale of the Dirtiest of Carpets} | Flip This Rental

Another angle of T’s bedroom. You can see by the doorway there was a dark spot removed. I’m thinking maybe it wouldn’t have hurt to go over the spots more than once and use more water but I didn’t want the floors to be really wet and have to wait forever to put furniture back.

 DIY Carpet Cleaning | Bedroom BeforeDIY Carpet Cleaning | Bedroom After

At first glance in these pictures the room doesn’t look much different, but if you pay closer attention it almost looks like the carpet is yellowy in the first picture. I’m thinking that is actually due to the carpet cleaning since I edited both these photos the same and they weren’t taken very far apart. It looked cleaner in person anyway.

DIY Carpet Cleaning | Closet Side Before DIY Carpet Cleaning | Closet Side After

You can see in these pictures along the indent in the carpet a stain was removed. You can also see in these pictures how I got lazy and didn’t move all of the furniture. I would have if I had help but I was on a time crunch since I was moving out to my college apartment that night.

DIY Carpet Cleaning | Dresser Side Before DIY Carpet Cleaning | Dresser Side After

Again I think the carpet looks brighter in the after picture 🙂

DIY Carpet Cleaning | LR Angle 4 Before DIY Carpet Cleaning | LR Angle 4 After

The corner of the living room is much cleaner! The little black spot in the center was removed and the coloring of the carpet looks much more even.

DIY Carpet Cleaning | LR Angle 2 BeforeDIY Carpet Cleaning | LR Angle 2 After

Mostly in this picture it looks like it got worse but on the right hand side you can see it l looks more even. I honestly don’t know it looks worse in some parts???

DIY Carpet Cleaning | LR Angle 3 Before DIY Carpet Cleaning | LR Angle 3 After

From this angle you can definitely tell the carpet cleaner worked i’t’s magic. Right below the shadow of the couch on the left you can see a dirty yellowy area that I completely removed.

Well that’s the entire house! Add some furniture and you have a house tour 😉 Don’t worry I have one of those in the works. I almost felt silly at times writing this post because I knew what a difference the cleaning was making, but it just wasn’t showing up how I wanted in the pictures. Have you ever had a project that you felt great about but it just wasn’t translating on the blog scene? I think I also need to improve my picture taking skills so those fine details show through in photos. Let me know what you think!

See You Around!

Lauren <3

Antique Chair Makeover – Stage 1


So besides being a crazy youngster that enjoys doing daring things to her rental home without asking her landlord permission, I also enjoy buying old lousy furniture and dumping money and countless hours into it. BUT the final product tends to be somewhat decent so I usually am happy. I bought an old trunk from salvation army for $10 once and turned it into a table. It cost me 3X as much to fix it up but I get a lot of compliments on it so it’s okay.

I’m currently working on an old chair my mom’s boyfriend had lying around his garage, so they kindly donated it to me. I cannot for the life of me pinpoint when it was made and it’s driving me bonkers. I wanted to paint it white, distress it, and reupholster it but I have a soft heart for antiques and decided to restore it. I don’t have a place for it in my house so I’m fixing it up and giving it back to my mom for her birthday.

            Antique Chair Makeover - Stage 1| Flip This RentalAntique Chair Makeover - Stage 1| Flip This Rental

This is before I cleaned it. The wood is really worn and dirty, and the leather seats are really damaged. Poor thing needs some TLC 🙁 So far I think it’s made of dark walnut?? and that it’s really old?? maybe?

Antique Chair Makeover - Stage 1| Flip This Rental

I figured this tag on the back would make it a piece of cake to figure out how old it was, what it’s made of, and how much it’s worth.

WRONG-O. 

I searched for hours, dayssss and I can’t find a chair company/manufacturer, leather company, or anything based out of Detroit. Seriously, if you know anything about this chair tell me. Oh, it’s kind of hard to read but the right side says Detroit, Michigan 😉

The first thing I did with this chair is give it a good cleaning with some hot water, soap, and borax. The borax probably wasn’t necessary but I just love that stuff.

Antique Chair Makeover - Stage 1| Flip This Rental

He looks a lot better after a nice bath but he’s far from a shiny diamond of a chair. Sorry chair, you’re still a lump of coal. Next I used Howard Restor-A-Finish in Dark Walnut and #0000 Steel Wool to restore the color of the wood and hydrate it. The top of the arms are really faded. There were also several scratches on the wood and the Restor-A-Finish is supposed to hide them really well.

When using the Restor-A-Finish make sure to put a drop cloth or newspaper underneath your project or apply it outside. It’s very oily and I’m sure it would make a mess if it spills. Let me tell you this stuff makes a BIG difference. You almost can’t tell that the wood was so neglected.

 Antique Chair Makeover - Stage 1| Flip This Rental

 Antique Chair Makeover - Stage 1| Flip This Rental

Antique Chair Makeover - Stage 1| Flip This Rental

Antique Chair Makeover - Stage 1| Flip This Rental

I just love how rich the wood looks after using Restor-A-Finish. It really brings out the carved details in the chair as well. This product is really easy to use and a little goes a long way. I almost wish it came in smaller containers because I don’t really know what else I’ll use it on. Maybe that’s an excuse to buy more dumpy furniture 😛

Stay tuned for the next stage in this chair’s makeover. I’m scared to pull all that leather off!

See You Around!

Lauren <3

Prepping Cabinets for Paint – Step 1

Every time I go into my kitchen I let out a sigh of disappointment. My kitchen is really tiny, really grungy, and really outdated. I dream of having pretty white cabinets and counters that come clean. Here is what my kitchen looks like now so you can feel my pain and see how tiny it is 🙁

Prepping Cabinets for Paint - A Review of Mean Green | Flip This Rental

One day I realized that I can have pretty white counters and not so dreadful counter tops. I went digging on Pinterest for ideas on how to update cabinets, counters, and backsplash on the cheap. I decided it wouldn’t be too taxing to paint the cabinets since I don’t have a lot of them and the insides are already painted white (although they do need to be sanded and repainted *groan*).

The first step in creating a “work with what you’ve got” dream kitchen is degreasing cabinets thoroughly. This is an important step because if you don’t degrease then the paint and primer will have a hard time sticking and ruin your paint job, even if you sand. It would be tragic to put in all that work and still have it look like poop.

To degrease my cabinets I bought Mean Green Super Strength Cleaner & Degreaser. I usually DIY my own cleaners out of natural ingredients I keep on hand, but I had a feeling I would need something really tough since I was prepping the cabinets for paint. I like this product because it doesn’t have a powerful smell like most cleaning products and I didn’t feel like my hands were going to melt off if I got it all over. The degreaser was a fair price and I will definitely use it to clean other areas of my kitchen as well. The bottle doesn’t say that this specific product is for cabinets, but it worked great.

Prepping Cabinets for Paint - A Review of Mean Green | Flip This RentalTo degrease the cabinets I sprayed the cabinets one at a time with Mean Green and used a damp rag to scrub off the grime. The hot spots of my cabinets were the handles and along the sides of the doors/drawers. The faces of the doors weren’t too bad in most spots except near the stove and sink. It took me a few hours to do and not too much elbow grease. I didn’t keep close track of time but I would guess that time included trying to take pictures in my poorly lit kitchen. Now my cabinets are clean (but still ugly) and feel so much nicer to the touch.

Now some before and afters!

Prepping Cabinets for Paint - A Review of Mean Green | Flip This Rental Prepping Cabinets for Paint - A Review of Mean Green | Flip This Rental

Before                                                                           After

You can definitely see an improvement, and what’s left is imperfections in the wood

  Prepping Cabinets for Paint - A Review of Mean Green | Flip This RentalPrepping Cabinets for Paint - A Review of Mean Green | Flip This Rental

Before                                                    After

You can see the grime in the bottom left corner is gone and the hardware is sparkly clean. Having clean cabinets definitely shows how much abuse they have taken. Even better reason to paint!

Prepping Cabinets for Paint - A Review of Mean Green | Flip This Rental

This is after I cleaned and you can see the giant scratches and how faded the finish is on the wood

Prepping Cabinets for Paint - A Review of Mean Green | Flip This Rental

Here is my cat trying to help out 😉 Say hi Eleanor

Prepping Cabinets for Paint - A Review of Mean Green | Flip This Rental

And finally my clean cabinets in the limelight. What do you think of the color and weird grain of this wood? Are you tackling a similar project? Drop by the comments and let me know what you think!

If you liked this post, check out how I cleaned my cabinet hardware here.

See You Around!

Lauren <3