DIY Ceramic Tile Backsplash

Today is the day I share with you our brand new tile backsplash, and the steps it took to install it. Our kitchen is yet another step closer to being awesome, and it almost doesn’t visually suck anymore.

We were very lucky to get most of our materials free. Below are the list of materials you would need. The only things we had to buy are the items I indicated with a price. Clicking the material links will take you to sources of where to purchase/ where I did purchase the items.

Materials:

My Project Cost:  $37.50 (Accounting for selling the joint compound leftovers and not accounting for sales tax)

Project Value/Potential Cost: $251.53

NOW. The cost will vary depending on the type of materials you buy, and what tools you already own. I just wanted to see with the almost exact products I used, including their sizes, how much this project could have cost me.

If you missed my post of how I prepped my walls check that out here.

I mentioned I was going to explain how we filled in the hole in our backsplash wall, but I can’t really do that because Chris did it without me. Not complaining, but he didn’t take pictures and he didn’t really explain it to me very well. But, I’m assuming most people don’t have that issue and it’s mostly a case by case thing anyway.
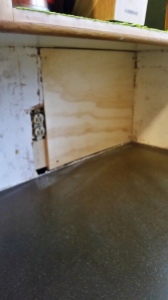
DIY Ceramic Tile Backsplash

The next thing I did was lay out several tiles in my pattern on the counter. This way after we put the mastic on the wall we wouldn’t have to scramble to get tiles up, and it would help us engrave the pattern into our brain.
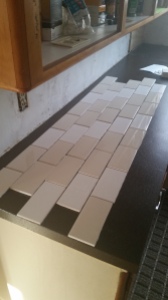
DIY Ceramic Tile Backsplash

DIY Ceramic Tile Backsplash

As we went along we used 1/8″ spacers in most places to keep everything even. In some places we didn’t use them because the tile cuts weren’t 100% even so it looked a little weird using a spacer, or the spacer wouldn’t stay put.

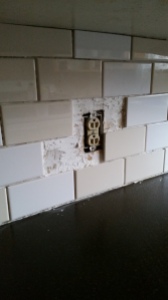
You can see in the picture above that we just tiled around the outlets. This is because we didn’t have the proper tools to make the types of cuts we needed. This can sometimes be avoided by laying out a pattern in a way that doesn’t have weird cuts.

We left all the spots around the outlets without tile, and took tiles to Chris’s brother’s house to have him cut them (since he had the right tools). Afterwards we then reapplied some mastic on the wall and to the tiles.
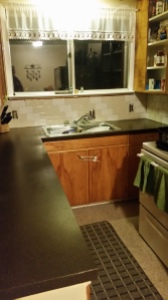
DIY Ceramic Tile Backsplash

Here is what the tile looked like from a distance once we put it all up.

Then we let it sit for longer than the recommended amount of time before we grouted. We definitely did not choose the best timing to decide to grout. It was around 11:00 PM when we started. We would’ve done it during the day but Chris had Little T over night and we had to wait until he went to bed. 2 year old boys are not very good at entertaining themselves when house work is going on.

Another problem we ran into was rock hard grout. We had to chisel away at the chunk to get usable grout which ended up having little chunky pieces even after we mixed it with water.

If we had started doing this during the day we would have said screw it and just went to buy a new bag of grout but we were tired, wanted to get it done, and it was so late so nowhere close was open. This made it a pain in the behind to apply, but overall didn’t really hinder the way the grout looked.
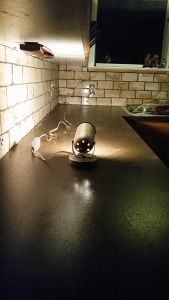
DIY Ceramic Tile Backsplash

Here’s the grout right after we applied it and before we wiped anything off. Do you like our light strategy? We had to be super quiet because our house only has one heat source and we couldn’t shut Little T’s door all the way because it would get too cold in his room. So instead of turning the kitchen light on and risking waking him up, we just used this and moved it around.
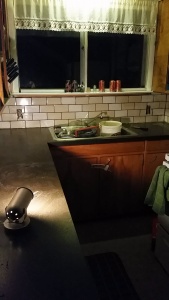
DIY Ceramic Tile Backsplash

This picture is after I wiped everything down with a damp cloth to clean the grout lines up, but not necessarily to get the tile perfectly clean (I have yet to do that).
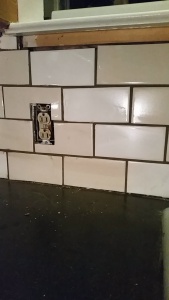
DIY Ceramic Tile Backsplash

Here is a close up of an area that I got pretty clean.

I really liked the light look of the tile without the grout, and I was a little nervous about what the tile would look like with the dark grout. However, I really like the way it turned out! I think it goes quite nicely with the counter tops and the tile doesn’t stick out as being too modern.
DIY Ceramic Tile Backsplash

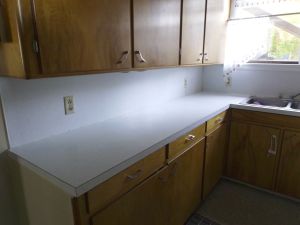
As a reminder that is what the kitchen looked like originally.
DIY Ceramic Tile Backsplash

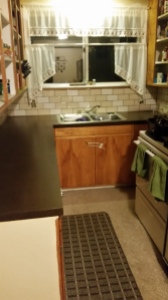
This is what it looks like now. It’s a little discombobulated, but with some new flooring and painted white cabinets it will look prim and proper.

My main suggestion would be to make sure your materials aren’t going to cause you any headache. I’m all about reusing materials so they don’t go to waste but I think I much rather would have bought new grout. Cutting the tiles wasn’t a bad choice, but it was a little nerve wracking that everything wasn’t completely straight as this was my first time doing tile.

The most frustrating part was trying to find the right time to do the project, and I could have benefited from slightly better planning. Overall, I’m satisfied and this was a much needed update.

Have a good holiday, and see you around!

Lauren <3


Thrifty Bathroom Storage

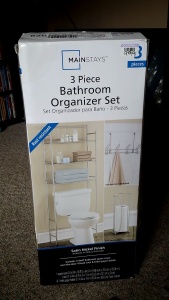
My bathroom is pretty small, and seriously lacking in the storage department along with the rest of my house. I’m a total storage and organization nerd, and I would spend SO much money on storage if I could. But since I can’t, I’m always looking for thrifty ways to get the same effect. The other day Chris and I were at Goodwill, and he spotted this 3 piece bathroom organizer for only $10!! Thrifty bathroom storage for the win!

Thrifty Bathroom Storage #thriftstorefinds #goodwill Thrifty Bathroom Storage #thriftstorefinds #goodwill

I found the exact same thing in the $30 range online!! For some reason I couldn’t find this exact thing on Wal-Mart’s website. Maybe they don’t sell it anymore? In that case this piece is a collector’s item 😉 I was a little nervous to buy it at first because I thought maybe some of the pieces were missing. The box was taped really well, but I was able to peek inside and see that the pieces were still in the plastic bags. So, we decided to take a chance on it.

Thrifty Bathroom Storage #thriftstorefinds #goodwill

When I got all the pieces out I found half of the directions and got scared until I found the other half. Nothing a little tape can’t fix!

Thrifty Bathroom Storage #thriftstorefinds #goodwill

After I fixed the directions I pulled all the pieces and was making sure they were all there. And then I came across this…

Thrifty Bathroom Storage #thriftstorefinds #goodwill

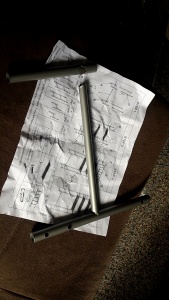
You can’t really see it on the paper, but this is supposed to be one piece. I don’t know what happened but there are two of these parts, and both of them were broken. I put the rest of the shelf together while I figured out how to fix these pieces. They went on top so they weren’t necessary, but it would be better if they could be used.

Finally I remembered some sort of welding stuff that came in a tube. I had seen it on Pinterest before but couldn’t remember exactly what it was. When Chris came home from work he told me it was called JB Weld and he already had some! 😀

Thrifty Bathroom Storage #thriftstorefinds #goodwill

It comes in two tubes. One labeled hardener and one labeled steel. He just mixed a fair amount together (equal amounts of both) on a piece of cardboard and applied it to each broken piece. We let it sit over night and it was all fixed!

Thrifty Bathroom Storage #thriftstorefinds #goodwill

Not the prettiest repair job, but it’s fixed and it’s not very noticeable when the shelf is all put together.

Thrifty Bathroom Storage #thriftstorefinds #goodwill

I’ll have to figure out what all I want to store on here, and how to style it but for now I’m just happy to at least have a place to set things 🙂 I want to store towels on it, but most of the ones we have are stained and ugly. That’s another thing I need to invest in.

Have you ever ran into a thrift store disaster, or had a close call? What was your favorite thrift store find?

See You Around!

Lauren <3
Bathroom Tour and Project Plans

I am slowly working on creating a home tour which will include before and after pictures of my house as well as explanations of what I plan to do to the house in the future. This page will be “living” so to speak and will constantly be changing as the house changes. Throughout this process I will try to post reveals of rooms that have had a significant amount of change to them along the way.

Today I am going to share my bathroom with you! The bathroom is one of my favorite rooms in the house because at a glance it looks crisp and clean. On the other hand there are still some issues with the bathroom that need to be worked out.

Bathroom Tour and Project Plans

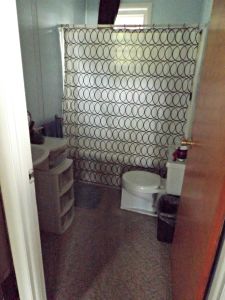
Here is the view of the bathroom before you walk in. I know what your first impression is: mmmm carpet in the bathroom! Yes, it is horrifying and it should be gone soon! Chris and I have flooring to replace the carpet. We just need the gusto to get it done and a few more supplies. Read more about that here if you so choose (and haven’t done so already) 🙂

Bathroom Tour and Project Plans

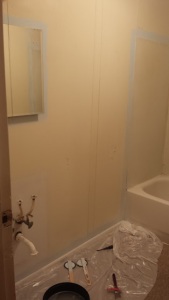
The main things that changed in the bathroom since we’ve lived here are painting the walls and getting rid of the old sink. Those projects were pre-blog days, and sadly I don’t have before pictures of the sink. However, I did find a picture of the walls while we were in the process of painting!

Bathroom Tour and Project Plans

Holy ew, right?! I don’t think the walls were painted a light yellow because the rest of the house was painted plain white. The color of the walls basically blended in with the plastic on the shower, and now it is a stark contrast as you’ll notice in the photos further down.

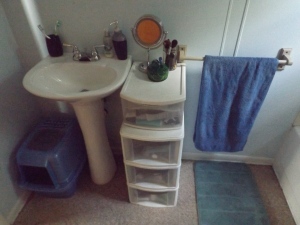
The sink was about from the wall on the left to halfway through where the plastic drawers are now. It was retro like my kitchen counters, and the shelf inside the cabinet was rotting out. We lost the storage in the bathroom (which wasn’t useful because of the rot) but we gained a lot more space in the tiny bathroom. I would like to add some shelving to the bathroom above the toilet to gain some of the storage back. We bought the pedestal sink unused at a thrift store for $60 which the landlord reimbursed us for.

Bathroom Tour and Project Plans

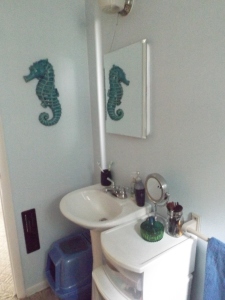
In this angle you can see the mirror which has a small medicine cabinet as well as the light above it.

I actually like the light and I think it looks vintage (in a cool way), but it needs a good cleaning and the hardware needs a coat of spray paint.

Oil rubbed bronze anyone? 😀 I spray painted the vent in flat black because it was rusty and nasty looking. The little sea horse is from TJ Maxx – gotta love that place <3 I want to add a hook below the sea horse for a hand towel

Bathroom Tour and Project Plans

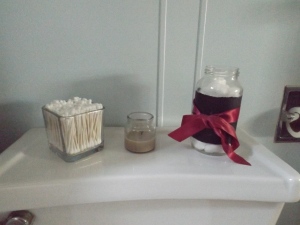
Here are what I call the toilet accessories. The q tip holder is a reused candle jar, and the jar with cotton balls is an old spaghetti sauce jar that I painted with chalkboard paint and added a ribbon. The candle is called coastal woods by Mainstays and it smells fantastic by the way 😉

Bathroom Tour and Project Plans

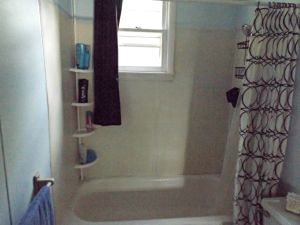
Now for the not so pretty parts. The tub surround is made of plastic sheets and they are stained yellowy. They may have even come in an off white tan ish color, but either way it doesn’t look good. I have been able to get it cleaner using a homemade shower cleaner that uses vinegar, but it’s not anywhere near my standards. The caulking was also done very sloppily and is coming off in some spots around the tub.

Because there isn’t a fan in the bathroom moisture has caused some damage. The paint is peeling and cracking on the window as well as the ceiling. The ceiling is textured and I would love to get rid of it. I would like to add frosted contact paper to half of the window, and take the curtain down. This way there is always natural light coming in, but no one can see into the shower. It would also be epic to add a bathroom fan, but who knows how much that would cost or if the landlord would pay for it.

Bathroom Tour and Project Plans

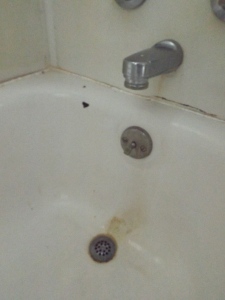
Here you can see the staining and messy caulk. You can also see a chip in the tub’s finish, and there are a few more in other spots of the tub. Funny story – there is a chipped spot in the back of the tub on the bottom and for the longest time whenever I would be getting in the shower and already had taken my glasses off I would think it was a spider. I had to put my glasses back on and double check it wasn’t a spider. Silly me. I would love to refinish the tub with a rustoleum kit as well as tiling the tub surround. Tiling the tub is probably a long shot though…

Bathroom Tour and Project Plans

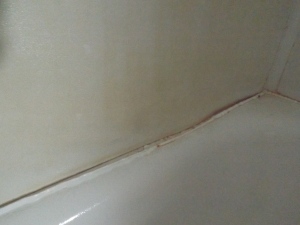
I don’t know how this happens but the surround pulled away from the caulk instead of the caulk coming apart. Either way I can’t imagine that’s very good for the wall behind the plastic sheeting.

Well, there’s my bathroom for you! It’s not as glamorous as I would like, but the projects we’ve done so far haven’t cost much money and the decorations were all relatively cheap as well. Once we put the new floor in then I will be much happier with it. The shower is really rough, but at least that can be hidden with a shower curtain.

What do you think of the space? I would love to hear ideas on creative storage solutions! Are you excited to see more room tours and the Home Tour Page?

Thanks for stopping by!

Lauren <3

The Easiest Pallet Headboard That Ever Existed

Recently, Pinterest created a lot of buzz about reclaimed wood and pallet furniture . So, I wanted to get my hands on some pallets and see what all the craze was about. The first project I wanted to do was create a simple headboard for my apartment bedroom. As you may have already seen here, my apartment has white textured walls and in order to make a cozy space I needed to add color as well as more visual interest.

My goal with this project was to not spend any additional money, and I also wanted a piece that I wouldn’t feel bad trashing once I moved out of my apartment. A pallet was perfect because you can find tons of them for free, and upcycling gives them an extended life.

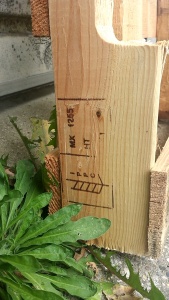
To begin any pallet project you need to make sure they are safe to use. This post helped me learn what the different markings on a pallet meant, and which markings meant a pallet was unsafe to use. Below is a picture of the stamp on my pallet:

Flip This Rental | The Easiest Pallet Headboard That Ever Existed - Pallet Markings

The label marking on the left side is the stamp of the International Plant Protection Convention (IPPC) and this stamp means the pallet is up to the IPPC’s standards (read the linked post above for more details). The upper right marking MX 1255 is the country code (Mexico) followed by the registration number of the supplier. Below that, HT means the pallet was heat treated opposed to MB – treated with Methyl Bromide. Do not use pallets with an MB stamp!

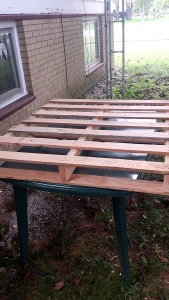
After making sure my pallet was safe to use I began using a palm sander to smooth out the pallet. Using that thing didn’t last long! There was either something wrong with it or I’m just a weakling. It was bouncing all over and made my hand tingle way too much. So instead I decided to switch over to the good old fashion non-electric sanding block. A headboard doesn’t need to be baby butt smooth either, so a regular sanding block worked just fine. I sanded it just enough to make sure I wouldn’t get any slivers. This is how my pallet looked to start:

Flip This Rental | The Easiest Pallet Headboard That Ever Existed

To add color to my pallet I decided to use leftover Howard Restor-A-Finish in Dark Walnut from this project instead of buying a stain. To apply the finish you can just use an old rag or use steel wool. Fine steel wool is typically used to buff out scratches in wood that is being restored. I used steel wool since I had quite a bit and I didn’t know if the Restor-A-Finish would stain my rag or not. We don’t have a lot of crappy rags around our house and I didn’t want to risk it ;).

Flip This Rental | The Easiest Pallet Headboard That Ever Existed

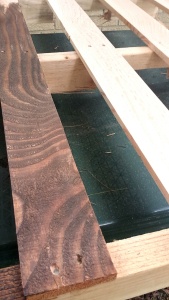
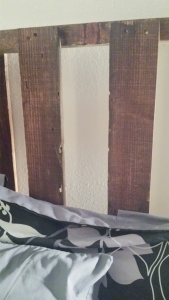
Above is a close up of the contrast between the wood with finish and without. I really like how the finish emphasized the grain in the wood which will add visual interest for my room.

Flip This Rental | The Easiest Pallet Headboard That Ever Existed

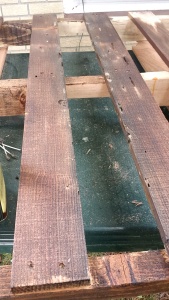
You can especially see in the board on the right in the above picture that there are little holes and imperfections in the wood. I used Q-tips dipped in the finish to get into the little crevices. it worked really well, but I went through quite a few Q-tips because the finish drained out of them really quickly.

Flip This Rental | The Easiest Pallet Headboard That Ever Existed

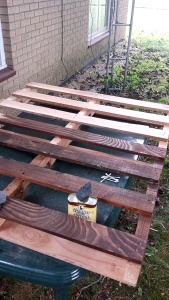
Here is a farther back picture of the difference between with and without finish.

Flip This Rental | The Easiest Pallet Headboard That Ever Existed

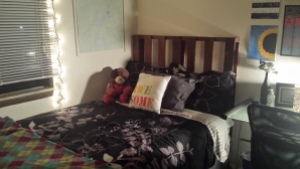
Here is the finished product up on my bed! This project was so simple I really could not have asked for it to go any smoother. To get the headboard up I pulled my mattress out a little and the frame stayed put. I simply set the headboard on top of my bed frame. Once I pushed my mattress back the pallet wobbled a little, so I stuck two command strips on the back of each side to keep it held against the wall.

Now I will share some complimentary glamour shots 😉

 Flip This Rental | The Easiest Pallet Headboard That Ever Existed Flip This Rental | The Easiest Pallet Headboard That Ever Existed Flip This Rental | The Easiest Pallet Headboard That Ever Existed

As soon as I got the headboard up on my bed I was so giddy. I can’t believe how easy this project was and it looks great! I absolutely love how the wood looks worn in some places. It has a rustic barn feel to it. I have two more pallets at home and I already have ideas for them! I’m not sure how soon I can tackle those projects, but I’m definitely excited to get started.

See You Around!

Lauren <3
Pssst.. If you liked this post don’t forget to share it!

Flip This Rental – College Style

Now that I’ve been settled in to my apartment for almost two weeks I figured it’s time to give you a little tour of my bedroom! The main goal with my room was to fill as much of the wall space with color as I could. I ordered a tapestry from Amazon and it practically fills up my entire East wall. To the right of my wall I hung a big map from my kayaking trip last summer.

Flip This Rental - College Style | My Apartment Bedroom

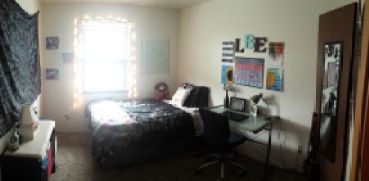
Above is the panoramic view of my room. I was standing in the doorway when I took this picture. As you can see the room isn’t huge, but it’s a decent size.

Flip This Rental - College Style | My Apartment Bedroom

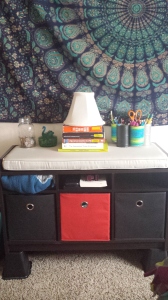
This is supposed to be an entryway bench but I use it to store jeans, pajama pants, and leggings. I put the bench on risers so it would be easier to grab stuff and I wouldn’t have to bend way over. It also makes it blend in with the room better because all of my furniture is about the same height. On top of the bench I have my textbooks, a jar of change, my jewelry holder, and upcycled cans used for holding pens, pencils, and what not. The lampshade is for a future DIY project.

Flip This Rental - College Style | Small Gallery Wall

This is my small gallery to the left of my window. Once I print out pictures I will add them here to fill in the spaces.

Flip This Rental - College Style | Bed Details

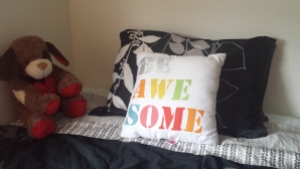
Here are the little details on my bed. I love the idea of having basic black and whites and adding splashes of color with artwork and small objects. The puppy was a valentine’s day present from my boyfriend and he keeps me from getting homesick (yes I know that sounds childish).

Flip This Rental - College Style | Desk Decorations

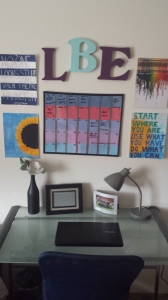
Everything you see in the gallery above my desk is a DIY I made. I made my calendar from a cheap poster frame with paint samples and washi tape to divide up the days and weeks. I write on it with a whiteboard marker. The vase is a spray painted wine bottle with “flowers” made from melted CD’s and gold wire.

Flip This Rental - College Style | Bedroom Closet

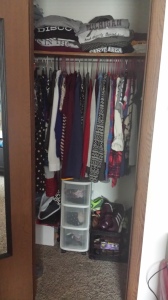
My closet isn’t very pretty but for now it’s pretty functional. I have two different sets of drawers for more clothes and the black bin is all my extra shoes. To the left is my laundry basket, a box full of sweaters, and on top of that I have a bag full of purses I’m currently not using and other bags. On the shelf I fold all my sweatshirts, t-shirts, and tank tops as well as extra sheets for my bed.

Flip This Rental - College Style | Easy Scarf Storage

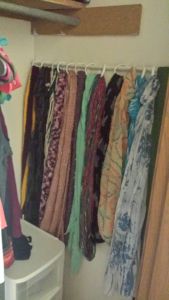
This is my scarf rack inside my closet. I made this by putting two command hooks on each end and using a curtain rod. Most of the scarves are hung up with shower curtain rings. I didn’t quite have enough otherwise they’d all be hung on rings. The winter fluffy scarves are towards the back and the lighter scarves are in the front.

Flip This Rental - College Style | My Apartment Bedroom

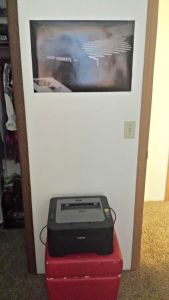
I keep my printer on top of this storage ottoman. In the ottoman are random things for hanging pictures and just stuff I don’t use on a regular basis. Below the Arctic Monkeys poster I plan on hanging two sheets of paper. One will have all of my professors office hours and contact information, and the other paper will have the detailed goals that I set for this semester. When I took this picture I just realized the trim on the closet and the trim on the door are different colors and grain :’D gotta love college housing.

I love how cozy my room turned out and it’s definitely nice being able to have a space to call my own since I don’t have that at home. So what do you think? Did I do a good job hiding the fact that I live in cheap bland apartment?

See You Around!

Lauren <3