5 Tips For a Professional Paint Job

Recently I have been working with my uncle a lot who owns Custer’s Renovations & Paint. He does any kind of finishing work you can think of, and I have been learning a ton about painting. So today I’d like to share with you 5 tips on how to achieve a professional paint job on your own. Specifically, I’ll show you how I implemented what I learned when I painted my own bathroom.

Scrape, Repair, & Caulk

One of the first steps to achieving a professional paint job is doing the appropriate prep work. If there are any bumpy areas left from a previous paint job make sure to scrape them away. Fill in any holes and areas that have been dinged. If there are any gaps in the trim make sure to caulk them with paintable latex caulk.

When my bathroom was painted previously there were a bunch of areas where paint splattered off of the roller and left tiny little bumps everywhere. Scraping these away ensured my paint job would be as smooth as possible. The window was painted quite poorly before so it made it difficult to get everything scraped off. However, what I did manage to scrape off and fix made a big difference. There were also huge gaps around the window that made the room look unfinished and overall kind of dingy.

5 Tips For a Professional Paint Job

5 Tips For a Professional Paint Job


5 Tips For a Professional Paint Job
Before

5 Tips For a Professional Paint Job

5 Tips For a Professional Paint Job
After

Sand & Dust

After your repairs dry, make sure to sand the patches and ideally, sand all of the walls with a fine grit sandpaper. Sanding the entire wall ensures you didn’t miss any little bumps and the finish will be smooth. Before painting, take a rag and dust the walls and trim.

It’s also a really good practice to sand in between coats and to do at least two coats.

Lighting

One of the most interesting tips my uncle showed me is how he uses lighting. In his opinion, lighting is one of the biggest factors in catching imperfections. By shining a big, bright light across the wall, you see any flaws such as bumps or drips because the light will create shadows across these areas. Without the light, you might not catch these because natural light doesn’t have the same effect. You might not notice some imperfections when you’re painting but will catch them later on because the lighting has changed. By using a light right off the bat you’re more likely to catch the mistakes.

Details

Another major factor in achieving a professional paint job is paying very close attention to detail. Wipe up any drips you spot or anywhere you painted “outside the lines”. By paying attention to detail throughout the process you will avoid fixing mistakes later on, which is often more difficult than fixing mistakes as they happen.

You want to roll on a decently thick coat of paint, but there is a fine line because you really want to avoid drips. It takes a bit of practice to get used to the feel of the perfect amount of paint and it can also depend on the type of paint you’re using. Some paints, such as Behr, are runnier than others.

One thing I noticed that makes a huge difference in the quality of my own painting is not taping things off. It takes me a lot of time to tape trim off and I can never seem to get the tape sealed right. I actually end up getting more paint on the trim when I tape than if I don’t tape and paint carefully. The key here is to keep a damp rag near you so you can wipe up any little spots where you go outside the lines. The more you practice the less you’ll have to wipe anything up. My uncle is a very skilled professional who is a lot faster, and better, at taping than I am so he’ll tape things here and there.

Stipple

Last but not least, stipple your brush as you’re cutting in. By this I mean dab your brush on the wall instead of dragging it down the wall. This helps match the texture of the roller so you don’t end up seeing brush marks. Typically I drag my brush down the wall to get the right amount of paint on. Then, I go back and stipple it.

These techniques are easy to do and don’t take much time on top of the amount of time it already takes to paint. In the long run, it’s well worth it in order to achieve a professional paint job.

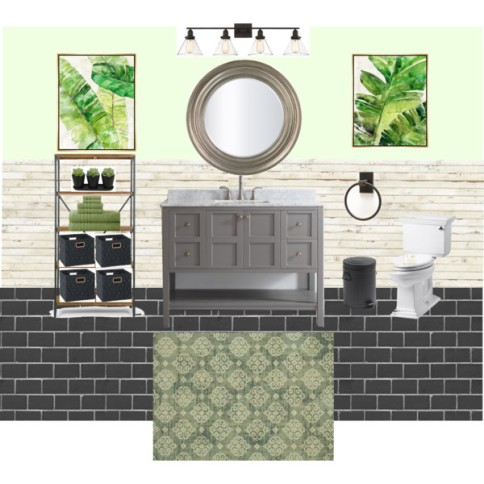
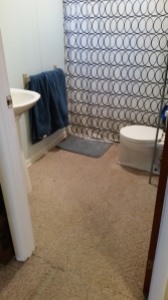
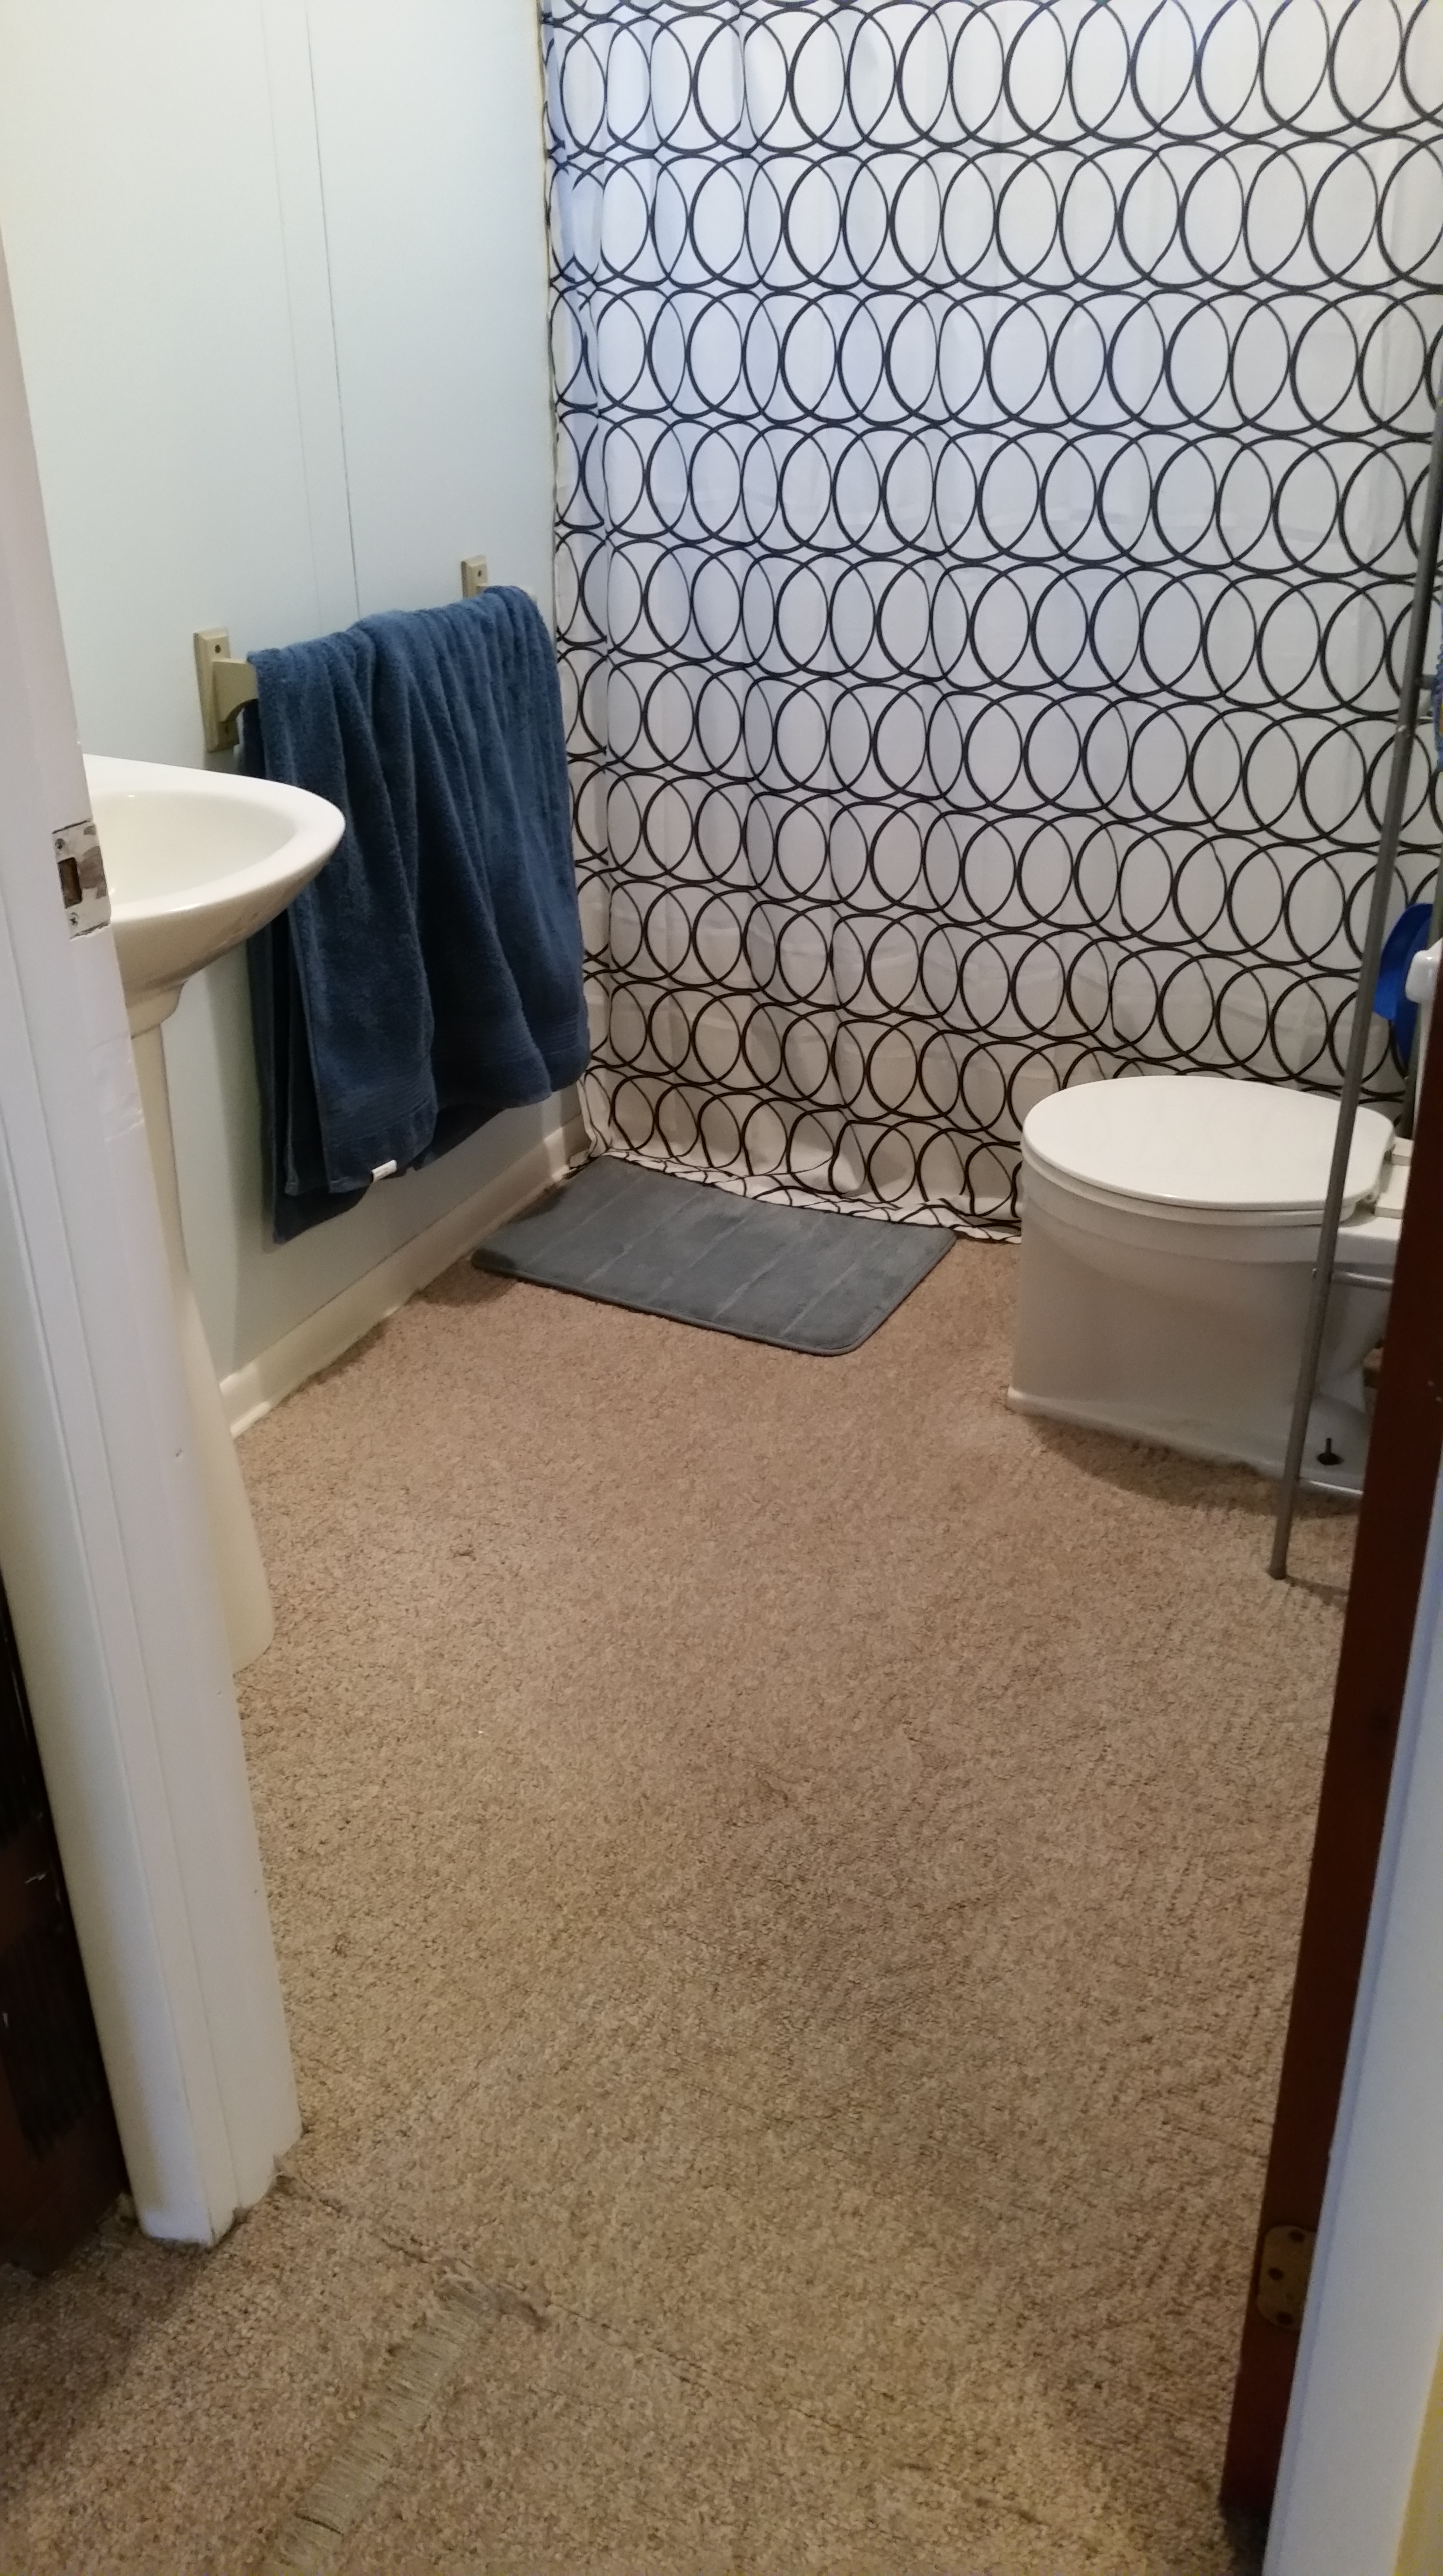
And, of course, I have to show you the before and after pictures 🙂

5 Tips For a Professional Paint Job 5 Tips For a Professional Paint Job5 Tips For a Professional Paint Job 5 Tips For a Professional Paint Job5 Tips For a Professional Paint Job 5 Tips For a Professional Paint Job

The walls are painted with Sherwin Williams Svelte Sage, and the ceiling is painted with Devoe Paint Simplicity Stone.

What’s your favorite tip for a professional paint job?

If you liked this post, feel free to share it 🙂

See You Around!

Lauren <3

How to Style with Greenery, Pantone Color of the Year 2017

Recently, Douglas Elliman, a global real estate firm, contacted me to participate in their Pantone Color of the Year challenge. I will not be compensated for this post, and all opinions are my own. To see Florida property listings by Douglas Elliman and for more tropical inspiration, click here.

Spring is right around the corner, and St. Patrick’s day is even closer. So, now is a good time to share some ideas on how to work green into a room. Specifically, Greenery, Pantone Color of the Year for 2017.

According to Pantone’s website, “Greenery signals consumers to take a deep breath, oxygenate and reinvigorate” (Pantone). It “symbolizes the reconnection we seek with nature, one another, and a larger purpose”.

Originally I thought that this wouldn’t be a color that I would paint on a wall but when I got thinking, I realized it would look great in a bathroom. Greenery seems to be a rejuvinating color especially in combination with neutrals.

I think the best tip I have for this color, and something I would do in my own home, is to style the room with a half wall. For example – shiplap, board and batten, or beadboard depending on your personal style.

This way there is texture added to the room, but it will tone down the vibrant green on the wall.

I created a mood board with my ideas on how to use this color in a bathroom.

How to Style with Greenery, Pantone Color of the Year 2017

One thing that I really like about the way this room is put together is the easily interchangeable color scheme. The green tropical feel is mostly emphasized by all the green accessories and it wouldn’t be too much work or money to change the paint color if you decided it wasn’t for you.

Blue is one of my favorite colors and it seems that I always end up thinking about doing a beachy look for a bathroom and I think that comes from the fact that there are a lot of blue accessories for bathrooms. To see what I mean, just look at my bathroom.

I think this is a fun and different way to have a tropical bathroom without making everything blue. Although I still think it would look great to add in some blue accents.

How would you use Pantone’s 2017 Color of the Year?

See You Around!

Lauren <3


DIY Plank Vinyl Floor – Bathroom Update

I am so excited to finally have this project done. I’ve been waiting at least a couple of months to put the new bathroom floor in, and we finally had time to do it! On Halloween weekend nonetheless, but it was worth it 😀

As you may know if you’ve been following along, we got free Mannington Adura floors from Chris’s dad who installs floors for a living and had leftovers from a job! This stuff is awesome. I can already tell it’s going to be really durable, and it’s absolutely gorgeous. The style and color is called Dockside Seashell. This whole name confused me when we first got it, but I’ll break it down. Mannington is the brand, Adura is a type of “luxury vinyl”, Dockside is the style/grain on the wood, and Seashell is the gray color.

DIY Plank Vinyl Floor - Bathroom Update

Just a reminder, above is what my bathroom looked like before in all its carpeted glory.

DIY Plank Vinyl Floor - Bathroom Update

Here is what we found when we moved the toilet. A nasty wax ring, and a nasty unpainted wall! woo. I honestly wasn’t surprised one bit. Grossed out? Yes. Surprised? No.

 DIY Plank Vinyl Floor - Bathroom UpdateDIY Plank Vinyl Floor - Bathroom Update

The next step was removing the carpet, and the layer underneath. Luckily the floor that was under the carpet was in good shape and we didn’t have to remove it all the way down to the concrete.

Next we pulled the tack strips up, swept and cleaned the floor thoroughly before we laid the glue down.

DIY Plank Vinyl Floor - Bathroom Update

To lay the glue down we started with just one side of the room so it was easier to work. There are instructions that come with the glue but basically you just dump some glue on the floor and use a trowel to spread it around. Then you put a fan on it and wait until it gets tacky or until it is mostly clear. You want to be able to adjust the pieces a little bit, but not enough for them to slide around on you while you work.

To start the floor we put a full size board in the top left corner. Then we cut a board to fit in the space below. The remaining piece from the second board is then put at the top in the next row. Just keep alternating like this and you will get a floor with a good pattern. This is what the professional told us to do, I wouldn’t make this stuff up! 😛

DIY Plank Vinyl Floor - Bathroom Update

To cut the boards we just used a square and a box knife. In some cases we had to measure the length of the board we needed, but most of the time it was easier to put the board next to where it needed to be laid and make a mark with the knife of where to cut. Generally the boards just need to be scored with the knife, and you can snap it.

DIY Plank Vinyl Floor - Bathroom Update

Above is where we stopped before laying more glue. Once the rest of the floor was ready to be done Chris sat on the boards we already put in place, and cut the boards on top of a cardboard box.

DIY Plank Vinyl Floor - Bathroom Update

When we got to this point Chris had to measure how wide of a piece he needed and cut the boards long way. This was pretty difficult using the square, but I imagine there is an easier way to do it so the cut is even the whole way down. We had a little bit of a struggle, but overall it ended up fine.

DIY Plank Vinyl Floor - Bathroom Update

After the floor was all down there were still a few things I wanted to fix before putting everything back together. One of the things was painting this wall! I couldn’t put the toilet back knowing that this monstrosity was behind it. It just wouldn’t feel like a complete reno. Also notice the rotted out trim in the corner.. we’ll get to that in a bit 😉

The first thing I did was wipe the nastiness off the wall with a hot rag.

DIY Plank Vinyl Floor - Bathroom Update DIY Plank Vinyl Floor - Bathroom Update

Then I sanded the wall so the paint was able to stick well, primed it, and then painted it!

Notice the rotted trim looks different? I used Durham’s Rock Hard Water Putty to fill in the holes and prevent the wood from rotting further. It is a powdered material, and you just add water to activate it. Mix it up and apply it to the surface. I just used my hands since that seemed easiest. This stuff is moldable, sandable, and paintable. And since it comes in powdered form you don’t have to worry about it setting up in the container. It’s super cheap too and I already have other plans for it around the house 😀 I think this is my new favorite home improvement product.

DIY Plank Vinyl Floor - Bathroom Update

The other thing we did was get rid of the yucky wax seal, and instead of replacing it with another wax seal we opted for a universal reusable seal. It was like $7, and is somewhat adjustable. The whole thing was too tall so we just removed a layer of the spongy stuff in the middle.

DIY Plank Vinyl Floor - Bathroom Update DIY Plank Vinyl Floor - Bathroom Update

The last thing I decided to do was quickly go over the trim with a coat of paint. I’ve painted the bathroom trim before, but now the floor height is lower and some ugly areas were uncovered. As usual I sanded and wiped it down first.

DIY Plank Vinyl Floor - Bathroom Update

The trim looks as fresh as it’s good ole pal the floor. 😉

Now are you ready for the finished product??? are you sure?? okay, here it is!! 😀

DIY Plank Vinyl Floor - Bathroom Update

It’s everything I dreamed and more. No joke. I feel like it just makes the space feel so much bigger, brighter, and lighter. It’s amazing.

The bathroom has come such a long way since we moved in and I think it’s becoming one of my favorite spots in the house if it wasn’t already. I can’t wait to show the landlords the results.

Next my plans are to re caulk the shower, and paint the new trim piece between the carpet and the vinyl. I also need to look into cosmetic fixes for the shower surround.

DIY Plank Vinyl Floor - Bathroom Update DIY Plank Vinyl Floor - Bathroom Update

Here’s a side by side just as a reminder 🙂

Do you love it too? Do you feel like you could tackle a similar project after reading this post? What’s your favorite flooring?

See You Around!

Lauren <3

Thrifty Bathroom Storage

My bathroom is pretty small, and seriously lacking in the storage department along with the rest of my house. I’m a total storage and organization nerd, and I would spend SO much money on storage if I could. But since I can’t, I’m always looking for thrifty ways to get the same effect. The other day Chris and I were at Goodwill, and he spotted this 3 piece bathroom organizer for only $10!! Thrifty bathroom storage for the win!

Thrifty Bathroom Storage #thriftstorefinds #goodwill Thrifty Bathroom Storage #thriftstorefinds #goodwill

I found the exact same thing in the $30 range online!! For some reason I couldn’t find this exact thing on Wal-Mart’s website. Maybe they don’t sell it anymore? In that case this piece is a collector’s item 😉 I was a little nervous to buy it at first because I thought maybe some of the pieces were missing. The box was taped really well, but I was able to peek inside and see that the pieces were still in the plastic bags. So, we decided to take a chance on it.

Thrifty Bathroom Storage #thriftstorefinds #goodwill

When I got all the pieces out I found half of the directions and got scared until I found the other half. Nothing a little tape can’t fix!

Thrifty Bathroom Storage #thriftstorefinds #goodwill

After I fixed the directions I pulled all the pieces and was making sure they were all there. And then I came across this…

Thrifty Bathroom Storage #thriftstorefinds #goodwill

You can’t really see it on the paper, but this is supposed to be one piece. I don’t know what happened but there are two of these parts, and both of them were broken. I put the rest of the shelf together while I figured out how to fix these pieces. They went on top so they weren’t necessary, but it would be better if they could be used.

Finally I remembered some sort of welding stuff that came in a tube. I had seen it on Pinterest before but couldn’t remember exactly what it was. When Chris came home from work he told me it was called JB Weld and he already had some! 😀

Thrifty Bathroom Storage #thriftstorefinds #goodwill

It comes in two tubes. One labeled hardener and one labeled steel. He just mixed a fair amount together (equal amounts of both) on a piece of cardboard and applied it to each broken piece. We let it sit over night and it was all fixed!

Thrifty Bathroom Storage #thriftstorefinds #goodwill

Not the prettiest repair job, but it’s fixed and it’s not very noticeable when the shelf is all put together.

Thrifty Bathroom Storage #thriftstorefinds #goodwill

I’ll have to figure out what all I want to store on here, and how to style it but for now I’m just happy to at least have a place to set things 🙂 I want to store towels on it, but most of the ones we have are stained and ugly. That’s another thing I need to invest in.

Have you ever ran into a thrift store disaster, or had a close call? What was your favorite thrift store find?

See You Around!

Lauren <3

Bathroom Tour and Project Plans

I am slowly working on creating a home tour which will include before and after pictures of my house as well as explanations of what I plan to do to the house in the future. This page will be “living” so to speak and will constantly be changing as the house changes. Throughout this process I will try to post reveals of rooms that have had a significant amount of change to them along the way.

Today I am going to share my bathroom with you! The bathroom is one of my favorite rooms in the house because at a glance it looks crisp and clean. On the other hand there are still some issues with the bathroom that need to be worked out.

Bathroom Tour and Project Plans

Here is the view of the bathroom before you walk in. I know what your first impression is: mmmm carpet in the bathroom! Yes, it is horrifying and it should be gone soon! Chris and I have flooring to replace the carpet. We just need the gusto to get it done and a few more supplies. Read more about that here if you so choose (and haven’t done so already) 🙂

Bathroom Tour and Project Plans

The main things that changed in the bathroom since we’ve lived here are painting the walls and getting rid of the old sink. Those projects were pre-blog days, and sadly I don’t have before pictures of the sink. However, I did find a picture of the walls while we were in the process of painting!

Bathroom Tour and Project Plans

Holy ew, right?! I don’t think the walls were painted a light yellow because the rest of the house was painted plain white. The color of the walls basically blended in with the plastic on the shower, and now it is a stark contrast as you’ll notice in the photos further down.

The sink was about from the wall on the left to halfway through where the plastic drawers are now. It was retro like my kitchen counters, and the shelf inside the cabinet was rotting out. We lost the storage in the bathroom (which wasn’t useful because of the rot) but we gained a lot more space in the tiny bathroom. I would like to add some shelving to the bathroom above the toilet to gain some of the storage back. We bought the pedestal sink unused at a thrift store for $60 which the landlord reimbursed us for.

Bathroom Tour and Project Plans

In this angle you can see the mirror which has a small medicine cabinet as well as the light above it.

I actually like the light and I think it looks vintage (in a cool way), but it needs a good cleaning and the hardware needs a coat of spray paint.

Oil rubbed bronze anyone? 😀 I spray painted the vent in flat black because it was rusty and nasty looking. The little sea horse is from TJ Maxx – gotta love that place <3 I want to add a hook below the sea horse for a hand towel

Bathroom Tour and Project Plans

Here are what I call the toilet accessories. The q tip holder is a reused candle jar, and the jar with cotton balls is an old spaghetti sauce jar that I painted with chalkboard paint and added a ribbon. The candle is called coastal woods by Mainstays and it smells fantastic by the way 😉

Bathroom Tour and Project Plans

Now for the not so pretty parts. The tub surround is made of plastic sheets and they are stained yellowy. They may have even come in an off white tan ish color, but either way it doesn’t look good. I have been able to get it cleaner using a homemade shower cleaner that uses vinegar, but it’s not anywhere near my standards. The caulking was also done very sloppily and is coming off in some spots around the tub.

Because there isn’t a fan in the bathroom moisture has caused some damage. The paint is peeling and cracking on the window as well as the ceiling. The ceiling is textured and I would love to get rid of it. I would like to add frosted contact paper to half of the window, and take the curtain down. This way there is always natural light coming in, but no one can see into the shower. It would also be epic to add a bathroom fan, but who knows how much that would cost or if the landlord would pay for it.

Bathroom Tour and Project Plans

Here you can see the staining and messy caulk. You can also see a chip in the tub’s finish, and there are a few more in other spots of the tub. Funny story – there is a chipped spot in the back of the tub on the bottom and for the longest time whenever I would be getting in the shower and already had taken my glasses off I would think it was a spider. I had to put my glasses back on and double check it wasn’t a spider. Silly me. I would love to refinish the tub with a rustoleum kit as well as tiling the tub surround. Tiling the tub is probably a long shot though…

Bathroom Tour and Project Plans

I don’t know how this happens but the surround pulled away from the caulk instead of the caulk coming apart. Either way I can’t imagine that’s very good for the wall behind the plastic sheeting.

Well, there’s my bathroom for you! It’s not as glamorous as I would like, but the projects we’ve done so far haven’t cost much money and the decorations were all relatively cheap as well. Once we put the new floor in then I will be much happier with it. The shower is really rough, but at least that can be hidden with a shower curtain.

What do you think of the space? I would love to hear ideas on creative storage solutions! Are you excited to see more room tours and the Home Tour Page?

Thanks for stopping by!

Lauren <3