Winter Projects

Seeing as it is already winter and I have a break and new semester coming up I figure I should create a list of winter projects to accomplish before spring. I also think hope I’m going to have a lot of exterior work to do when the weather gets nice, and I don’t want to be stuck inside.

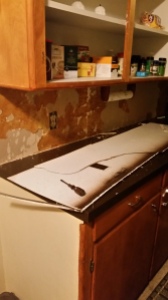
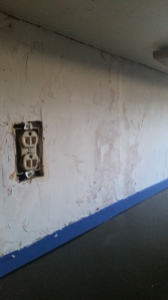
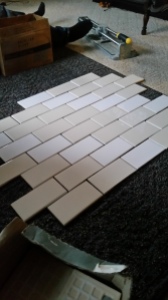
First things first: kitchen backsplash. The walls are prepped and the hole is filled. I’m going home and should be starting the tile tonight! As a refresher here is what the layout will look like except not so tall.

Winter Projects

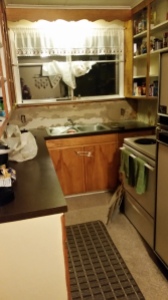
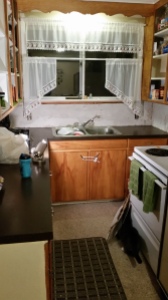
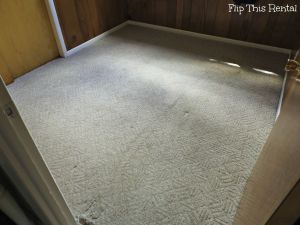
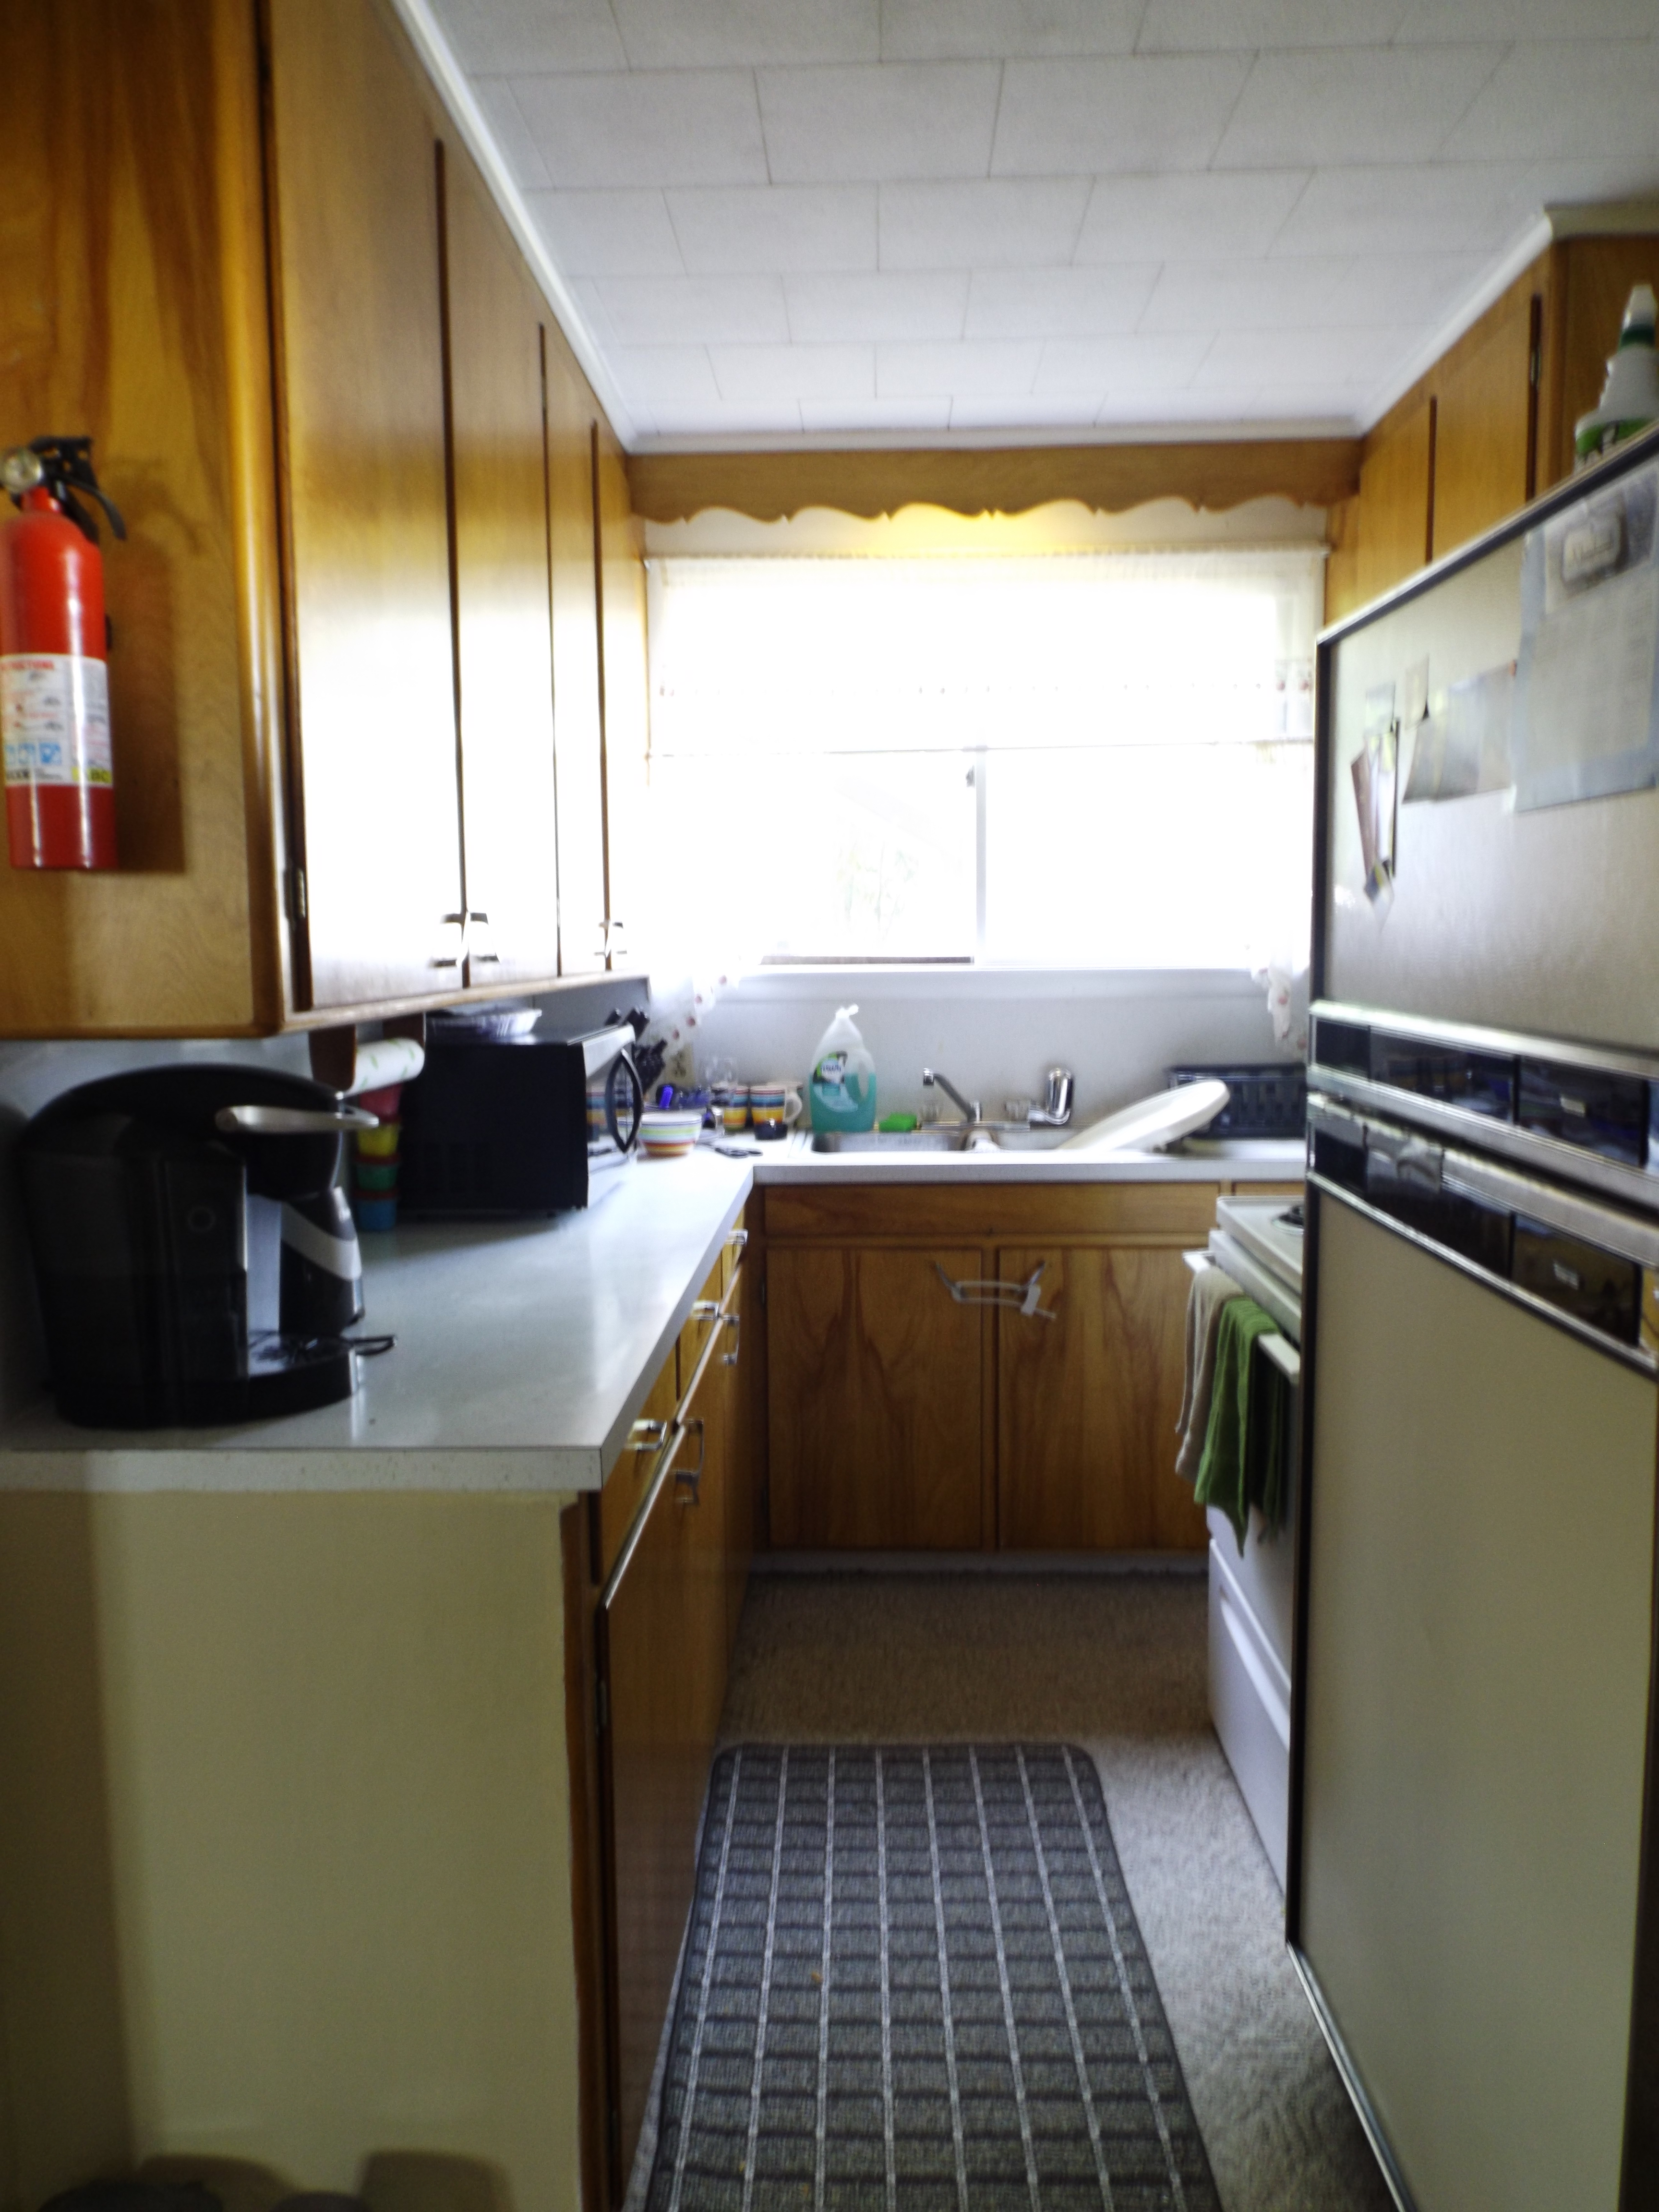
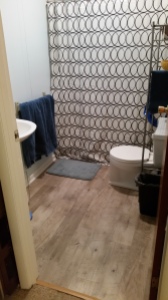
I would also like to replace the carpet in the kitchen with the same plank vinyl we used in the bathroom. The catch with this is we are going to tell our landlords we’ll only do it if we can paint the cabinets white, which I also want to complete before spring. The only way it would backfire is if they say no to both. Honestly I wouldn’t be surprised by that at this point. Just imagine this floor:
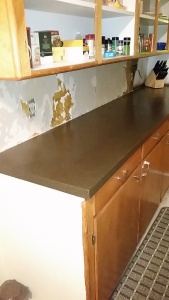
Winter Projects

In this kitchen:

Winter Projects

Also imagine the new spray painted countertops, ceramic backsplash, and white cabinets. I know, it’s a stretch.

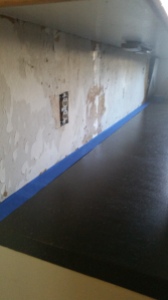
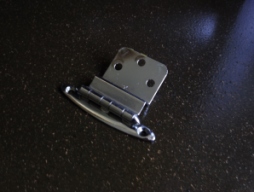
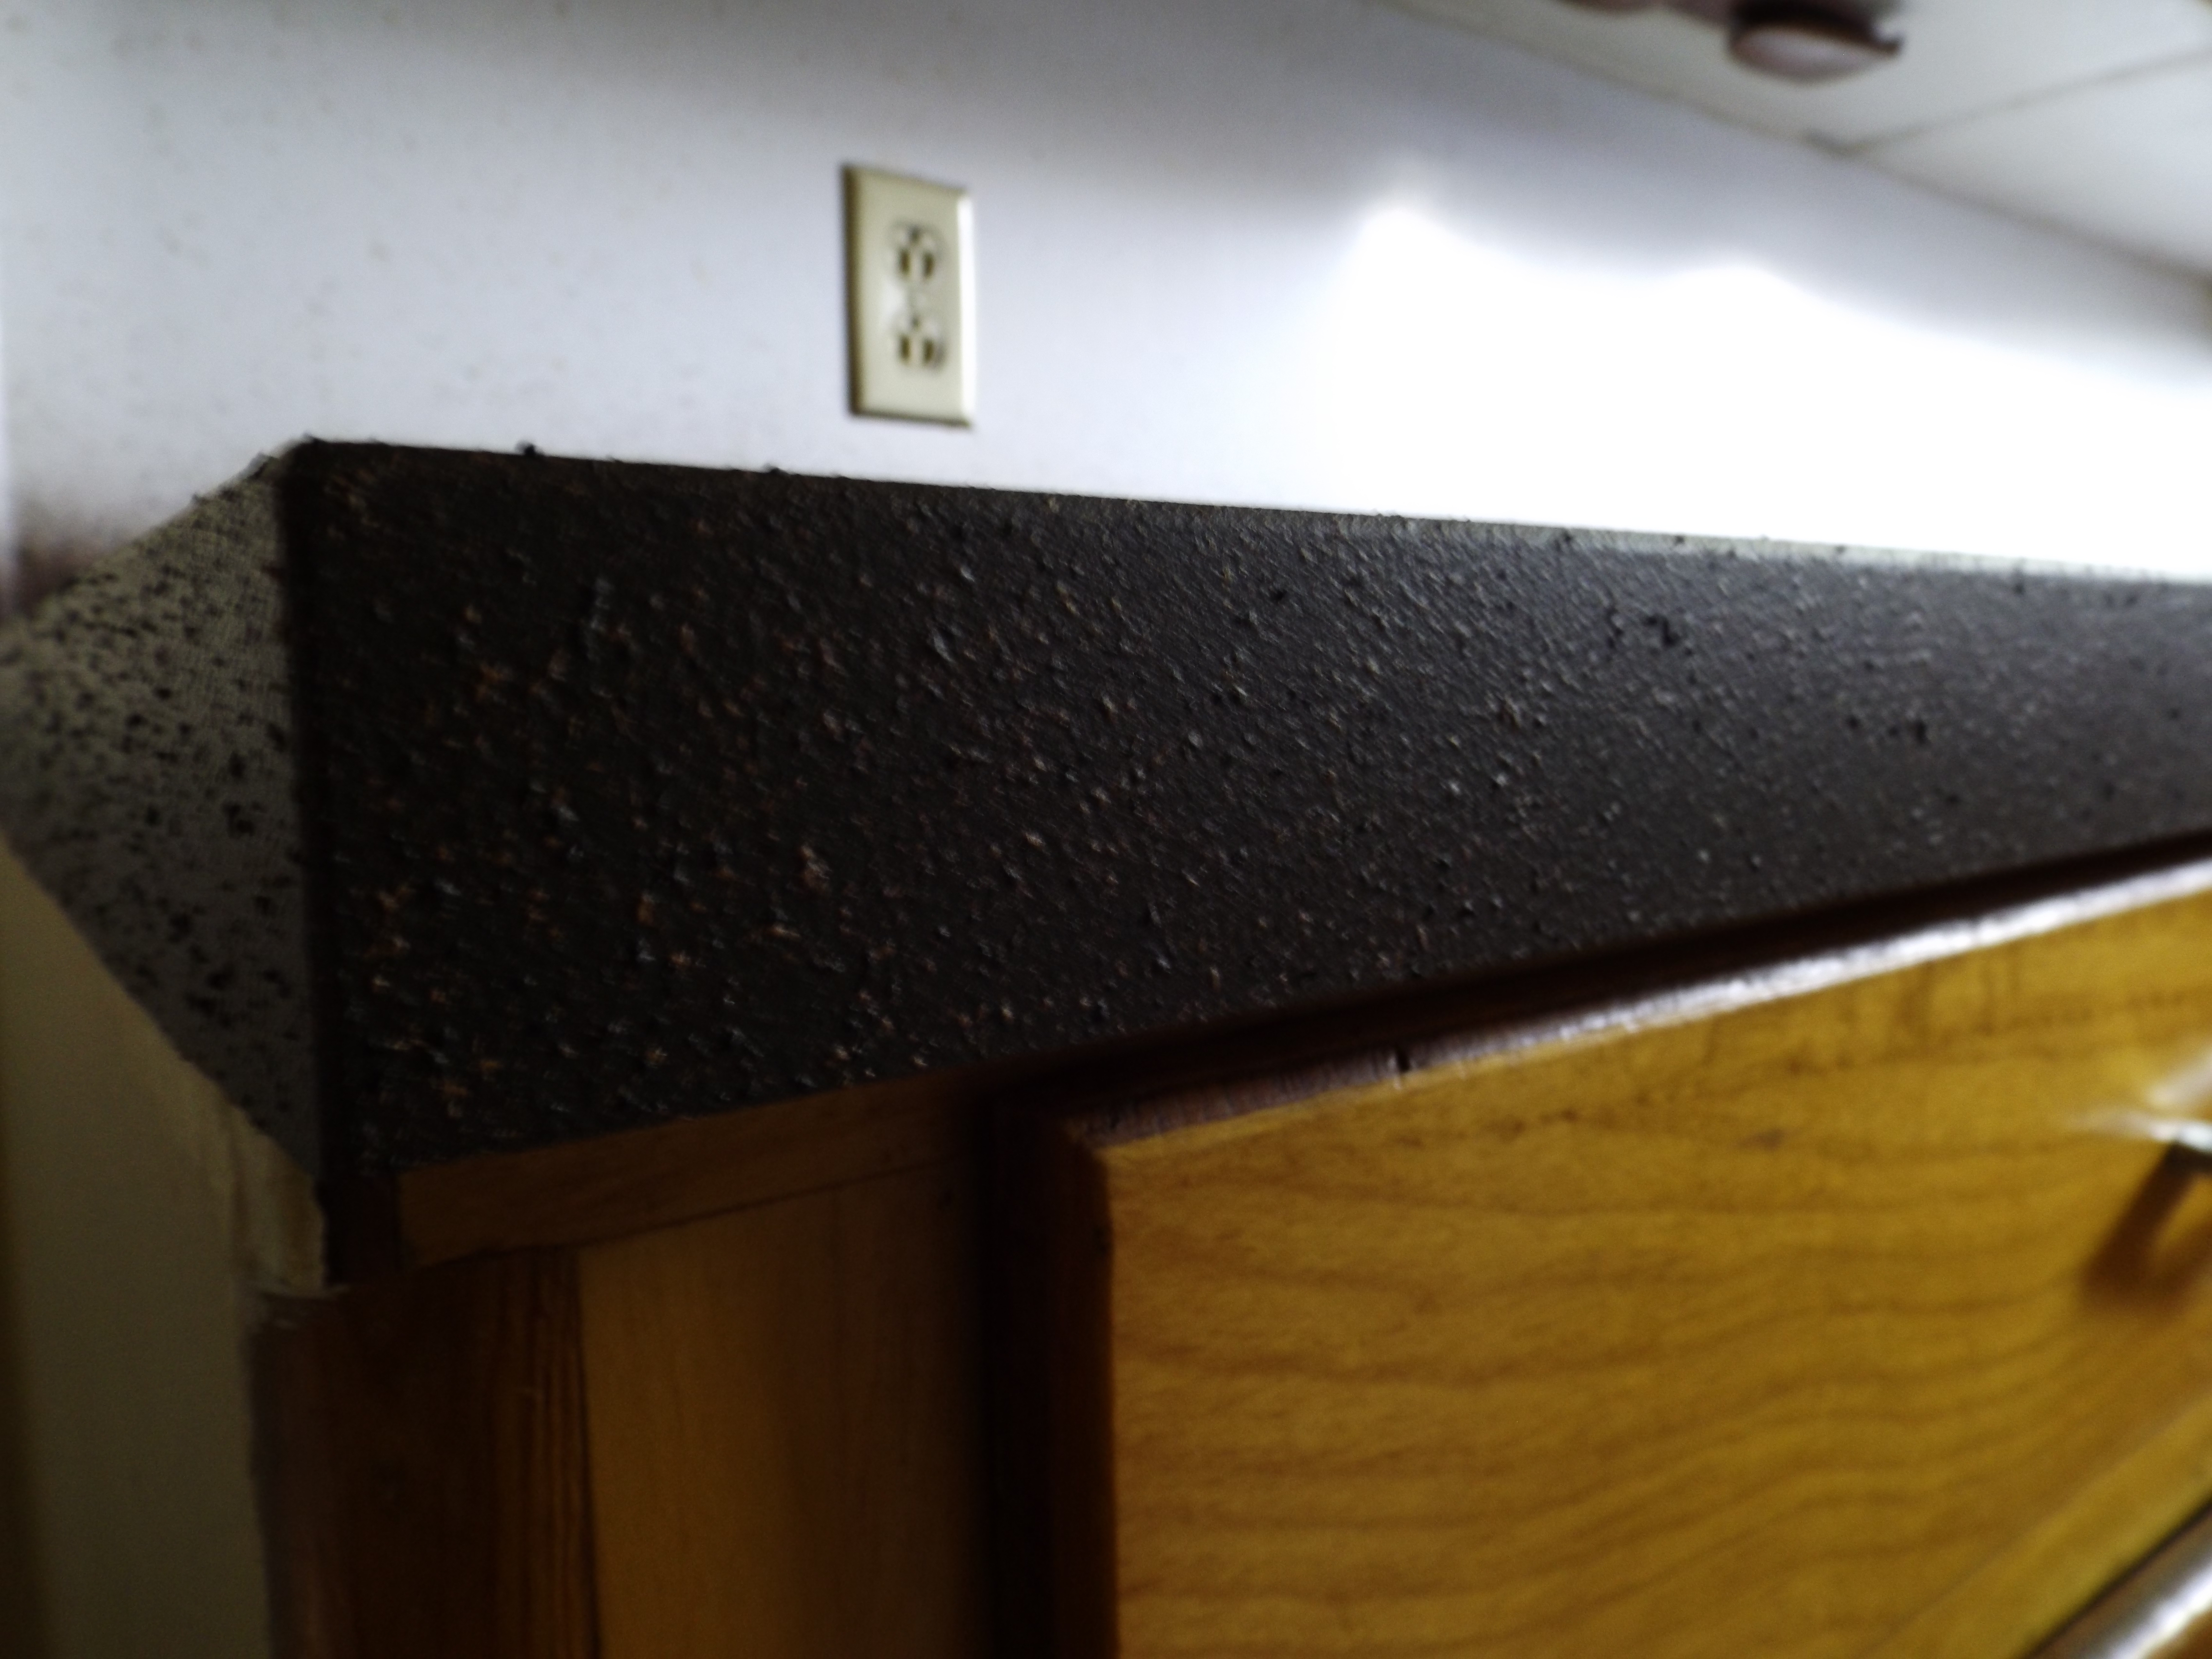
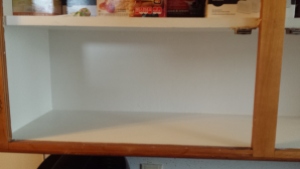
I am currently in the process of scraping the peeling paint out of the old cabinets and repainting the insides. This takes forever but I’m at least hoping to have the upper cabinets done by spring. Here is a crisply painted cabinet innard for your viewing pleasure:

Winter Projects

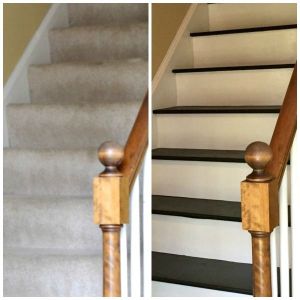
Another project I’ve had on my mind is ripping the carpet off the entry way landing and replacing it with vinyl. If the stairs have good wood underneath I might stain them instead. Think something like this:

Winter Projects
Source: To Simply Inspire

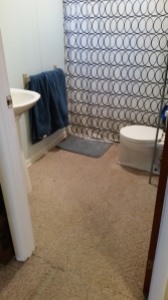
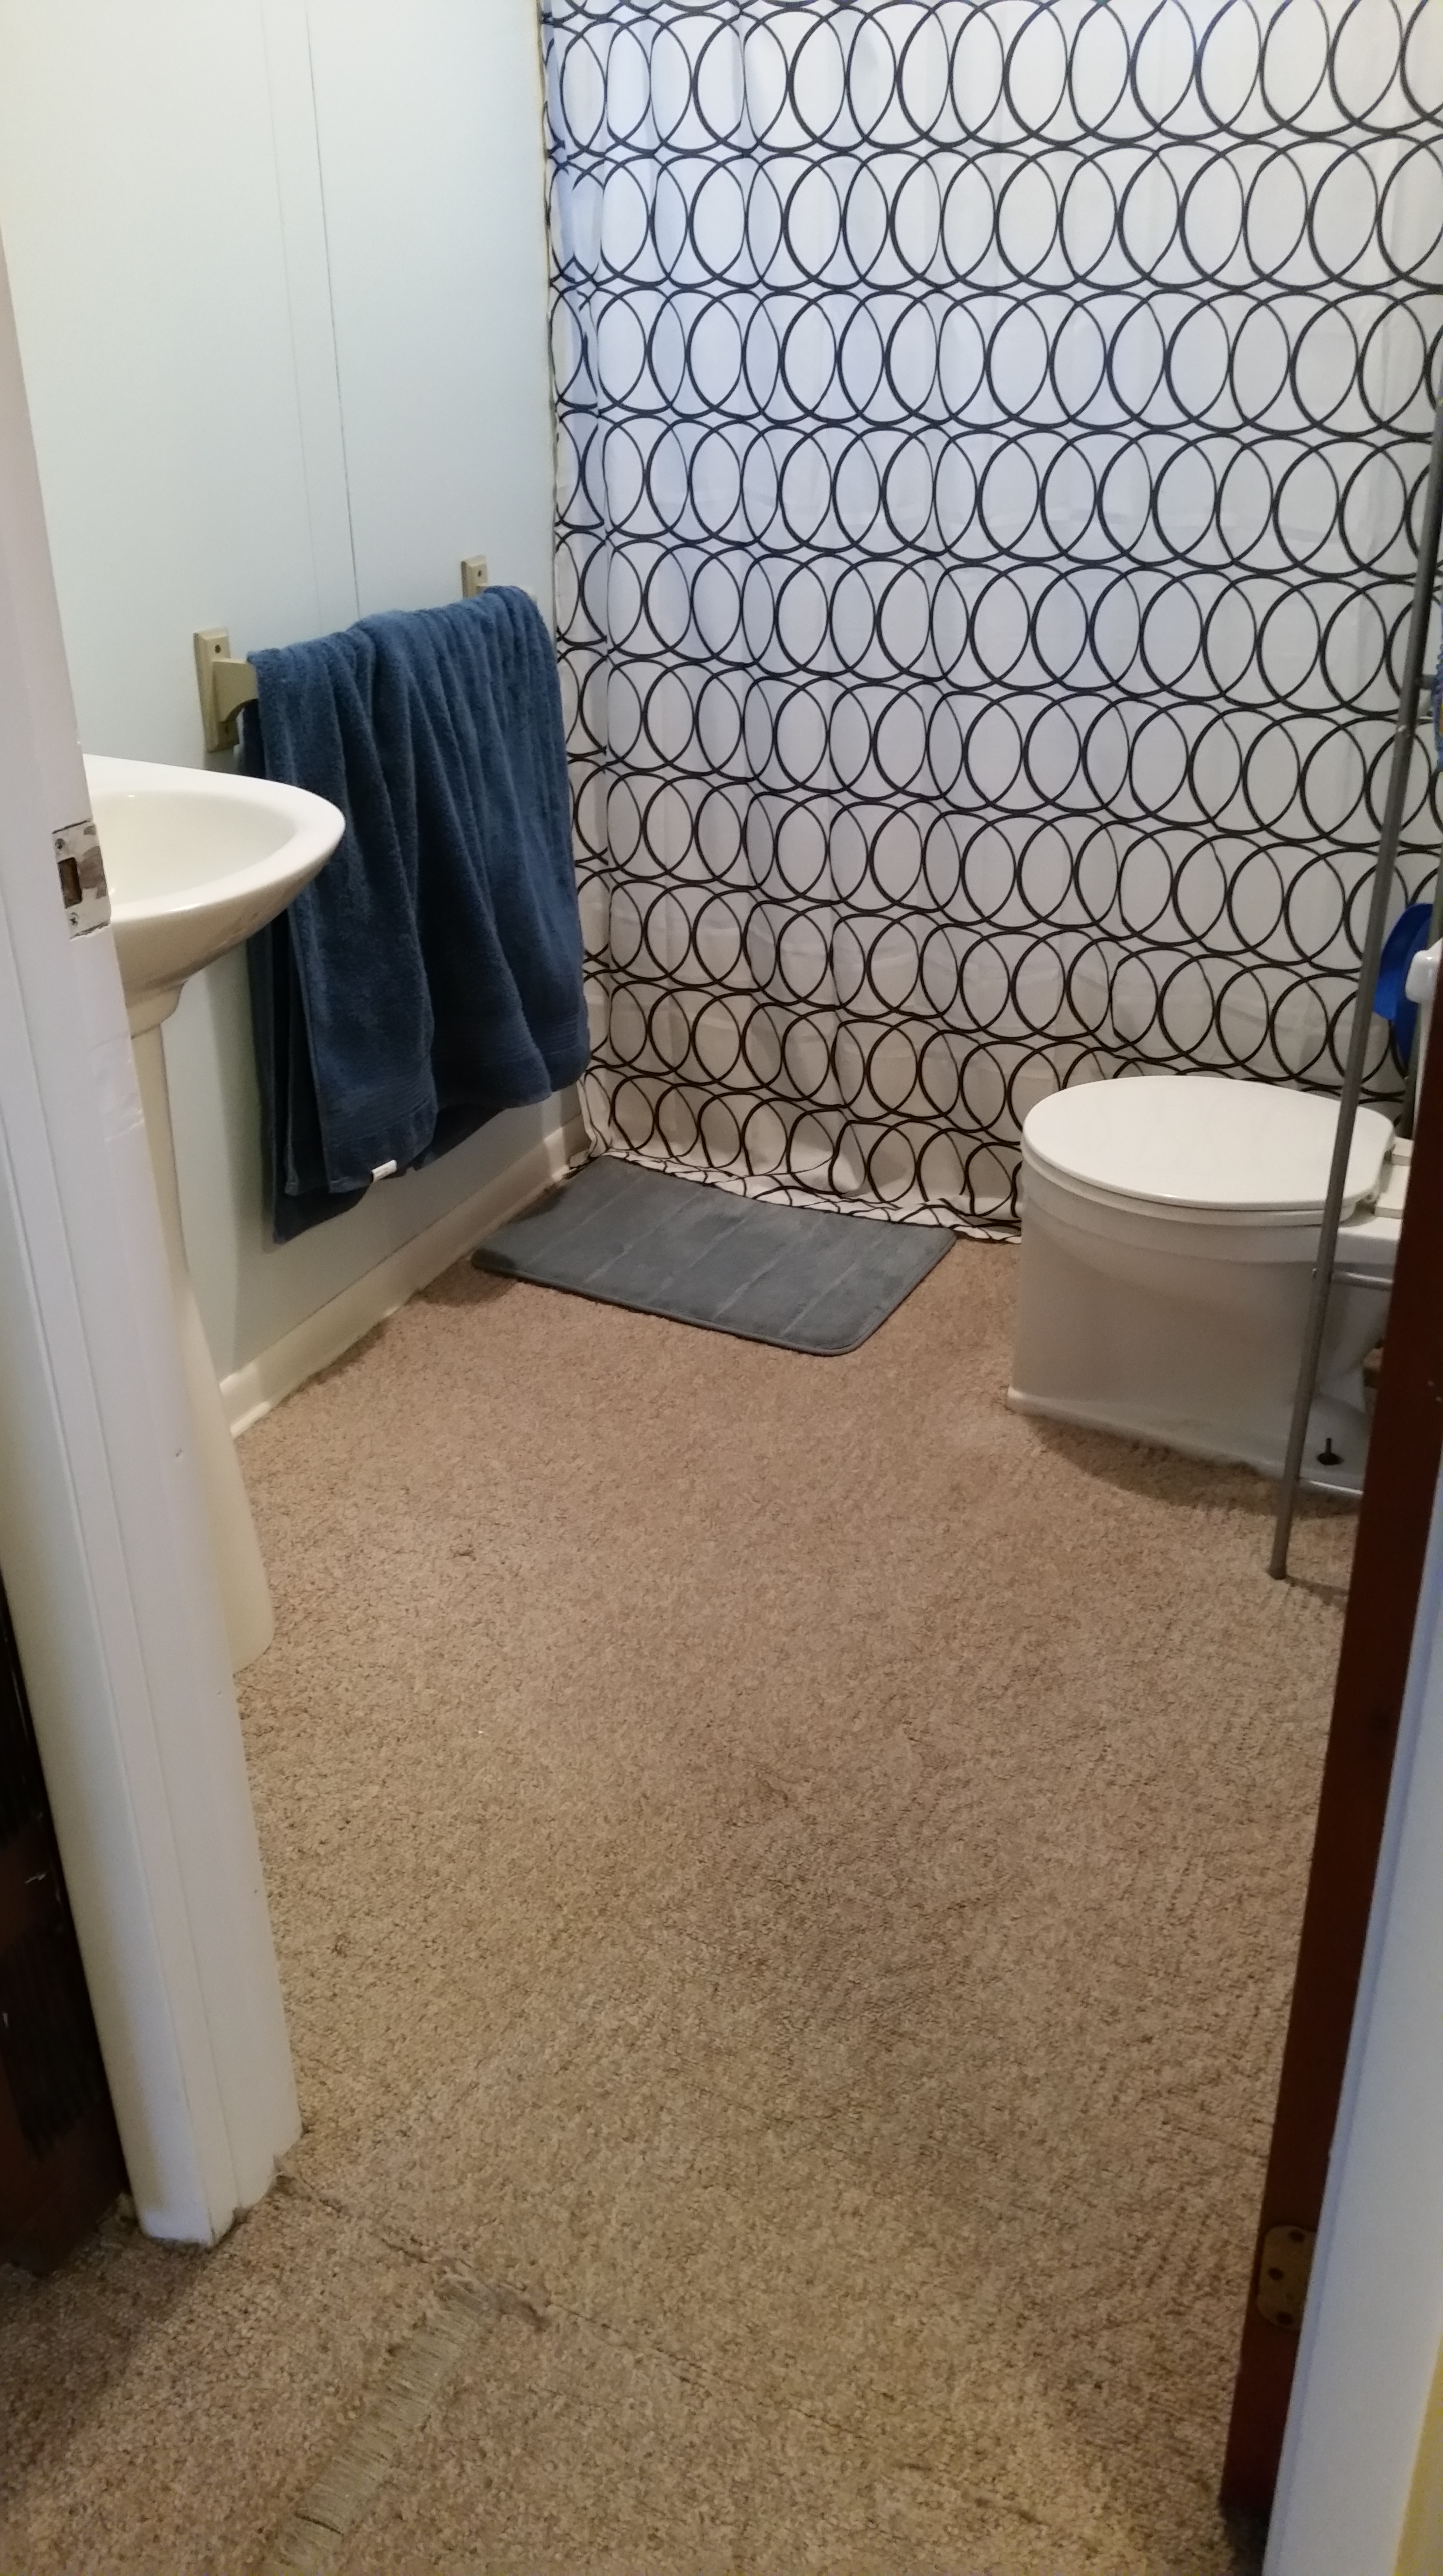
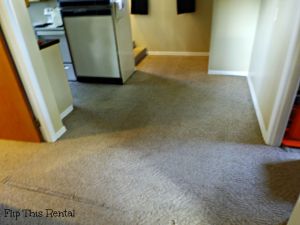
There is a huge run in our carpet outside of the bathroom and I would like to get the carpet stretched so that problem is fixed. Chris’s dad installs flooring and I think we could convince him to fix it for us. You can see the run in the picture below. I think it’s worse now than it was then. (This is from when I cleaned my carpet)

Winter Projects

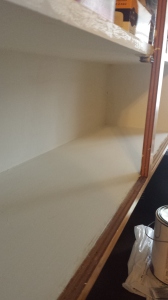
Maybe this one is adding too many to the pile but I would love to build shelves the whole height of our small entry closet. Currently it has one shelf and that’s really not doing us any good. At the least I want to add in a couple more shelves. This is the hot mess I’m dealing with currently:

Winter Projects

I had Chris send me that picture so sorry for the quality and also sorry for the fall wreath that’s still hanging out. whoops… I should probably take that down.

Honestly the amount of major projects left in the apartment is becoming minimal. Chris and I are getting a little more serious about looking at buying the place,  especially since I will be living there full time starting in May. Our expenses will be smaller and we’ll have extra money to invest. So far it seems like a good idea but we need to look into the details.

I can just imagine the hilarity of showing you the before pictures of the upstairs. It’s a million times worse than what we started with in our unit. Although I think I might like the layout better.

What are your plans for the winter?

See You Around!

Lauren <3

Prepping Walls for Backsplash

A project I am currently working on is prepping walls for backsplash in the kitchen. This means that soon we will have beautiful tile in our kitchen. yeeee.

Prepping Walls for Backsplash

Here is what the backsplash looked like after spray painting my counters. I knew I would be tearing off the laminate backsplash and replacing it with tile eventually, so I didn’t bother avoiding overspray. It seems likes I’ve lived with this ombre look for ages now.

One night I just decided to start ripping tell Chris to start ripping.
Prepping Walls for Backsplash
I unscrewed the outlet covers, and Chris pried away. This section came off in a couple pieces then I had to peel off some of the paper glue backing (the orangey yellow stuff)
Prepping Walls for Backsplash
I tried to get most of the excess backing off to try to help get the wall a little flatter but I didn’t worry about it too much since I also put joint compound on it to smooth it out even better. This was way easier than peeling and sanding until my brain went dead.

Before I applied the joint compound I used a box cutter to cut away all the caulk from the counter.
Prepping Walls for Backsplash
First I taped off the counter as well as where the backsplash and painted wall met because these surfaces are already the way I want them.

To apply the joint compound I used a putty knife and went to town. I tried applying thin layers and only using what I needed to even everything out, but still have everything coated.
Prepping Walls for Backsplash
Here’s what the wall looks like after the new layer. Once the compound dried I sanded it lightly to get rid of any ridges. You can kind of see the ridges in the photo below.

Prepping Walls for Backsplash

You might have noticed in the pictures in the right hand side there is a broken piece of backsplash hanging out. Behind it there isn’t any wall there and it is an access to the outside water spigot. We figure we don’t need it so we will be putting a board up there and patching the hole up. I’ll explain in detail that process when I post about the actual tile job.

Here is the other section of the backsplash which was done at a different time. Chris also had to pull out a piece of the window trim in order to get the laminate out.
Prepping Walls for Backsplash Prepping Walls for Backsplash
It’s amazing how much cleaner and brighter it all looks. I don’t even mind the unfinished look because at least I’m making progress and it will be gorgeous soon enough.

I came up with a unique way to get a beautiful design with the free tile we were given. I’d love to share it now but instead I think I’ll make you wait until next week. 😉

See you around!

Lauren <3

Click here to see how I tiled the backsplash.

Cleaning Cabinet Hardware Naturally

Once upon a time in an insane land far away, I thought my landlords were going to let me paint my cabinets. In some fantasy I’m still holding onto hope they will. I feel like a broken record at this point, repeating my wishes constantly.

Because I thought they were going to say yes, I spent the time and energy taking all the upper cabinet doors off, labeling them with sticky notes, and cleaning the hardware. I put all the hardware in separate baggies with numbers that correspond with the cabinet they go on.

 Cleaning Cabinet Hardware | Super easy technique for cleaning hardware with items you probably already have Cleaning Cabinet Hardware | Super easy technique for cleaning hardware with items you probably already have

To clean the door’s hardware I put them in separate containers to clean them. I sprinkled baking soda on them before covering them in distilled white vinegar and let them soak for a few hours.

Cleaning Cabinet Hardware | Super easy technique for cleaning hardware with items you probably already have Cleaning Cabinet Hardware | Super easy technique for cleaning hardware with items you probably already have

After soaking I scrubbed the hardware with an SOS pad and rinsed. The baking soda and vinegar really did a good job of loosening up the gunk that was caked on. If you’re in the process of revamping your cabinets and are reusing your hardware I really recommend doing this step. You can really get into every crevice when the hardware is not on the door.

Cleaning Cabinet Hardware | Super easy technique for cleaning hardware with items you probably already have

Here are a few side by sides of how much of a difference this can make. Plus, a reminder at how horribly disgusting my cabinets are.

Cleaning Cabinet Hardware | Super easy technique for cleaning hardware with items you probably already have Cleaning Cabinet Hardware | Super easy technique for cleaning hardware with items you probably already have

Now I sit and wait until my wish comes true. My cabinets are without doors, and the insides are begging me to paint them. I’ve done a few of the inside shelves as you may have already seen here, and I’m slowly painting them while I wait. I hope I don’t finish all the insides of the cabinets and clean all of the hardware before I get to paint. At least I will have something to keep me busy in the mean time.

When is the last time you thought about cleaning your hardware? Do you get impatient waiting to do your next big project, and how do you deal with the anticipation?

See You Around!

Lauren <3

DIY Plank Vinyl Floor – Bathroom Update

I am so excited to finally have this project done. I’ve been waiting at least a couple of months to put the new bathroom floor in, and we finally had time to do it! On Halloween weekend nonetheless, but it was worth it 😀

As you may know if you’ve been following along, we got free Mannington Adura floors from Chris’s dad who installs floors for a living and had leftovers from a job! This stuff is awesome. I can already tell it’s going to be really durable, and it’s absolutely gorgeous. The style and color is called Dockside Seashell. This whole name confused me when we first got it, but I’ll break it down. Mannington is the brand, Adura is a type of “luxury vinyl”, Dockside is the style/grain on the wood, and Seashell is the gray color.

DIY Plank Vinyl Floor - Bathroom Update

Just a reminder, above is what my bathroom looked like before in all its carpeted glory.

DIY Plank Vinyl Floor - Bathroom Update

Here is what we found when we moved the toilet. A nasty wax ring, and a nasty unpainted wall! woo. I honestly wasn’t surprised one bit. Grossed out? Yes. Surprised? No.

 DIY Plank Vinyl Floor - Bathroom UpdateDIY Plank Vinyl Floor - Bathroom Update

The next step was removing the carpet, and the layer underneath. Luckily the floor that was under the carpet was in good shape and we didn’t have to remove it all the way down to the concrete.

Next we pulled the tack strips up, swept and cleaned the floor thoroughly before we laid the glue down.

DIY Plank Vinyl Floor - Bathroom Update

To lay the glue down we started with just one side of the room so it was easier to work. There are instructions that come with the glue but basically you just dump some glue on the floor and use a trowel to spread it around. Then you put a fan on it and wait until it gets tacky or until it is mostly clear. You want to be able to adjust the pieces a little bit, but not enough for them to slide around on you while you work.

To start the floor we put a full size board in the top left corner. Then we cut a board to fit in the space below. The remaining piece from the second board is then put at the top in the next row. Just keep alternating like this and you will get a floor with a good pattern. This is what the professional told us to do, I wouldn’t make this stuff up! 😛

DIY Plank Vinyl Floor - Bathroom Update

To cut the boards we just used a square and a box knife. In some cases we had to measure the length of the board we needed, but most of the time it was easier to put the board next to where it needed to be laid and make a mark with the knife of where to cut. Generally the boards just need to be scored with the knife, and you can snap it.

DIY Plank Vinyl Floor - Bathroom Update

Above is where we stopped before laying more glue. Once the rest of the floor was ready to be done Chris sat on the boards we already put in place, and cut the boards on top of a cardboard box.

DIY Plank Vinyl Floor - Bathroom Update

When we got to this point Chris had to measure how wide of a piece he needed and cut the boards long way. This was pretty difficult using the square, but I imagine there is an easier way to do it so the cut is even the whole way down. We had a little bit of a struggle, but overall it ended up fine.

DIY Plank Vinyl Floor - Bathroom Update

After the floor was all down there were still a few things I wanted to fix before putting everything back together. One of the things was painting this wall! I couldn’t put the toilet back knowing that this monstrosity was behind it. It just wouldn’t feel like a complete reno. Also notice the rotted out trim in the corner.. we’ll get to that in a bit 😉

The first thing I did was wipe the nastiness off the wall with a hot rag.

DIY Plank Vinyl Floor - Bathroom Update DIY Plank Vinyl Floor - Bathroom Update

Then I sanded the wall so the paint was able to stick well, primed it, and then painted it!

Notice the rotted trim looks different? I used Durham’s Rock Hard Water Putty to fill in the holes and prevent the wood from rotting further. It is a powdered material, and you just add water to activate it. Mix it up and apply it to the surface. I just used my hands since that seemed easiest. This stuff is moldable, sandable, and paintable. And since it comes in powdered form you don’t have to worry about it setting up in the container. It’s super cheap too and I already have other plans for it around the house 😀 I think this is my new favorite home improvement product.

DIY Plank Vinyl Floor - Bathroom Update

The other thing we did was get rid of the yucky wax seal, and instead of replacing it with another wax seal we opted for a universal reusable seal. It was like $7, and is somewhat adjustable. The whole thing was too tall so we just removed a layer of the spongy stuff in the middle.

DIY Plank Vinyl Floor - Bathroom Update DIY Plank Vinyl Floor - Bathroom Update

The last thing I decided to do was quickly go over the trim with a coat of paint. I’ve painted the bathroom trim before, but now the floor height is lower and some ugly areas were uncovered. As usual I sanded and wiped it down first.

DIY Plank Vinyl Floor - Bathroom Update

The trim looks as fresh as it’s good ole pal the floor. 😉

Now are you ready for the finished product??? are you sure?? okay, here it is!! 😀

DIY Plank Vinyl Floor - Bathroom Update

It’s everything I dreamed and more. No joke. I feel like it just makes the space feel so much bigger, brighter, and lighter. It’s amazing.

The bathroom has come such a long way since we moved in and I think it’s becoming one of my favorite spots in the house if it wasn’t already. I can’t wait to show the landlords the results.

Next my plans are to re caulk the shower, and paint the new trim piece between the carpet and the vinyl. I also need to look into cosmetic fixes for the shower surround.

DIY Plank Vinyl Floor - Bathroom Update DIY Plank Vinyl Floor - Bathroom Update

Here’s a side by side just as a reminder 🙂

Do you love it too? Do you feel like you could tackle a similar project after reading this post? What’s your favorite flooring?

See You Around!

Lauren <3

Painting Cabinet Shelves

The cabinet painting is still basically at a halt. The landlords still say no. However, I still have hope and the next plan is to get an extra box of flooring that we will be using in the bathroom, and then we’ll have enough to do the kitchen too. But, we’ll tell the landlords we can’t do it unless we paint the cabinets. Yellow cabinets do not look good with beautiful gray barn wood looking floors. Hopefully this last resort tactic works. I might just have to paint them anyway, but I rather not.

Since I can’t paint the outside of the cabinets I’ve started painting the insides since they desperately need it too.

Painting Cabinet Shelves

This is a different cabinet than I painted, but I had already peeled too much paint off for you to see how dirty it was to start with. I cleaned the shelves really well and they’re still too dingy to be left alone.

Painting Cabinet Shelves

You can see here how the paint is peeling. The peeling is worse in some of the other cabinets.

The worst part about the cabinets is that they trapped the smell of food horribly. Even after I cleaned the cabinets and let them air out without food for a while, I could smell it again shortly after I put everything back.

Painting Cabinet Shelves

Here is the cabinet I painted with most of the paint peeled off the bottom, and quite a bit off the walls. I peeled as much off as I could before sanding it down and wiping up the dust.

Painting Cabinet Shelves

Above is the cabinet with a coat of primer. When I painted the wall trim I didn’t put a coat of primer on it, and I wish I did because it might have helped it from getting dinged up again. I absolutely hate dealing with the peeling paint, so I hope that this primer will cut down on that.

Painting Cabinet Shelves

The cabinet with a coat of paint and all dry.

Painting Cabinet Shelves Painting Cabinet Shelves

Here are comparison photos of a painted shelf and a non painted shelf. The bottom shelf in both pictures is painted, and the top one is not.

Painting Cabinet Shelves

Painting Cabinet Shelves

The cabinet is put back together, now I just need to find a better way to organize the spices. I’ll slowly work on painting a shelf or two at a time and hopefully that will keep my mind off wanting to paint the outsides.

I should make decent progress if I don’t get too irritated with having to peel all the paint off. I might, however, get a little grossed out with doing some of the lower cabinets by the sink that are exposed to the pipes inside the wall. Maybe I’ll come up with another project entirely to make them look more finished.

What’s your worst home improvement nightmare? Do you have any tips for organizing spices?

See You Around!

Lauren <3

Bathroom Tour and Project Plans

I am slowly working on creating a home tour which will include before and after pictures of my house as well as explanations of what I plan to do to the house in the future. This page will be “living” so to speak and will constantly be changing as the house changes. Throughout this process I will try to post reveals of rooms that have had a significant amount of change to them along the way.

Today I am going to share my bathroom with you! The bathroom is one of my favorite rooms in the house because at a glance it looks crisp and clean. On the other hand there are still some issues with the bathroom that need to be worked out.

Bathroom Tour and Project Plans

Here is the view of the bathroom before you walk in. I know what your first impression is: mmmm carpet in the bathroom! Yes, it is horrifying and it should be gone soon! Chris and I have flooring to replace the carpet. We just need the gusto to get it done and a few more supplies. Read more about that here if you so choose (and haven’t done so already) 🙂

Bathroom Tour and Project Plans

The main things that changed in the bathroom since we’ve lived here are painting the walls and getting rid of the old sink. Those projects were pre-blog days, and sadly I don’t have before pictures of the sink. However, I did find a picture of the walls while we were in the process of painting!

Bathroom Tour and Project Plans

Holy ew, right?! I don’t think the walls were painted a light yellow because the rest of the house was painted plain white. The color of the walls basically blended in with the plastic on the shower, and now it is a stark contrast as you’ll notice in the photos further down.

The sink was about from the wall on the left to halfway through where the plastic drawers are now. It was retro like my kitchen counters, and the shelf inside the cabinet was rotting out. We lost the storage in the bathroom (which wasn’t useful because of the rot) but we gained a lot more space in the tiny bathroom. I would like to add some shelving to the bathroom above the toilet to gain some of the storage back. We bought the pedestal sink unused at a thrift store for $60 which the landlord reimbursed us for.

Bathroom Tour and Project Plans

In this angle you can see the mirror which has a small medicine cabinet as well as the light above it.

I actually like the light and I think it looks vintage (in a cool way), but it needs a good cleaning and the hardware needs a coat of spray paint.

Oil rubbed bronze anyone? 😀 I spray painted the vent in flat black because it was rusty and nasty looking. The little sea horse is from TJ Maxx – gotta love that place <3 I want to add a hook below the sea horse for a hand towel

Bathroom Tour and Project Plans

Here are what I call the toilet accessories. The q tip holder is a reused candle jar, and the jar with cotton balls is an old spaghetti sauce jar that I painted with chalkboard paint and added a ribbon. The candle is called coastal woods by Mainstays and it smells fantastic by the way 😉

Bathroom Tour and Project Plans

Now for the not so pretty parts. The tub surround is made of plastic sheets and they are stained yellowy. They may have even come in an off white tan ish color, but either way it doesn’t look good. I have been able to get it cleaner using a homemade shower cleaner that uses vinegar, but it’s not anywhere near my standards. The caulking was also done very sloppily and is coming off in some spots around the tub.

Because there isn’t a fan in the bathroom moisture has caused some damage. The paint is peeling and cracking on the window as well as the ceiling. The ceiling is textured and I would love to get rid of it. I would like to add frosted contact paper to half of the window, and take the curtain down. This way there is always natural light coming in, but no one can see into the shower. It would also be epic to add a bathroom fan, but who knows how much that would cost or if the landlord would pay for it.

Bathroom Tour and Project Plans

Here you can see the staining and messy caulk. You can also see a chip in the tub’s finish, and there are a few more in other spots of the tub. Funny story – there is a chipped spot in the back of the tub on the bottom and for the longest time whenever I would be getting in the shower and already had taken my glasses off I would think it was a spider. I had to put my glasses back on and double check it wasn’t a spider. Silly me. I would love to refinish the tub with a rustoleum kit as well as tiling the tub surround. Tiling the tub is probably a long shot though…

Bathroom Tour and Project Plans

I don’t know how this happens but the surround pulled away from the caulk instead of the caulk coming apart. Either way I can’t imagine that’s very good for the wall behind the plastic sheeting.

Well, there’s my bathroom for you! It’s not as glamorous as I would like, but the projects we’ve done so far haven’t cost much money and the decorations were all relatively cheap as well. Once we put the new floor in then I will be much happier with it. The shower is really rough, but at least that can be hidden with a shower curtain.

What do you think of the space? I would love to hear ideas on creative storage solutions! Are you excited to see more room tours and the Home Tour Page?

Thanks for stopping by!

Lauren <3

DIY Carpet Cleaning – From Drab to Shag {A Tale of the Dirtiest of Carpets}

Can I use shag to describe my newly cleaned carpets even though I do not in fact have shag carpet? I think so. Moving on. Cleaning my carpets is something I put on my to-do list for this month and in reality it has been on my wish list for a LONG time. I put it on an official to-do list because I’ve waited long enough and school is starting very soon. I don’t own a carpet cleaner so I had to borrow one from a family member. This is one of the reasons I had to wait so long.

I cleaned my carpets on a few different days. The first day I did my entryway/stairs, kitchen, dining room, and bathroom. The second day I did the second bedroom, and the last day I did the living room and master bedroom. These days totally were not consecutive. Whoops.

DIY Carpet Cleaning | From Drab to Shag {A Tale of the Dirtiest of Carpets} | Flip This Rental DIY Carpet Cleaning | From Drab to Shag {A Tale of the Dirtiest of Carpets} | Flip This Rental

Even though the lighting is different in these photos you can still see how much smaller and less noticeable the stain is. This was probably the dirtiest area in our whole house. Below is a view of the dining room from the living room. I might do this area again in the future because the nastiness isn’t completely gone 🙁

DIY Carpet Cleaning | From Drab to Shag {A Tale of the Dirtiest of Carpets} | Flip This Rental DIY Carpet Cleaning | From Drab to Shag {A Tale of the Dirtiest of Carpets} | Flip This Rental

When I first started cleaning the carpets I didn’t really see a huge difference in most of the spots. That is until I dumped the first bucket of dirty water. Ho-ly COW. I am shocked at how disgusting that water was, and there was sediment along the bottom of the bucket too. I even vacuumed before I started. My hypothesis is that the carpets don’t look much different because I only cleaned a surface layer of dirt off. There was so much grime that I couldn’t get deep into the fibers of my carpet. The areas I cleaned the first day took 3 or 4 gallons of water with about 2oz of cleaner for each gallon.

DIY Carpet Cleaning | From Drab to Shag {A Tale of the Dirtiest of Carpets} | Flip This Rental DIY Carpet Cleaning | From Drab to Shag {A Tale of the Dirtiest of Carpets} | Flip This Rental

The cleaner I used is Bissell Febreze Oxy Carpet Cleaner in the Hawaiin Aloha scent. I didn’t buy this product I borrowed it along with the carpet cleaner. The hyperlink goes to Walmart if you want more information on the product. Even though I couldn’t see too much of a difference on most spots on my carpet I definitely noticed a difference on how it felt when I was walking around on it. The carpet was kind of scratchy and grimy feeling before. Now it feels soft and my feet don’t pick up dirt as I’m walking around. Even right after I vacuumed my feet would still pick up pieces of dirt.

DIY Carpet Cleaning | From Drab to Shag {A Tale of the Dirtiest of Carpets} | Flip This Rental DIY Carpet Cleaning | From Drab to Shag {A Tale of the Dirtiest of Carpets} | Flip This Rental

Above is the one spot in my house that I avoid touching at ALL COSTS. You can see that it is between the shower and the toilet which to begin with means there will be water. Then you add on that this is also the spot where we keep the plunger and toilet bowl cleaner. AND ITS CARPETED. Pretty please don’t barf all over your computer or phone or whatever else at the thought of how gross that is.

I used the attachment on the carpet cleaner to get into this corner and I think it did a pretty decent job of getting a lot of the grime out. I think the edges along the wall and bathtub are stained that way for the rest of the carpet’s life. Originally, I wasn’t planning on cleaning the bathroom carpets since we will be tearing it out soon and replacing it with vinyl planks. If you haven’t heard about that yet check it out here. However, I don’t know when we will be replacing the floor and just in case it doesn’t happen for a while it would be nice to have clean carpets in the mean time.

  DIY Carpet Cleaning | From Drab to Shag {A Tale of the Dirtiest of Carpets} | Flip This RentalDIY Carpet Cleaning | From Drab to Shag {A Tale of the Dirtiest of Carpets} | Flip This Rental

Little T’s bedroom before and after. Again, not much of a difference but you can see in the middle of the room on the left there was a dark spot that was removed (not just the lighting I promise :p).

DIY Carpet Cleaning | From Drab to Shag {A Tale of the Dirtiest of Carpets} | Flip This Rental DIY Carpet Cleaning | From Drab to Shag {A Tale of the Dirtiest of Carpets} | Flip This Rental

Another angle of T’s bedroom. You can see by the doorway there was a dark spot removed. I’m thinking maybe it wouldn’t have hurt to go over the spots more than once and use more water but I didn’t want the floors to be really wet and have to wait forever to put furniture back.

 DIY Carpet Cleaning | Bedroom BeforeDIY Carpet Cleaning | Bedroom After

At first glance in these pictures the room doesn’t look much different, but if you pay closer attention it almost looks like the carpet is yellowy in the first picture. I’m thinking that is actually due to the carpet cleaning since I edited both these photos the same and they weren’t taken very far apart. It looked cleaner in person anyway.

DIY Carpet Cleaning | Closet Side Before DIY Carpet Cleaning | Closet Side After

You can see in these pictures along the indent in the carpet a stain was removed. You can also see in these pictures how I got lazy and didn’t move all of the furniture. I would have if I had help but I was on a time crunch since I was moving out to my college apartment that night.

DIY Carpet Cleaning | Dresser Side Before DIY Carpet Cleaning | Dresser Side After

Again I think the carpet looks brighter in the after picture 🙂

DIY Carpet Cleaning | LR Angle 4 Before DIY Carpet Cleaning | LR Angle 4 After

The corner of the living room is much cleaner! The little black spot in the center was removed and the coloring of the carpet looks much more even.

DIY Carpet Cleaning | LR Angle 2 BeforeDIY Carpet Cleaning | LR Angle 2 After

Mostly in this picture it looks like it got worse but on the right hand side you can see it l looks more even. I honestly don’t know it looks worse in some parts???

DIY Carpet Cleaning | LR Angle 3 Before DIY Carpet Cleaning | LR Angle 3 After

From this angle you can definitely tell the carpet cleaner worked i’t’s magic. Right below the shadow of the couch on the left you can see a dirty yellowy area that I completely removed.

Well that’s the entire house! Add some furniture and you have a house tour 😉 Don’t worry I have one of those in the works. I almost felt silly at times writing this post because I knew what a difference the cleaning was making, but it just wasn’t showing up how I wanted in the pictures. Have you ever had a project that you felt great about but it just wasn’t translating on the blog scene? I think I also need to improve my picture taking skills so those fine details show through in photos. Let me know what you think!

See You Around!

Lauren <3

Garage Shopping Trip

The other day Chris and I were at his parents and we took a little shopping trip through his dad’s garage. It was a complete success. We ended up with vinyl flooring to do the bathroom and the landing at the top of our entryway stairs. We also got two different sizes of white tile to do the kitchen backsplash. I’m thinking this project will have minimal costs even though we need a few more supplies to get started.

To do the bathroom we need a special glue for the vinyl we got, which Chris’s dad will have soon after he finishes another job. For the landing we need a metal strip that goes where the vinyl and carpet meet. Chris’s dad has a few pieces of it we just need to tell him our measurements so he can cut it. To do the tile we just need to get grout and mortar. I already have some leftover mortar from my mom (not sure how much we need), and Chris’s dad might have grout.

The bathroom floor is made by Mannington and is a type of luxury vinyl called Adura. Our specific floor is called Dockside Sea Shell. I love how much it looks like real wood and it’s easier to take care of than laminate wood floors. I’m thinking it will be easier to install too. In the pictures you can see that it actually has a texture to it. There might even be enough of this to do the kitchen too. Yet another great reason to paint the kitchen cabinets white because the yellowy wood of the cabinets would not look good with this gray wood look.

Garage Shopping Trip Garage Shopping Trip

The other vinyl we got is not nearly as cool, but it is still a nice looking wood vinyl. I wish there was enough to do all of the stairs but that’s unlikely. On the bright side my cat seems to like the new floors 😉

Garage Shopping Trip

When I got home I realized the tiles are actually two different colors. Uh oh. I played around with them a little bit and came up with a pattern that I think will work. The problem is they don’t quite fit, but we can always trim a little bit off the top tile.

Garage Shopping Trip

We already have the approval to put the vinyl down in the bathroom. Not sure if Chris is going to ask about the stairs landing or the backsplash, but we’ll see how it turns out. Even if he decides to ask permission I think hope these projects are a no brainer.

See You Around!

Lauren <3

5 LOGICAL Reasons to Paint Kitchen Cabinets

The night before Chris and I were going to tackle painting the kitchen cabinets he decided that he wanted to ask permission to paint. I got really anxious because there was always the slight chance that she would (ridiculously) say no. Mind you I already had taken off all of the upper cabinet doors along with all the hardware. Did I also mention he had no part in helping with that? Ugh. Boyfriends.

I’m not going to lie, growing up I was a rule follower and I asked permission for everything. I just couldn’t stand the thought of my beautiful white cabinets being torn from my grasp when I am so very capable of painting them myself. She didn’t say no, but she did say she would have to ask her husband. Her husband said NO. AGHHHH. I was furious because I felt like he just didn’t understand, and he hardly does much with the rentals anyway. I wanted to scream and tell her to woman up and realize she doesn’t need her husband’s approval. However that probably wouldn’t solve a thing and I would still have ugly cabinets. So instead I decided to have Chris give these reasons why they should change their minds.

5 LOGICAL Reasons to Paint Kitchen Cabinets | Flip This Rental1. Cabinet Damage

Our cabinets have several spots where they are obviously worn down. There are scratches on one cabinet door (no idea how those got there), finish worn down near handles and edges of doors/drawers. Even after I thoroughly cleaned/degreased everything twice the edges of the cabinets are gummy feeling. A few of the cabinets feel gritty and not smooth like some of the less worn down doors. This is not unusual for old cabinets, but the damage really makes the kitchen look run down.

2. Easy to Clean and Repair

Going along with the previous point, painting the cabinets will make it much easier to clean and repair any spots that get worn out. Putting myself in the landlord’s shoes I know I would want to efficiently clean and make any repairs from the time one tenant moves out, and another one moves in.

It’s harder to see dirt and grime on the cabinets the way they are now because the color of the cabinets exactly matches grease that might splatter out of a frying pan. What kinds of dirt, grime, or food do you know of that is white and will cling itself to a kitchen cabinet? none (okay maybe marshmallow fluff? 😉 ). In another setting cabinets that hide grime are a good thing because they create less work and hide the dirt. In a rental setting white cabinets make it really easy for a landlord to see how dirty the cabinets are, and to make a quick estimate of how long it will take to clean between tenants.

3. New Update for Cheap

Or in our case a new update for $0. It really cannot get any better than that. I respect it if the landlord’s are hesitant because they really like the look of wood and they don’t want to cover it up. However, we have plenty of leftover paint and primer that they already paid for to paint the walls. It would be the same amount of work if not more to sand and re-stain AND it would end up costing them more money in the long run.

5 LOGICAL Reasons to Paint Kitchen Cabinets | Flip This Rental4. White Paint Opens up the Space

The kitchen in our apartment is really small and feels very claustrophobic because of the dark colors. Using light colors tricks your mind into thinking the space is actually bigger than it is. I especially noticed this when I took the upper cabinets doors off because the insides are actually already white. A decent sized kitchen is on a lot of people’s wishlist when it comes to homes, and at least white cabinets will make it not seem so cramped. Our home is located in a residential area a block or two away from the school. This means the property should really be trying to attract small families. Families generally do a decent amount of cooking so it makes sense to have a kitchen that will fit those needs.

5. Painted Cabinets are Popular

There are images all over Pinterest of painted cabinets, how to paint cabinets, and why you should paint cabinets. These days people are ditching the wood for a crisp paint job. Brains over beauty is generally the way to go. In this case painting the cabinets white is both brains and beauty. Especially in the business of rental properties it is critical to understand what a vast majority of people will be looking for in a home, and not just a select few. I can safely say that a vast majority of people are NOT looking for retro yellowy weird wood grain cabinets.

Obviously I want my living space to be appealing to me, but I also understand that I do not own it and some day someone else will have to work their style into the home as well. Throughout all of my projects I have held this mentality and that’s why it is frustrating to me that they said no to painting the cabinets. To me it seems like a well thought out business move. Hopefully after explaining these points to them they will change their minds.

5 LOGICAL Reasons to Paint Kitchen Cabinets | Flip This Rental

If you liked this post don’t forget to share it!

See You Around!

Lauren <3

Updating Counter Tops with Spray Paint

The latest home project I tackled is updating my counter tops. As you can see my counters are a very common retro white with gold specks. The edges are very worn, and have stains and cut marks where someone (myself included) used the counter as a cutting board. For this specific project I decided to go with the ask for forgiveness instead of permission approach. I assumed my landlord would gasp at the concept of spray painted counters. I’ll admit it made me a little nervous at first too.

 Updating Counter Tops with Spray Paint | Flip This Rental Updating Counter Tops with Spray Paint | Flip This Rental

Spray painting counters is a cheap and great alternative to replacing them altogether. To begin, I cleaned the counters, let them dry, sanded them, wiped them down again, and let them dry while I was taping everything off. The supplies I used were:

Updating Counter Tops with Spray Paint | Flip This Rental  Updating Counter Tops with Spray Paint | Flip This Rental  Updating Counter Tops with Spray Paint | Flip This Rental

I had everything on hand already except the paint and the poly. I purchased two cans each of the paint and a 1qt can of poly. In the end I used 1 can of the primer/base coat and about 1 and a half cans of the textured paint.

After prepping the surface tape everything off that you don’t want to get paint on. I didn’t tape off my “backsplash” because I am eventually going to redo that as well. To tape the sink off I put painters tape along the edges of the stainless steel. Only get tape on your sink and not the counter (it’s kind of tricky) otherwise when you pull it off you will see the counter show through. I was told after the fact that you can lift the sink up a smidge without having to undo all the plumbing. That would’ve been nice to know! After I taped the edges I laid a piece of the plastic drop cloth over top. To tape it down I pulled the edges tight and then put tape on it so no paint would get in.

 Updating Counter Tops with Spray Paint | Flip This RentalUpdating Counter Tops with Spray Paint | Flip This Rental

When spray painting indoors make sure you have plenty of ventilation and take breaks often if the fumes start to get to you. If you cannot get proper air flow do not spray paint inside. I worked in small sections and went near a window during my breaks for some fresh air. Also, if you have any gas appliances nearby shut them off before you begin this project!!!

Now to the fun part! Begin by spraying a thin-ish layer of the primer/base coat. Let this dry again and put another thicker coat on to make the color even. Make sure to avoid puddles or drip marks on the counter. Once this is completely dry you can add the textured spray. Make sure to shake this often or the textured particles will settle at the bottom and the finish won’t be even. I did a few coats and some touch ups to achieve an even texture. As it’s drying it will look a little splotchy, so let it dry completely before deciding to do another coat.

Updating Counter Tops with Spray Paint | Flip This Rental Updating Counter Tops with Spray Paint | Flip This Rental

This is what the counters looked like before adding polyurethane, and an up close of the texture. I almost liked the way my cabinets looked for a hot minute after doing this update, but that minute soon passed and I once again envisioned white cabinets.

After letting the paint completely dry add the first layer of polyurethane. Let this dry for 3-4 hours and add another coat. I did 2 coats and I could still slightly feel the texture of the paint, which I liked. The directions said to sand in between coats to ensure an even finish, but I skipped that and it looks great. After the final coat of poly let sit for 24 hours before using the counters.

Here is the finished product!

Updating Counter Tops with Spray Paint | Flip This Rental Updating Counter Tops with Spray Paint | Flip This Rental

I absolutely love how the counters turned out and I cannot wait to add the backsplash and paint the cabinets. I was going to do paintable beadboard wallpaper, but my boyfriend’s dad might have some leftover tile that we could have fo FREE that would look nice in our kitchen. Comment below if you have any questions, want to let me know what you think, or just want to say hi!

Updating Counter Tops with Spray Paint | Flip This Rental

UPDATE: I went back and added a 3rd coat of poly because it was discoloring when wet. The color went back to normal once the wet spot dried but I was concerned that it would ruin the longevity of the finish.

UPDATE: Check out this post for an update on how my counters are holding up! (2/19/17)

See You Around!

Lauren <3