How to Restore Painted Hardware

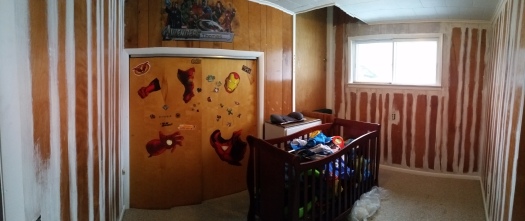
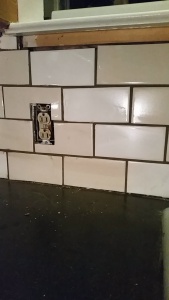
One of the first things I noticed when I moved into this apartment, and something I have noticed in several other homes, is the sloppily painted hardware. This always bothers me because I think it shows a lack of pride by the painter. Not to mention the blatant disregard for quality craftsmanship that is becoming harder to find in today’s homes.

I figured the best case scenario would be to strip the paint and restore the hardware to its original finish. Worst case scenario would be stripping the paint and spray painting the hardware. What I got, for the most part, was better than best case scenario. I didn’t just get to restore some antique hardware. I got to restore some antique copper hardware.

Removing Hardware

The first step in restoring the hardware is to remove it. This is a little tricky when it’s caked in paint. In my case, the people who painted over the hardware didn’t differentiate between the hardware and the wall/door. The first step is to scrape the paint from the screws. You should only have to do it enough to fit the screw driver in and the rest will come with it when you unscrew it. I also took a knife and scored the paint around the outside of the hardware.

How to Restore Painted Hardware How to Restore Painted Hardware How to Restore Painted Hardware

The first vent was a little harder to remove because it was difficult to tell how many screws there were and how the pieces came apart. I figured out that the vent had three different pieces. Not all vents will be the same, so I won’t go into the specifics of how mine was attached to the wall. However, my strategy was basically just trial and error. I unscrewed the one screw I could see, and scraped a little on the bottom part to see if there were any screws down there. Then, I scored the paint around the outside of the vent and tugged a little.

Another good suggestion I have is to be careful with the tools you are using to scrape and unscrew. It’s pretty easy to scratch the metal underneath.

Removing Paint

The first step I took to remove the paint was putting the hardware in boiling water. I placed the smaller pieces in a crockpot and turned it on low and let them soak for a while. For the vents, I got a large plastic tub and dumped a couple pots of boiling water over it. Remember the paint is easiest to peel and scrape when the water is still hot, so don’t let it sit for too long.

How to Restore Painted Hardware How to Restore Painted Hardware

Boiling water worked really well for the hardware, but the vents needed extra help because of the details on the front of the vent. To get the stubborn spots I used Citristrip. When scraping the paint off the vents I pretty much stuck to using a plastic scraper so I didn’t scratch the metal. It would be easier to avoid scratches with a flat surface, but the vent had way too many curves and details.

Removing Tarnish

The last step is to remove the tarnish. I think one of the best ways to do this is by using Bar Keeper’s Friend. Just get the hardware slightly wet, sprinkle it on and scrub really well. Then rinse and repeat if necessary. Unless the hardware was really bad, Bar Keeper’s Friend got the tarnish off really easily. Then, I buffed any scratches out with a fine steel wool.

How to Restore Painted Hardware How to Restore Painted Hardware How to Restore Painted Hardware How to Restore Painted Hardware

How to Restore Painted Hardware How to Restore Painted Hardware

I am amazed by the fact that anyone would think to cover this beautiful hardware up. The vents were so caked with paint I couldn’t even see all the awesome details towards the bottom. They definitely didn’t turn out perfectly but the little bit of tarnish that’s left shows their age and will hopefully remind people of their quality.

What do you think? Would you have put in the hours to restore this painted hardware?

See You Around!

Lauren <3

How to Restore Painted Hardware

If you liked this post or found it useful, don’t forget to share it! 🙂

5 Tips For a Professional Paint Job

Recently I have been working with my uncle a lot who owns Custer’s Renovations & Paint. He does any kind of finishing work you can think of, and I have been learning a ton about painting. So today I’d like to share with you 5 tips on how to achieve a professional paint job on your own. Specifically, I’ll show you how I implemented what I learned when I painted my own bathroom.

Scrape, Repair, & Caulk

One of the first steps to achieving a professional paint job is doing the appropriate prep work. If there are any bumpy areas left from a previous paint job make sure to scrape them away. Fill in any holes and areas that have been dinged. If there are any gaps in the trim make sure to caulk them with paintable latex caulk.

When my bathroom was painted previously there were a bunch of areas where paint splattered off of the roller and left tiny little bumps everywhere. Scraping these away ensured my paint job would be as smooth as possible. The window was painted quite poorly before so it made it difficult to get everything scraped off. However, what I did manage to scrape off and fix made a big difference. There were also huge gaps around the window that made the room look unfinished and overall kind of dingy.

5 Tips For a Professional Paint Job

5 Tips For a Professional Paint Job


5 Tips For a Professional Paint Job
Before

5 Tips For a Professional Paint Job

5 Tips For a Professional Paint Job
After

Sand & Dust

After your repairs dry, make sure to sand the patches and ideally, sand all of the walls with a fine grit sandpaper. Sanding the entire wall ensures you didn’t miss any little bumps and the finish will be smooth. Before painting, take a rag and dust the walls and trim.

It’s also a really good practice to sand in between coats and to do at least two coats.

Lighting

One of the most interesting tips my uncle showed me is how he uses lighting. In his opinion, lighting is one of the biggest factors in catching imperfections. By shining a big, bright light across the wall, you see any flaws such as bumps or drips because the light will create shadows across these areas. Without the light, you might not catch these because natural light doesn’t have the same effect. You might not notice some imperfections when you’re painting but will catch them later on because the lighting has changed. By using a light right off the bat you’re more likely to catch the mistakes.

Details

Another major factor in achieving a professional paint job is paying very close attention to detail. Wipe up any drips you spot or anywhere you painted “outside the lines”. By paying attention to detail throughout the process you will avoid fixing mistakes later on, which is often more difficult than fixing mistakes as they happen.

You want to roll on a decently thick coat of paint, but there is a fine line because you really want to avoid drips. It takes a bit of practice to get used to the feel of the perfect amount of paint and it can also depend on the type of paint you’re using. Some paints, such as Behr, are runnier than others.

One thing I noticed that makes a huge difference in the quality of my own painting is not taping things off. It takes me a lot of time to tape trim off and I can never seem to get the tape sealed right. I actually end up getting more paint on the trim when I tape than if I don’t tape and paint carefully. The key here is to keep a damp rag near you so you can wipe up any little spots where you go outside the lines. The more you practice the less you’ll have to wipe anything up. My uncle is a very skilled professional who is a lot faster, and better, at taping than I am so he’ll tape things here and there.

Stipple

Last but not least, stipple your brush as you’re cutting in. By this I mean dab your brush on the wall instead of dragging it down the wall. This helps match the texture of the roller so you don’t end up seeing brush marks. Typically I drag my brush down the wall to get the right amount of paint on. Then, I go back and stipple it.

These techniques are easy to do and don’t take much time on top of the amount of time it already takes to paint. In the long run, it’s well worth it in order to achieve a professional paint job.

And, of course, I have to show you the before and after pictures 🙂

5 Tips For a Professional Paint Job 5 Tips For a Professional Paint Job5 Tips For a Professional Paint Job 5 Tips For a Professional Paint Job5 Tips For a Professional Paint Job 5 Tips For a Professional Paint Job

The walls are painted with Sherwin Williams Svelte Sage, and the ceiling is painted with Devoe Paint Simplicity Stone.

What’s your favorite tip for a professional paint job?

If you liked this post, feel free to share it 🙂

See You Around!

Lauren <3

How to Clean Up Your Yard When You Have no Idea Where to Start

One of the biggest issues I have had with this house is the exterior. Especially now that most of the big projects are done inside.  It seems like whenever we invite someone new over I always give the disclaimer of “I know the outside is a hideous mess but I promise the inside is completely different”.

First impressions are a huge deal and the curb appeal of this house is giving a seriously bad first impression. If future renters saw a listing of this house and all they saw was the exterior I have no doubt that would seriously limit the pool of potential tenants.

How to Clean Up Your Yard When You Have no Idea Where to Start

How to Clean Up Your Yard When You Have no Idea Where to Start
Some very generous photos of what the exterior looks like (taken in the summer)

This spring I want to get serious about bringing in some much-needed curb appeal (I’ve said that before). But, the problem was I had no idea where to start because there are seriously SO many issues. I think this is a common problem, so I wanted to share my process on how to get started. So here it is, how to clean up your yard when you have no idea where to start.

1. BRAIN DUMP

I originally was going to call this step a brainstorm but quickly changed that because I have been brainstorming ideas for like ever. Really this is a brain dump because I’m putting all the crap in my brain down on paper.

To do this step think about all the issues that are going on, anything that you would like to accomplish, and write it down. Write stuff down that you know you won’t get to until years later, and write stuff down that you don’t have a budget for yet. The point is to put your thoughts on the page to realize your overall vision and set goals.

My yard is a yucky mess, but there are also costly cosmetic fixes that I would like to do. I wrote everything down even though some might be unrealistic to accomplish in the short term. And some might not be possible at all due to lack of landlord approval.

During this step I put various amounts of dollar signs next to certain items based on their estimated cost.

How to Clean Up Your Yard When You Have no Idea Where to Start

This is purely a guess on how expensive things are. I did not do any research at this phase on project costs, I will do that later. This simply gives me an idea of when/if I will accomplish these projects and how big of a priority they are.

2. Recognize what is easiest to accomplish, and will make the most impact

After I dumped out all my ideas I starred the projects with the most impact. These are the items I will start with. There’s no point in thinking about painting the house to make it all pretty if there is a yard full of leaves and junk. For this spring I absolutely want to focus on:

  • Cleaning up the leaves and pine needles from the yard and all the “garden beds”
  • Getting rid of the junk in the yard by the garage, by the house, on the porch, etc.
  • Get the village to actually fix the driveway this spring. It’s a serious mud pit over here

How to Clean Up Your Yard When You Have no Idea Where to Start

3. Identify projects that should be done soon but aren’t huge eye sores

These are the kinds of things that are preventing you from adding all the pretty stuff to your yard, or things that are pretty much necessary but aren’t awful to look at. On my list these things include:

  • Make pallet compost bin
  • Kill moss
  • Wash outsides of windows
  • Plant grass seed
  • Power wash: house, porch, garage, and cement
  • Remove rock beds from South and East sides of house
  • Trim trees if needed

Most of the things on this list are pre-cursors to the tasks that I don’t have the budget for yet or need time to get to (the remaining things on the list)

How to Clean Up Your Yard When You Have no Idea Where to Start

4. Research, Planning, and Goal Setting.

This phase is somewhat ongoing and is really where you can get into either a loss of steam or seeing some real progress. Set specific goals that are realistic and have relative deadlines attached to them. This way you will know what to work on when, and you can manage your time between other projects.

Pinterest is what I use the most for research and planning. Once I have my general ideas down I start to look up specifics to see how I am going to do a project. You won’t need to do this for everything you have in mind but it’s helpful when taking on a big project or a project that requires learning a new skill.

One thing I found recently is an article on maintaining dirt roads and driveways. I won’t be able to accomplish it myself but I have a better idea of what the village should be doing to repair our driveway. Basically, the research and planning notes should be a more detailed explanation of the project. This is what my notes for the driveway look like:

How to Clean Up Your Yard When You Have no Idea Where to Start

This process is something I do for a lot of projects even when I somewhat have an idea of where to start, it doesn’t have to be just for your yard. I feel like this system helps me to make actual progress instead of constantly rethinking the first step and remembering all the projects I want to do.

What do you do to help you accomplish big projects? What do you have planned this season to clean up your yard? Let me know in the comments!

See You Around! (and have fun crossing stuff off your lists) 😀

Lauren <3

How to Clean Up Your Yard When You Have No Idea Where to Start

Spray Painted Counter Update – Almost 2 Years Later

I wanted to share an update since it’s been almost 2 years since my post about how I updated my counter tops with spray paint! When I researched doing my counters, my main concern was how well spray paint would hold up. If it tells you anything about how they’re holding up, I can’t believe it’s been almost 2 years since I did this project!

If you want to see what materials I used and the how-to for this project, check out this post.

My biggest concern was next to the sink where we put our dishes to dry. We have a drying rack but most of the time all the dishes won’t fit in that. So, Chris lays a dish towel down and lays dishes on that. As you can imagine this gets a lot of moisture on the counters, and it discolors. I went back and added another layer of poly because I was concerned it was hurting the counter, but so far it hasn’t done any damage. (It still discolors when wet, but like only when it’s really wet).

Spray Painted Counter Update - Almost 2 Years Later

We usually clean down the counters with a Clorox disinfecting wipe or just with a sponge and soap. Initially I didn’t think the Clorox wipes had any effect but I did notice a little bubbling of the poly.

Spray Painted Counter Update - Almost 2 Years Later

I’m not 100% sure that this is from using Clorox wipes but I’m pretty sure because I don’t really use them on either side of the sink and those areas don’t have any bubbling.

Spray Painted Counter Update - Almost 2 Years Later

I’m not sure what it’s from, but there’s also this area that looks a little gummy. It’s not very noticeable and the only difference is that it’s not slippery smooth like the rest of the counter.

There’s also a tiny little scrape or two on the edge of the counter where the white is peaking through. I thought maybe it was a flake of white paint because that’s the case in other areas but I think this is a little ding. When I scratched at it though it didn’t make it any worse.

Overall I’m really happy with how they’ve held up and I’m surprised considering we’re not as gentle on them as I thought we should be.

Here’s a full picture of the counters now:

Spray Painted Counter Update - Almost 2 Years Later

And here’s the before and after from when I originally did the project:

Spray Painted Counter Update - Almost 2 Years Later

Spray Painted Counter Update - Almost 2 Years Later

You might also notice that we have a tile backsplash and we removed the upper cabinet doors. If you want to read more about the backsplash check out this post about doing the tile, and this post about prepping the wall.

For the time and money this project takes it’s a perfect solution to fixing up counters before a complete overhaul. This could even be a permanent solution for areas like a laundry room.

So there you have it! My counters are holding up great and I’m really glad I decided to spray paint them. My ongoing struggle now is to make our open cabinets look a little prettier.

See You Around!

Lauren <3

Guest Bedroom Makeover – Home Away From Home

Wow. So it’s been forever since I last posted. I finished my last semester of classes for undergrad in December and at the beginning of January, I started an internship. I graduate in May just to turn around and start my master’s in the fall! Phew.

All of the big changes really took a toll on my mind and body, so blogging wasn’t a top priority. I kept pushing without taking care of myself as much as I should have.

But now I’m feeling myself again and possibly on my way to being even better than before 😀

But back to the internship. If I drove from home it would be a 2-hour drive twice a week which means I would probably have to wake up at 6 am. Ew.

The good news is my mom and her boyfriend live 20 minutes away from my office. Jackpot. And in this crappy Michigan winter that makes life so much easier.

I’ve been staying in the guest room which they basically use as a giant storage closet.

Guest Bedroom Makeover - Home Away From Home

This is pretty much the before picture. The bed was originally coming out of the corner on an angle and the stuff wasn’t shoved into the corner as much.

They have a really nice house and it just makes me sad seeing a room not living up to its potential.

And since I’ll be staying here until May I figured it would be a great way to (1) make it feel homier for me and (2) make it feel homier for the future guests.

Guest Bedroom Makeover - Home Away From Home

Above is the product of my second step. Obviously, you can see there is less stuff shoved in the corner. I put a bunch of sleeping bags and pillows in a bag in the closet, some sheets and blankets in drawers, and shoved other stuff under the bed.

Ideally, I would like to have my mom sort through stuff with me, take some things down to the basement, and figure out better storage options for the rest.

I think the tall dresser would be better positioned in the hallway or even in the closet.

Guest Bedroom Makeover - Home Away From Home

My mom has some horse tack in here which might honestly be the best place for it for now. The other stuff though could definitely get moved out/around.

Guest Bedroom Makeover - Home Away From Home

In this picture, you can see I put my quilt on the bed because it made it feel homier for me. This will eventually get changed to match the room design, and my mom even mentioned buying a new bed set. I also moved this lamp in here which was first in the living room, then my mom moved it into her office. So we’ll see if that’s permanent.

Guest Bedroom Makeover - Home Away From Home

I like the footboard but I don’t think it goes perfectly with the style I have in mind for the room. Maybe if I’m feeling motivated I will stain it a darker color.

Also, say hi to Louie. He’s such a cool cat and pretty much in love with me. Lol

The Plan

Besides all the organizing I already talked about, I also want to do some DIYing and decorating. So here’s the short list of what I want to do:

  1. Organize/Declutter all the stuff
  2. Paint the walls
  3. Figure out the best furniture positioning (bed, side table, tall dresser, bring in a chair?)
  4. Paint the side table and dressers
  5. Stain the bed?
  6. Get a new bed set
  7. Decorate with objects around the house/thrifted/new

In future posts I hope to update you on how the organizing goes as well as share an updated design plan. I get the feeling that my mom will be open to my ideas so this should be a fun project for the next few months!

What are some amenities that make you feel more comfortable when you’re the guest? Or what are some things that you try to do for guests in your home?

Thanks for reading and as always…

See You Around!

Lauren <3

To see the next post in the series, click here.

DIY Staircase Update

About a month ago I texted my landlord about ripping up the carpet on the entry stairs and replacing it with some vinyl. It took her about a week to respond, so I figured the answer would be no as it usually is.

Quite the contrary, she texted back and said sure! That surprised me. Having permission to sporadically change things in the house is very exciting.

I started ripping the carpet up within half an hour of getting her text.

DIY Staircase Update

Here’s what we started with. The big rug is usually in the kitchen, but it’s been up there a while because spring tracks a lot of mud in, and it’s annoying having to vacuum the landing all the time.

DIY Staircase Update

We also track in a lot of pine needles which hurt like a SOB to step on when they’re stuck in the carpet.

Since I had permission from the landlord and was raring to go, I didn’t bother telling Chris before I started destroying the carpet. I was so sick of it and wasn’t going to wait any longer.

DIY Staircase Update

The first thing I found was the landing is made of plywood and covered in that black stuff. I think the black stuff is some sort of non-slip sand adhesive. Then I kept pulling up the carpet and got this piece of joy.

DIY Staircase Update

Nice pine steps and risers! Yay.

After ripping the carpet and padding off I pulled out all the tack strips and staples from the stairs. I didn’t pull all the staples from the landing because I’m going to cover it with vinyl, and the stairs will be painted and stained with General Finishes Java Gel. Instead, I pulled all the padding out of the staples and hammered them down.

One issue that I ran into with the tack strips is that I don’t own a crowbar. Instead, I just used a hammer and flathead screwdriver. Just wedge the screwdriver under the strip where the nail is and use the hammer to wiggle it under further. Then use the leverage and pull up on the strip (by pushing down on the screwdriver). It’s kind of a pain in the butt on some of them, but it works.

After getting all the staples off the steps they were ready to be sanded in preparation for stain. The picture below is before sanding.

DIY Staircase Update

I took my Ridgid random orbital sander to the steps with an 80 grit sanding pad. Since I have an orbital sander (which is round) I couldn’t get all the way to the edges of the stairs very well which left some paint. I went back by hand to try to get as much off as I could, but it wasn’t very efficient.

The picture below is after sanding. It’s a little hard to compare because of the opposite angles, but they’re a lot cleaner with fewer paint splatters.

DIY Staircase Update

Next, I cleaned the steps off with a shop towel and some mineral spirits. Then I applied mineral spirits to each step right before I stained. General finishes recommends this to help the stain go on smoothly.

Make sure to apply stain to every other step so that the stairs are still usable while the stain dries (6-8 hours).
DIY Staircase Update
And then here’s a picture of them all stained.
DIY Staircase Update

After the stain dried, I taped the stairs off to paint the risers.
DIY Staircase Update
I also used paper so I wouldn’t get paint on the steps. As you can see in the picture, I didn’t tape off the risers when I stained. I figured it would be easy to paint over. It seemed that it actually was easier to cover the paint with gel stain than the other way around.

Before priming I sanded the risers by hand with 80 grit sandpaper.
DIY Staircase Update
After the first coat of primer I went back and filled in the holes with spackle. Then I sanded lightly and did another coat. I like to wait until I prime to fill in the holes because it makes them a lot more visible.
DIY Staircase Update
After two coats of primer I applied two coats of paint.

I also sanded and repainted the trim by the landing to make sure it looks crisp before installing the vinyl
 imageDIY Staircase Update

I’ve repainted this trim probably twice already, but it gets dingy pretty quickly and the new floor will be lower than the carpet.

Before putting in the new vinyl I also wanted to stain the threshold of the front door to match the steps.
DIY Staircase Update DIY Staircase Update

Since the stairs are going to be a different color than the vinyl on the landing, I wanted to make sure the entry looks as cohesive as possible.

And of course, since stairs are high traffic I added a coat of General Finishes Gel Topcoat.

And after several days of putting it off, we finally got around to laying the vinyl on the landing! It’s really easy to do, and I was going to attempt doing it myself. Chris wanted me to wait until he would be around to help me though, which honestly was a good idea. Laying the floor and cutting the boards isn’t too bad when it’s just straight cuts, but having to work around the trim pieces was really frustrating for me. I explain in this post how we laid the floor in our bathroom, and what exactly we used if you’re interested 😀

DIY Staircase Update

Chris did up until this point on the landing, and I got to do the rest until the trim on the other side of the door. I didn’t get to do much cutting when we did the bathroom floor, so I’m glad I got to try it out.

DIY Staircase Update DIY Staircase Update

DIY Staircase Update DIY Staircase Update

I am so obsessed with how this project turned out. The entry is so much brighter and spacious now that the carpet is gone. And it’s going to  be way easier to keep it clean. No more lugging the vacuum all the way up the steps!

DIY Staircase Update DIY Staircase Update

If you like this post let me know, and feel free to pass it along!

See You Around!

Lauren <3


Punch List for A Rent Ready Home

I contacted my landlord with questions about the house which means I am one step closer to buying it. With all of the questions I asked her I should be able to run the numbers, make an offer, and work out a deal. Considering I can’t know how much longer we have until it’s time to get renters I compiled a punch list of things left to do.

In order to have the lower unit rent ready, these are the things that I must have completed

  • Remove the door in T’s bedroom
  • Paint the last wall in T’s bedroom
  • Paint the trim in T’s bedroom

Punch List for A Rent Ready Home

These first three tasks are the leftovers from when I painted the paneling in this room and the fact that the trim is in desperate need of a fresh coat

  • Touch up paint around the house
  • Finish Painting Inside Cabinets
  • Paint Outside Cabinets
  • Seal the grout on the new backsplash

Punch List for A Rent Ready Home

  • Check that the heater is clean and running smoothly
  • Check the smoke detector
  • Fix the run in the carpet
  • Install a fan in the bathroom
  • Fix the overhead light in the bathroom
  • Clean everything

On the other hand, there are also things I would like to have done before we get tenants. Time and money permitting

  • Replace carpet with new carpet in bedrooms/living room
  • Replace carpet with laminate in kitchen/dining area

american-quarter-horse-angle_1000

I’m thinking of going with a laminate similar to this (maybe even this one), and a beige brown carpet

  • Stain stair treads, paint the risers.

These last three wants all have to do with flooring. The only spot in our unit that doesn’t have carpet is the bathroom. Even in the places that it makes sense to have carpet, the carpet isn’t so great even after a good cleaning. Mostly the idea with replacing the flooring is we would likely get a better deal if we bought the same flooring for upstairs and downstairs all at once. One of the first things I would like to do once (if) we get the house is replace all the flooring upstairs even before moving in.

I’m planning on knocking out some of the items on the must-do list over my spring break (in one week). It’s probably a good thing that we just got bombarded with snow here in Michigan, otherwise I might be tempted to do some yard work.

What’s on your punch list?

See You Around!

Lauren <3


The Final Piece to a Paneling Free Home

I’m moving quite slowly on progress with the house, so this weekend I finally painted little T’s bedroom!

The Final Piece to a Paneling Free Home

Here is the panorama of this crazy room before its kick ass makeover. Hello again weird door midway up the wall. Glad you decided to make another appearance on the blog.

The post title suggests there is literally no more paneling in my house, but I mean the paneling is painted. Then again that’s not entirely true because I’m not going to paint the closet wall until we take out the weird door and drywall it. When that happens I’ll fill in the cracks in the paneling on just that wall so it doesn’t look super mish moshy. But anyway, PROGRESS. and that is why we are gathered here today.

The Final Piece to a Paneling Free Home

First I filled the crib up with toys, shoved it to the middle of the room, took stuff out of the room, put things in the closet, and decapitated the iron man sticker.

To prep I filled in all the holes with spackle, covered the stuff left in the room with a plastic drop cloth, and took off all the outlet covers. I then went through and sanded all the walls with 220 grit sandpaper. I was going to use my new electric sander, but I figured that would be a bit excessive for just needing to scuff the walls up a bit.

Please please do not skip the sanding step. When Chris and I painted our bedroom paneling we didn’t sand and it was a big mistake. If we nick the walls the paint scrapes right off and you can see the paneling. At the very least rough the surface up a bit even if you don’t sand the crap out of it.

The Final Piece to a Paneling Free Home

The Final Piece to a Paneling Free Home

Before I started painting I wiped all the sanding dust off the walls along with any cobwebs in the corners. I also vacuumed the carpet and along the trim to make sure no dust would get into my paint.

The Final Piece to a Paneling Free Home

The Final Piece to a Paneling Free Home

When I was cutting in I got all of the cracks because a roller doesn’t do a very good job of that. At this point I also filled in any more holes that I didn’t notice the first time around.

The Final Piece to a Paneling Free Home

After priming I saw areas where either the paneling color was showing through or it was discoloration from nicotine. In the end I decided to do one coat since that is what we did in the bedroom, and that paneling was even darker.


The Final Piece to a Paneling Free Home

Even when I cut in with the paint I filled in all the cracks. When I started brushing on the paint I remembered how much I love this color. It’s called winter sky gray. It seems rather blue to me though which was a surprise when we first painted our bedroom. I guess it makes sense though since skys are usually blue to some extent.

The Final Piece to a Paneling Free Home

Slightly above the electrical outlet near the door you will notice some flaws in the gaps. These parts were pulling away from the wall which obviously wouldn’t look good when painted. Chris’s genius solution was to staple gun them down, and it actually worked like a gem.

I love this picture because even though I haven’t repainted the trim you can see the crisp difference between the bluish gray wall and the white trim. Just beautiful. (excuse the splotches, the wall wasn’t done drying yet).

The Final Piece to a Paneling Free Home

Final product with the “accent wall”. still hadn’t put the room back together yet. I love how much the painted room draws attention to the window. It’s a reminder of how much brighter the room is.

Also notice how high the top of the door goes, and that the area up there is painted. I was using a chair to paint, but couldn’t reach high enough so I asked Chris if he could reach. He just decided to open up the door and stand on the stairs landing. It’s a good thing we’re close friends with the upstairs neighbors and we keep that door unlocked. (it is set up though so both sides can be locked and not one unit has control over the door). Either way it needs to go. Sayonara door!!

The Final Piece to a Paneling Free Home

Another view and a way for me to imagine that there is absolutely no more paneling. 😀 I’m in love.

The Final Piece to a Paneling Free Home

The Final Piece to a Paneling Free Home

And of course some views of the room put back together/rearranged (minus the still decapitated Iron Man)

Before painting my paneling I also got some really useful information in this blog post about what to use on different types of paneling, and some tools that make it a lot easier.

Chris and I worked on this project for about a day and a half. My body was definitely sore from constantly kneeling, standing, and getting up on a chair. Maybe I’m just weak but that stuff is taxing!

I’m glad to have this project done as it’s really going to propel me into finishing my other projects and working on my time management.

What are your motivating factors?

If you want to see how I finished the white dresser, check out this post.

See You Around!

Lauren <3


2016 Goals

2016 is a year I’m planning to be straight fire. I went on an awesome week long trip down south over break and I’m refreshed and inspired to tackle this new year’s goals (I’ll post about my trip next week).

When the new year rolls around I like to create a somewhat small list of goals. Some people like to make resolutions and say “new year, new me”. But eventually the newness wears off and “goals” disappear. I like to make realistic achievable goals because they don’t have to be made at the beginning of the year.

I write my priorities at the beginning of the year, and as the year goes on I add to the list or change it as necessary.

Three categories I want to address are home projects, financial goals, and educational goals

Home Projects for Spring/Summer

As a little bit of background, Chris and I are seriously considering buying the house we are currently renting. We haven’t sat down and talked to the landlords about the details yet, but if I run the numbers and it’s a good deal we will be taking the first leap into real estate investing! That being said, there are some major projects I want to get done to improve the house. I really want to focus on curb appeal this spring and summer (whether or not we are buying the house) so the projects will include:

  • Get rid of moss
  • Plant grass seed
  • Contact the village to level our driveway (it’s actually an alleyway)
  • Fix garage door
  • Plant flowers etc. for more privacy and aesthetic
  • Get rid of junk pile by garage
  • Ask landlords to clean stuff out of garage to make room for work space or storage
  • Power wash house
  • Paint house
  • Repair deck and paint or stain
  • Paint doors
  • Paint shutters and overhangs

2016 Goals

Not so pretty, huh?

Financial Goals

  • Buy the house
  • Save money for kayaks
  • Create and use a budget
  • Save money and/or find loans for a down payment if necessary
  • Apply to scholarships for school next year

Educational/Other Goals

  • Look into more information for applying to the Master’s in Public Administration
  • Make the Dean’s list Spring 2016 and Fall 2016
  • Meet 2 real estate investors in my area
  • Go to a real estate investing conference (already registered for one)

One way this year I’m going to try to constantly keep my priorities in mind will be by making a vision board with actual pictures of what I want my life to look like.

I will also go and type out more detailed step by steps to achieving my goals as well as creating realistic deadlines.

Overall I would say my goals are mostly aimed at honing in on what makes me happy and planning for the future.

What are your goals for 2016? Do you make goals or resolutions?

See you around!

Lauren <3

DIY Ceramic Tile Backsplash

Today is the day I share with you our brand new tile backsplash, and the steps it took to install it. Our kitchen is yet another step closer to being awesome, and it almost doesn’t visually suck anymore.

We were very lucky to get most of our materials free. Below are the list of materials you would need. The only things we had to buy are the items I indicated with a price. Clicking the material links will take you to sources of where to purchase/ where I did purchase the items.

Materials:

My Project Cost:  $37.50 (Accounting for selling the joint compound leftovers and not accounting for sales tax)

Project Value/Potential Cost: $251.53

NOW. The cost will vary depending on the type of materials you buy, and what tools you already own. I just wanted to see with the almost exact products I used, including their sizes, how much this project could have cost me.

If you missed my post of how I prepped my walls check that out here.

I mentioned I was going to explain how we filled in the hole in our backsplash wall, but I can’t really do that because Chris did it without me. Not complaining, but he didn’t take pictures and he didn’t really explain it to me very well. But, I’m assuming most people don’t have that issue and it’s mostly a case by case thing anyway.

DIY Ceramic Tile Backsplash

The next thing I did was lay out several tiles in my pattern on the counter. This way after we put the mastic on the wall we wouldn’t have to scramble to get tiles up, and it would help us engrave the pattern into our brain.

DIY Ceramic Tile Backsplash

DIY Ceramic Tile Backsplash

As we went along we used 1/8″ spacers in most places to keep everything even. In some places we didn’t use them because the tile cuts weren’t 100% even so it looked a little weird using a spacer, or the spacer wouldn’t stay put.

You can see in the picture above that we just tiled around the outlets. This is because we didn’t have the proper tools to make the types of cuts we needed. This can sometimes be avoided by laying out a pattern in a way that doesn’t have weird cuts.

We left all the spots around the outlets without tile, and took tiles to Chris’s brother’s house to have him cut them (since he had the right tools). Afterwards we then reapplied some mastic on the wall and to the tiles.

DIY Ceramic Tile Backsplash

Here is what the tile looked like from a distance once we put it all up.

Then we let it sit for longer than the recommended amount of time before we grouted. We definitely did not choose the best timing to decide to grout. It was around 11:00 PM when we started. We would’ve done it during the day but Chris had Little T over night and we had to wait until he went to bed. 2 year old boys are not very good at entertaining themselves when house work is going on.

Another problem we ran into was rock hard grout. We had to chisel away at the chunk to get usable grout which ended up having little chunky pieces even after we mixed it with water.

If we had started doing this during the day we would have said screw it and just went to buy a new bag of grout but we were tired, wanted to get it done, and it was so late so nowhere close was open. This made it a pain in the behind to apply, but overall didn’t really hinder the way the grout looked.

DIY Ceramic Tile Backsplash

Here’s the grout right after we applied it and before we wiped anything off. Do you like our light strategy? We had to be super quiet because our house only has one heat source and we couldn’t shut Little T’s door all the way because it would get too cold in his room. So instead of turning the kitchen light on and risking waking him up, we just used this and moved it around.

DIY Ceramic Tile Backsplash

This picture is after I wiped everything down with a damp cloth to clean the grout lines up, but not necessarily to get the tile perfectly clean (I have yet to do that).

DIY Ceramic Tile Backsplash

Here is a close up of an area that I got pretty clean.

I really liked the light look of the tile without the grout, and I was a little nervous about what the tile would look like with the dark grout. However, I really like the way it turned out! I think it goes quite nicely with the counter tops and the tile doesn’t stick out as being too modern.

DIY Ceramic Tile Backsplash

As a reminder that is what the kitchen looked like originally.

DIY Ceramic Tile Backsplash

This is what it looks like now. It’s a little discombobulated, but with some new flooring and painted white cabinets it will look prim and proper.

My main suggestion would be to make sure your materials aren’t going to cause you any headache. I’m all about reusing materials so they don’t go to waste but I think I much rather would have bought new grout. Cutting the tiles wasn’t a bad choice, but it was a little nerve wracking that everything wasn’t completely straight as this was my first time doing tile.

The most frustrating part was trying to find the right time to do the project, and I could have benefited from slightly better planning. Overall, I’m satisfied and this was a much needed update.

Have a good holiday, and see you around!

Lauren <3